
A wobbly bed can disrupt your sleep and gradually damage your bed frame’s joints. When a bed rocks or squeaks, the issue is frequently caused by uneven flooring—a common occurrence in many homes where concrete screeds, tiles, or timber floorboards have settled unevenly over time. Installing adjustable legs is a highly effective, reversible solution that allows you to customize the height of each individual support point. By compensating for floor dips and slopes, these adjustable components stabilize the frame, distribute weight evenly, and eliminate annoying creaks without requiring expensive floor renovations.
Diagnose the Wobble: Is It the Floor or the Bed Frame?
Before purchasing any replacement hardware, you must determine whether the instability stems from the floor itself or from structural weaknesses within the bed frame. Begin by performing a thorough physical inspection of the bed. Check all corner joints, brackets, and support slats to ensure they are tightly secured. Loose screws, stripped threads, or cracked wooden slats can mimic the rocking motion of an uneven floor. Tighten any loose fasteners and inspect the frame for structural integrity; if the frame itself is warped or damaged, simply changing the legs will not resolve the underlying wobble.
Once you have ruled out structural frame issues, turn your attention to the floor. You can easily identify floor dips and slopes using a standard spirit level placed directly on the floor surface parallel and perpendicular to the bed’s position. Alternatively, a simple marble test—placing a small marble on the bare floor and observing if it consistently rolls in a specific direction—can reveal subtle slopes. To find the exact height difference, place the spirit level on top of your bed frame. Lift the lowest corner of the bed until the level’s bubble is perfectly centered, and use a ruler to measure the gap between the bottom of that leg and the floor. This measurement represents the minimum adjustment range your new legs must accommodate.
Products mentioned in this guide
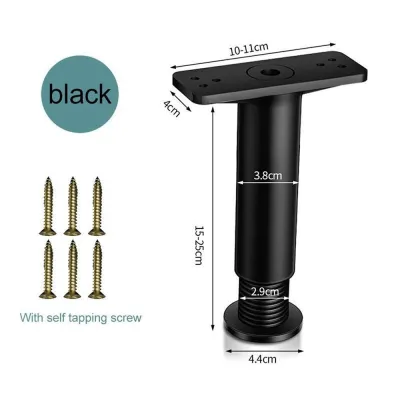
![[SG] 4PCS Adjustable Furniture Legs Aluminum Alloy Cabinet Leg Stand Square Non-slip Table Sofa Bed Leg Support](https://img.lazcdn.com/g/p/873a9a1412a7707f95a32d0075781b11.jpg_400x400q80.jpg_.webp)
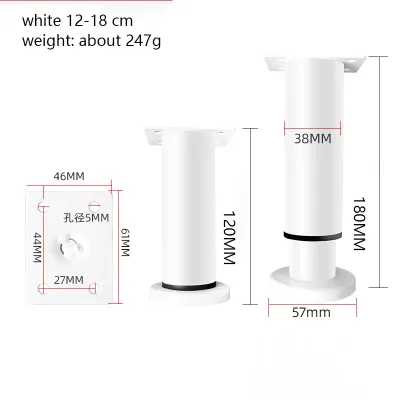
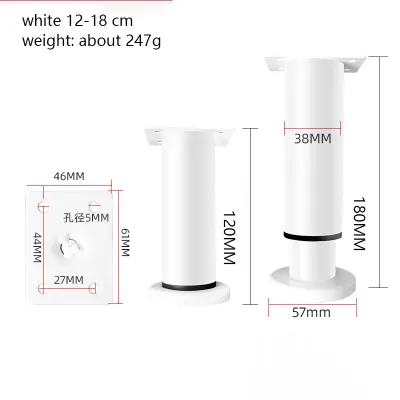
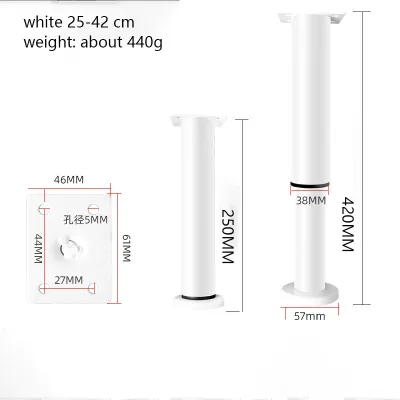
![[SG Ready Stock]Metal Adjustable Furniture Cabinet Leg 8-42CM Height Telescopic Table Leg Support Table Foot/4pcs](https://img.lazcdn.com/g/p/022c7671e85191f37ecbba7070749d98.png_400x400q80.png_.webp)
![[SG In Stock]Metal Adjustable Table Leg 8-42CM Height Table Leg Sofa Leg Support Cabinet Foot Coffee Table Leg Bed Leg](https://img.lazcdn.com/g/p/0bf38f3c1df98f1693b74830552c4d62.jpg_400x400q80.jpg_.webp)
![[SG] Adjustable Furniture Cabinet Leg Furniture Heightening Bracket Heavy Duty Coffee Table Leg Bracket](https://img.lazcdn.com/g/p/3729c53ddb687bb093d3475996b3c0d2.jpg_400x400q80.jpg_.webp)
Prices are valid at publication and may change. Please refer to the product page for the latest price.
Choosing the Right Adjustable Legs for Your Bed
Selecting the correct adjustable legs requires careful consideration of your bed frame’s existing design and the total load it must support. First, verify the attachment mechanism on your current bed frame. Most modern frames use threaded inserts (typically M8 or M10 hanger bolts), bolt-on brackets, or flat screw-in plates. If your bed has pre-installed threaded inserts, you must match the thread size and pitch of the new adjustable legs exactly to avoid stripping the threads. For frames without pre-existing inserts, look for adjustable legs that come with mounting plates, which can be screwed directly into a flat wooden surface.

Next, calculate the required weight capacity per leg to ensure long-term safety and stability. To do this, estimate the total weight of the bed frame, the mattress, the bedding, and the maximum combined weight of the sleepers. Divide this total weight by the number of legs supporting the bed (usually four corner legs and one or two center support legs). It is highly recommended to choose legs with a rated capacity that exceeds this calculated value to provide a safe buffer. Additionally, evaluate the adjustment range and thread thickness of the legs; thicker steel threads offer greater lateral stability, which prevents the legs from bending or shearing when the bed is subjected to horizontal movement.
Finally, consider the floor protection features integrated into the adjustable feet. Because adjustable legs concentrate the bed’s weight onto a relatively small surface area, they can easily scratch or dent your flooring. Look for legs equipped with built-in rubber pads, non-marking polyurethane glides, or wide, articulated bases that can tilt slightly to match the angle of an uneven floor. These features are particularly important in Singapore homes, where delicate parquet, laminate, or vinyl flooring can easily suffer permanent pressure marks under heavy loads.
Step-by-Step Guide to Installing and Adjusting the Legs
Replacing your bed legs and leveling the frame is a straightforward process, but it requires careful preparation to prevent injury or damage to your furniture. Start by clearing the area around the bed and removing the mattress, bedding, and loose slats to lighten the frame. Safely support the bed frame by sliding temporary wooden blocks, sturdy books, or heavy-duty plastic risers under the side rails near the corners. This keeps the frame elevated and stable, allowing you to work underneath without the risk of the bed collapsing on your hands.
Once the frame is securely supported, remove the old legs. If they are screw-in legs, rotate them counterclockwise to unscrew them from the inserts. For legs attached with brackets or screws, use the appropriate screwdriver or wrench to remove the hardware. Install the new adjustable legs strictly according to the manufacturer’s instructions. If you are using mounting plates, position them carefully at each corner, pre-drill pilot holes to prevent the wood from splitting, and secure the plates with the provided screws before threading the new legs into place.
With all the new legs installed, remove the temporary supports and lower the bed frame onto the floor. Place your spirit level back on top of the frame, checking both the length and width of the bed. Adjust each leg individually by turning the adjustable foot clockwise to lower it or counterclockwise to raise it. Work systematically, starting with the corner that has the largest gap, and make small, incremental adjustments. Continue checking the spirit level until the bubble remains perfectly centered in all directions and all legs make firm, even contact with the floor.
To complete the installation, secure any locking nuts or tightening mechanisms provided with your adjustable legs. Many heavy-duty legs feature a lock nut on the threaded stem that can be tightened flat against the mounting plate or the bottom of the leg. Tightening this nut prevents the threaded stem from turning or shifting over time due to the natural vibrations and movements of daily use. Double-check that there is no remaining play or wobble in any of the legs before replacing the slats, mattress, and bedding.
Safety Checks and Long-Term Maintenance
After installing and adjusting your new bed legs, perform a series of safety checks to ensure the modification is secure for daily use. Apply firm downward pressure to each corner of the bed and gently rock the frame from side to side. Listen closely for any creaking, clicking, or grinding sounds, which could indicate that a leg is not fully tightened, a mounting plate is loose, or a leg is slightly suspended off the floor. If you detect any movement, re-examine the legs and make micro-adjustments until the frame remains completely motionless under load.
Over the next few weeks, inspect the flooring directly beneath the adjustable feet for signs of indentations, cracking, or discoloration. If the feet are concentrating too much pressure on soft flooring like vinyl or laminate, you should place wide, non-slip furniture coasters or heavy-duty felt pads under each foot to distribute the weight over a larger surface area. Additionally, establish a routine to inspect the legs every few months. The weight of the bed and sleepers, combined with natural settling of the floor or frame, can cause locking nuts to loosen slightly. A quick check and re-tightening will maintain stability and prevent premature wear on the hardware.
While adjustable legs are highly effective for minor to moderate floor irregularities, certain conditions require professional intervention. If your floor has an extreme slope that exceeds the maximum safe extension limit specified by the leg manufacturer, do not attempt to over-extend the legs, as this drastically reduces their lateral strength and increases the risk of a sudden collapse. Similarly, if you discover severe structural rot, deep cracks, or warped wood in the bed frame’s main support beams during installation, consult a professional carpenter or consider replacing the frame entirely to ensure your safety.
Frequently Asked Questions (FAQ)
Can I use adjustable legs on a bed frame with a solid wooden base?
Yes, you can install adjustable legs on a solid wooden base, but you will need to prepare the attachment points first. Since solid bases rarely come with pre-installed threaded inserts, you must drill precise pilot holes into the wood and install metal mounting plates or threaded T-nuts. Ensure the wooden base is thick and sturdy enough to support the concentrated weight at the attachment points without cracking. If the base is thin or made of low-density particleboard, consult a professional carpenter to reinforce the attachment areas before installing the legs.
Will adjustable legs damage my vinyl or laminate flooring?
They can if they are not properly configured. Because adjustable legs often have smaller feet, they concentrate the entire weight of the bed and its occupants onto a few small points, which can cause permanent indentations or scratches on soft vinyl, laminate, or floating timber floors. To protect your flooring, select adjustable legs with wide, flat bases made of non-marking rubber or plastic. For added protection, place heavy-duty felt pads or wide furniture coasters under each foot to distribute the load safely and prevent sliding.
Community discussion
Share your experience or ask a question. Comments are reviewed before publication.