
Finding the right shoe cabinet with bench for your HDB flat or condominium entryway is a balancing act between maximizing storage and preserving precious floor space. In Singapore’s compact residential layouts, a poorly sized entryway unit can quickly turn a welcoming foyer into a cramped bottleneck. To select a unit that fits seamlessly, you must evaluate your physical entryway dimensions, map out essential clearances, and match the cabinet’s internal layout to your household’s daily habits.
Taking the time to plan your entryway layout prevents common frustrations, such as doors that cannot open fully or walkways that are too narrow to navigate comfortably. By following a systematic approach to measuring and selecting your furniture, you can create an organized, highly functional entrance that serves your family for years.
Step 1: Measure Your Entryway Space and Clearance
Before browsing online marketplaces or visiting showrooms, you must establish the absolute maximum physical limits of your entryway. Use a metal measuring tape to record the available floor footprint, focusing on both the maximum width along the wall and the maximum depth from the wall to the edge of your main walkway. Do not rely on visual estimates, as even a discrepancy of a few centimeters can prevent a cabinet from fitting into a designated recess.
Products mentioned in this guide
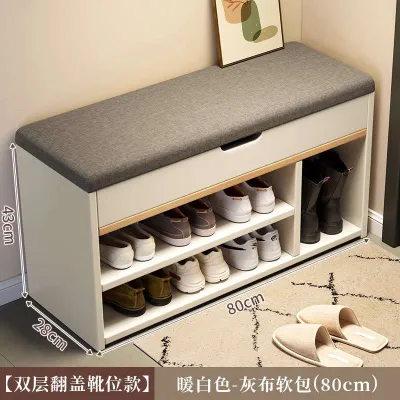
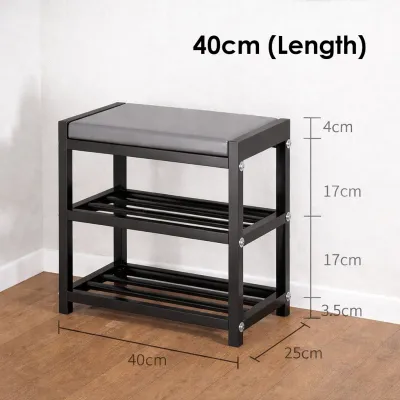
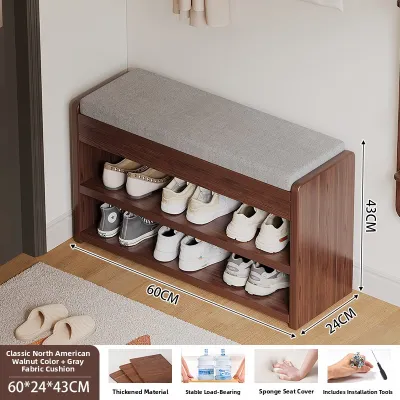
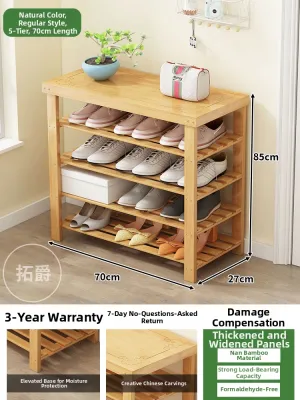
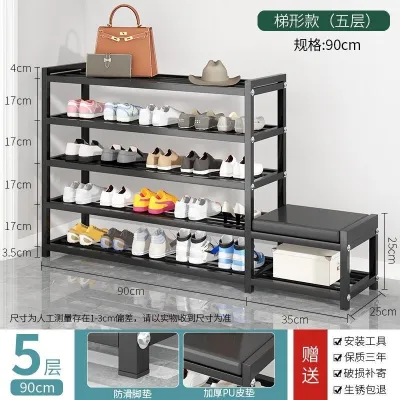
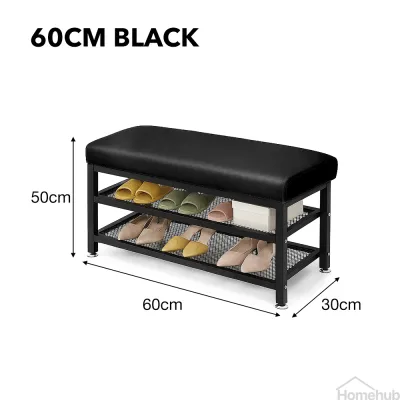
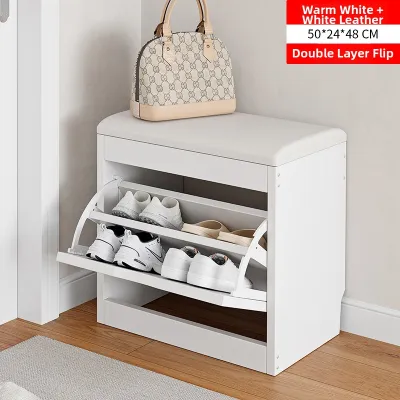
Prices are valid at publication and may change. Please refer to the product page for the latest price.
When measuring, always account for the thickness of your skirting boards. Skirting boards typically add 1.5 cm to 2 cm of depth at the base of the wall, which prevents flat-backed furniture from sitting completely flush unless the unit features a specific skirting cutout. Additionally, check the vertical clearance from the floor to any low-hanging beams, false ceilings, or wall-mounted fixtures to ensure a tall cabinet does not interfere with your home’s structure.
Next, map out the swing paths of all doors in the immediate vicinity. This includes your main wooden entrance door, the outer metal gate, and nearby doors such as those leading to a household shelter or a utility closet. A shoe cabinet must never obstruct these paths or force you to close one door just to open another. Ensure there is a clear, unobstructed path for daily foot traffic and emergency egress, keeping in mind that a cramped entryway makes carrying groceries or moving large items highly inconvenient.
Finally, locate and mark all wall-mounted utilities that you cannot move. Take note of light switches, intercom panels, fiber broadband termination points, and electrical outlets. Blocking these fixtures with a heavy cabinet creates long-term inconveniences, so your chosen unit must either sit clear of them or feature open back panels that allow easy access.
Step 2: Match Cabinet Dimensions to Your Space
Once you have your physical measurements, you can translate them into suitable furniture proportions. The width of your shoe cabinet with bench should correspond directly to your foyer type. If your home features a narrow corridor entryway, a compact unit measuring 60 cm to 80 cm in width is usually ideal to prevent the space from feeling claustrophobic. For wider, open-concept entryways that transition directly into the living room, you can opt for larger units spanning 100 cm to 120 cm, which offer more seating area and storage.

Cabinet depth is the most critical dimension for maintaining a comfortable walkway. Standard shoe cabinets require a depth of at least 30 cm to 35 cm to accommodate adult shoes placed straight-on. Because this unit includes an integrated bench, the depth must also support comfortable seating. A bench depth of 35 cm to 40 cm is generally the sweet spot, providing enough support for an adult to sit securely while keeping the profile slim enough to avoid encroaching on the primary walkway.
Height limits require careful consideration of both ergonomics and safety. The seating surface of the bench should ideally sit between 40 cm and 45 cm off the ground, which aligns with standard chair heights for comfortable knee flexion while putting on footwear. If the cabinet features an attached tall storage section next to the bench, ensure there is enough overhead clearance so you do not bump your head when transitioning from sitting to standing.
Step 3: Evaluate Capacity and Internal Layout
To ensure your shoe cabinet remains practical, you must balance its external dimensions with your household’s storage requirements. A single pair of adult shoes typically occupies about 20 cm to 25 cm of horizontal shelf space. By calculating the number of active shoes your family uses daily, you can determine the necessary shelf width; for example, a 100 cm wide shelf can comfortably hold four to five pairs of adult shoes per row.
Internal shelf adjustability is a crucial feature to look for when evaluating different models. Fixed shelves often lead to wasted vertical space or force you to store taller footwear, such as high-top sneakers, boots, or high heels, on their sides. Choosing a cabinet with adjustable or removable shelves allows you to customize the compartment heights to match your specific footwear collection.
In Singapore’s warm and humid climate, proper ventilation is essential for preventing mold growth and unpleasant odors. A fully sealed cabinet traps moisture from sweaty or damp shoes, which can damage both your footwear and the cabinet material. Consider a hybrid layout that features an open bottom shelf—often designed as a floating clearance of 15 cm to 20 cm beneath the cabinet—for daily-use shoes and wet umbrellas, combined with louvred or ventilated closed doors for less frequently worn pairs.
Step 4: Verify Structural and Installation Requirements
An entryway bench must be structurally capable of supporting the weight of an adult user. Before purchasing, check the manufacturer’s specified weight capacity for the seating area, ensuring it can safely support at least 100 kg to 150 kg. Lightweight units constructed from thin particleboard without central support legs may sag or crack over time under regular use.
Stability is another vital safety factor, especially when users lean forward or shift their weight to tie their shoes. Tall or top-heavy designs must be securely anchored to the wall using anti-tip hardware to prevent accidental tipping. Verify your wall type before installation; solid concrete walls require heavy-duty wall plugs and a rotary hammer drill, while drywall or partition walls require specialized toggle bolts to ensure a secure hold.
Finally, plan the logistics of getting the furniture into your home. Measure your building’s lift door width, lift interior height, and corridor turns to ensure the packaged box or fully assembled unit can be transported safely to your front door. If you are purchasing a flat-pack unit, ensure you have the necessary tools and space in your living room to assemble the cabinet safely according to the manufacturer’s instructions.
Common Sizing Mistakes to Avoid
One of the most frequent errors homeowners make is failing to account for the skirting board when planning their layout. This oversight forces the cabinet forward, which can cause the front edge to block door frames, trim, or the natural path of travel. Always measure from the outermost point of the skirting board rather than the bare wall to ensure your depth calculations are accurate.
Another common mistake is choosing a cabinet that is too deep for the available space, forcing you to step awkwardly into the living room or corridor just to sit down. Entryways should allow for fluid movement; if you must squeeze past the bench or twist your body to navigate the foyer, the unit is too large for your home.
Homeowners also frequently block access to their DB box or household shelter door, which can lead to compliance issues or safety hazards during emergencies. Lastly, ignoring ventilation in a closed cabinet almost guarantees odor and moisture issues; always check for ventilation holes, mesh backings, or slatted doors to keep your footwear fresh.
Frequently Asked Questions (FAQ)
How much clearance is needed in front of a shoe cabinet with a bench?
To sit comfortably, bend over to tie your shoes, and allow another person to pass behind you, aim for a minimum clearance of 90 cm to 120 cm in front of the bench. A clearance of less than 90 cm means your knees or feet may block the walkway entirely while you are seated, creating a temporary bottleneck in your entryway.
Can a shoe cabinet with bench block the main door from opening fully?
Yes, if the cabinet’s width or depth encroaches on the door’s swing radius, it will prevent the door from opening to its full 90-degree or 180-degree angle. This not only makes moving furniture difficult but also violates fire safety guidelines. Always measure the exact arc of your main door and gate, and position the cabinet outside this path to ensure an unobstructed exit route.

Community discussion
Share your experience or ask a question. Comments are reviewed before publication.