
Maximizing space in a compact Singapore Housing & Development Board (HDB) kitchen requires a deliberate shift from standard off-the-shelf furniture to highly integrated, multi-functional carpentry. A custom kitchen table cabinet offers the ultimate solution by combining essential food preparation surfaces, a dedicated dining area, and deep storage compartments into a single, cohesive footprint. By tailoring this unit to your specific layout, you can eliminate the clutter of separate tables and bulky cabinets, transforming even the narrowest galley kitchen into a highly efficient culinary workspace.
Successfully executing this design relies on precise spatial planning, selecting the right hardware, and understanding the ergonomic flow of your home. In a small flat, every millimeter counts, meaning your custom installation must serve multiple roles without disrupting daily foot traffic. This guide breaks down the essential steps to design, measure, and customize a kitchen table cabinet that fits your lifestyle and maximizes your HDB kitchen’s potential.
Assessing Your HDB Kitchen Layout and Walkway Clearance
Before sketching design ideas or contacting a carpenter, you must establish the exact physical boundaries of your kitchen. Begin by measuring the available floor space and wall dimensions, taking care to note any architectural irregularities. In many HDB flats, walls are not perfectly plumb, and skirting boards or floor tiles can slightly reduce your usable width. Use a high-quality steel tape measure to capture the dimensions at three different heights—floor level, countertop height, and eye level—to ensure your custom cabinetry fits flush against the walls.
Products mentioned in this guide
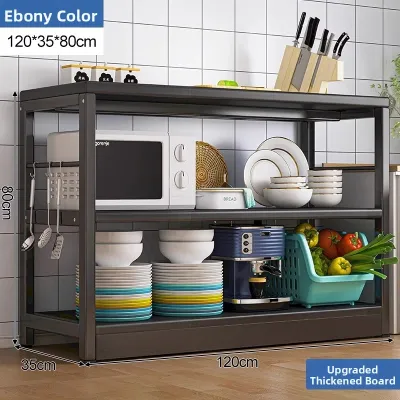
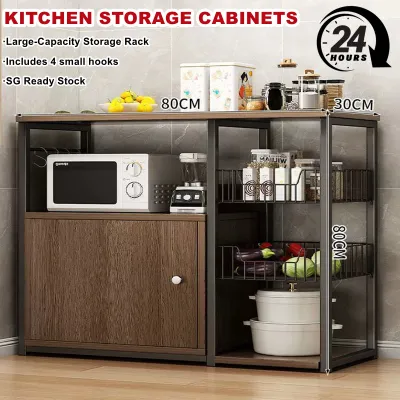
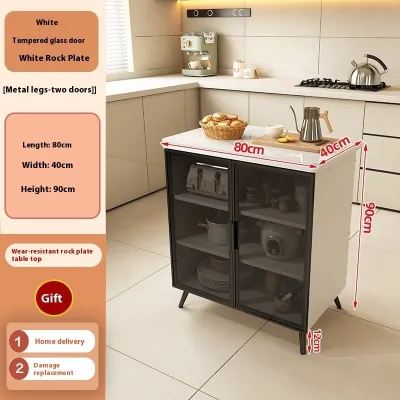
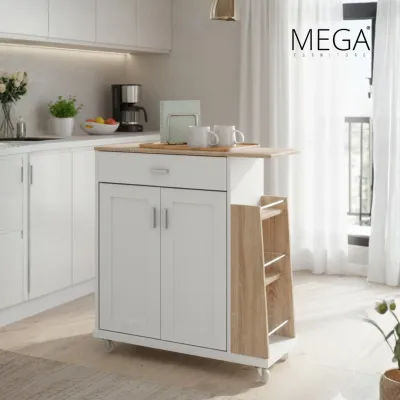
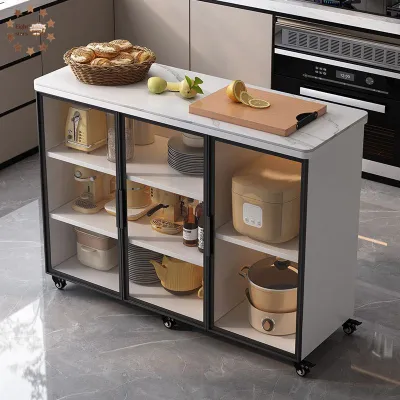
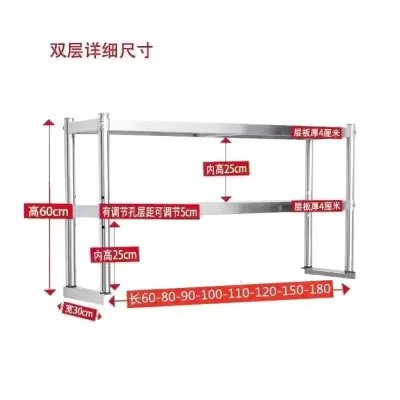
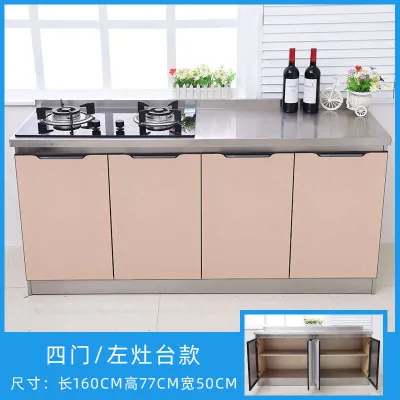
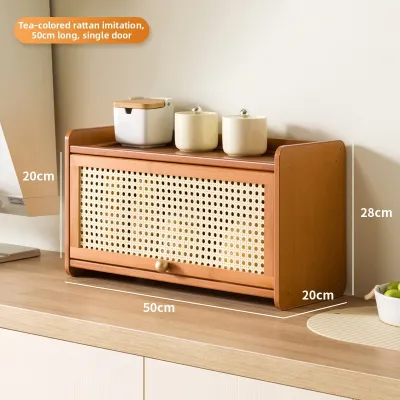
Prices are valid at publication and may change. Please refer to the product page for the latest price.
Equally critical is mapping the precise locations of existing utility points, including gas pipes, water inlets, waste pipes, and electrical power sockets. In Singapore, relocating plumbing or gas lines in public housing is highly regulated and often structurally impossible or prohibitively expensive. Your custom cabinet must be designed around these fixed points, ensuring that access valves, meters, and sockets remain completely unobstructed and easily accessible for maintenance or emergency shut-offs.
Walkway clearance is the ultimate metric that determines whether your kitchen remains functional or becomes an ergonomic bottleneck. In compact HDB layouts, especially narrow galley kitchens, you must maintain a minimum walkway width of 900mm to 1000mm. This clearance ensures that two people can pass each other comfortably and, more importantly, allows you to fully open appliance doors—such as your refrigerator, built-in oven, or front-loading washing machine—without hitting the cabinet. If your custom table is deployed, it should still leave enough room for a person to stand and work at the main counter safely.
Next, map out the dynamic swing paths of all doors, windows, and drawers in the vicinity. Draw a physical floor plan showing the arc of your refrigerator door, the oven door, and any adjacent cabinet doors. If you plan to install a pull-out or fold-down table, project its fully extended footprint onto this floor plan to verify that it does not block the primary entrance, service yard door, or emergency exit routes. A table that blocks access to the sink or stove when in use will quickly become a daily frustration.
When planning the finished dimensions of your custom units, do not overlook the physical logistics of delivery and assembly. Measure your home’s doorway clearances and the internal dimensions of your HDB block’s passenger lift. Large, pre-assembled cabinet frames or long, single-piece countertops might not fit inside standard lifts, requiring manual carry-ups via the stairs, which can incur hefty surcharges or even damage the components. Ensure your carpenter designs the unit to be delivered in modular, flat-pack, or semi-assembled sections that can be easily transported and assembled on-site.
Finally, identify the structural composition of the walls where you intend to mount or anchor the cabinet. HDB kitchens feature a combination of structural reinforced concrete walls, which cannot be hacked or heavily drilled without strict structural considerations, and non-structural drywall or lightweight concrete partition walls. Mounting a heavy, cantilevered cabinet or a fold-down table onto a non-structural partition wall requires specialized heavy-duty toggle bolts or internal reinforcement studs. Always refer to your flat’s original floor plan—where structural walls are indicated by thick, solid black lines—to determine what kind of anchoring system your carpenter must use to guarantee stability.
Choosing the Best Kitchen Table Cabinet Configuration
The layout of your HDB flat will largely dictate the ideal configuration for your kitchen table cabinet. There is no one-size-fits-all solution; instead, you must choose a design that aligns with how often you cook, how many people dine in the home, and the specific shape of your room.

Fold-Down and Pull-Out Table Mechanisms
For ultra-compact or narrow galley kitchens where floor space is at an absolute premium, fold-down and pull-out mechanisms are highly effective. A wall-mounted drop-leaf table integrated directly into the side or front of a base cabinet can be lifted and locked into place for meals or prep work, and then folded completely flat against the cabinet face when not in use. This configuration keeps the central walkway entirely clear during high-activity cooking periods, making it an excellent choice for solo dwellers or couples.
Alternatively, pull-out countertop extensions can be integrated seamlessly into your cabinetry, disguised as standard drawer fronts. These tables utilize heavy-duty telescopic tracks or folding leg supports that slide out from beneath the main countertop or from within a deep base drawer. When retracted, the table disappears entirely, maintaining a clean, minimalist aesthetic.
When planning these dynamic mechanisms, always calculate the spatial requirements for seating. A pull-out table might require 800mm of extension, but you must also factor in an additional 500mm to 600mm of clearance behind the table for a user to pull out a chair or stool, sit down comfortably, and get up without being pinned against the opposite wall.
Extendable Island and Peninsula Designs
If you have a semi-open or open-concept HDB kitchen, integrating your kitchen table cabinet into a peninsula or a compact island is a highly practical choice. A peninsula extends outward from an existing wall or counter line, acting as a natural divider between the cooking zone and the living area. By designing the peninsula with a generous countertop overhang—typically 250mm to 300mm deep—you create a comfortable breakfast bar where family members can sit on high stools without their knees hitting the cabinet doors.
For even greater flexibility, consider an extendable peninsula that features a nested slide-out table. This allows you to keep a compact, low-profile counter for daily use, which can then be extended into a full-sized dining table when hosting guests. The back of the peninsula, facing the living area, can be dedicated entirely to shallow shelving or display cabinets, keeping the active cooking zone strictly separated from the social zone.
When introducing a peninsula or island, you must carefully preserve the kitchen work triangle—the imaginary lines connecting your stove, sink, and refrigerator. Ensure that the peninsula does not block the direct path between these three high-use areas, as forcing yourself to walk around a large cabinet structure every time you prep a meal will ruin the kitchen’s efficiency.
Convertible and Hidden Table Solutions
For homeowners looking for maximum space reclamation and a high-end finish, convertible and hidden table solutions represent the pinnacle of custom carpentry. These designs include tables that fold completely flat into recessed cabinet doors, or flip up and lock seamlessly into the main countertop surface using flush-mounted pivot hinges. When closed, the cabinetry looks like a continuous, sleek wall of wood or laminate, with no visible seams or protruding legs to give away the hidden dining space.
While highly impressive, these specialized solutions come with significant mechanical complexity. They require precision-engineered hardware, such as counterbalanced gas struts, heavy-duty pivot hinges, and custom-milled tracks, which must be installed with absolute accuracy by an experienced carpenter. Consequently, the carpentry and material costs for these hidden solutions are substantially higher than simpler fold-down or pull-out alternatives.
Investing in these premium hidden mechanisms is generally justified when your kitchen serves as a highly visible extension of your living room, such as in modern open-concept BTO flats. If your kitchen is a separate, enclosed room where aesthetics are secondary to pure utility, simpler, robust mechanical solutions will offer better cost-to-performance value and lower long-term maintenance risks.
Maximizing Storage and Multi-Functional Utility
A well-designed kitchen table cabinet should never be just a table; it must perform double duty as a highly organized storage hub. To achieve this, you must optimize every cubic centimeter of the cabinet structure surrounding and beneath the table area.
Integrating deep drawers, pull-out pantries, or specialized appliance garages immediately adjacent to or beneath the table surface is an excellent way to keep your kitchen organized. Deep drawers equipped with heavy-duty runners are perfect for storing heavy pots, pans, and small appliances that would otherwise clutter your countertops. A pull-out pantry, consisting of narrow, vertical shelving units on tracks, can be built into the side of the cabinet to store dry goods, spices, and condiments right next to your dining or prep zone. Additionally, an appliance garage with a rolling tambour door or a lift-up pocket door can house your toaster, rice cooker, or coffee machine, keeping them plugged in and ready for use but hidden from view when dinner is served.
To maximize utility, design the table surface to double as an active food preparation station. This requires aligning the height of the table with your main kitchen countertops—typically 850mm to 900mm from the floor—rather than standard dining table height (750mm). Preparing food on a surface that is too low can cause back strain, while dining at a counter-height surface is easily accommodated by choosing comfortable bar stools or counter-height chairs. Furthermore, the table surface must be constructed from highly durable, food-safe materials that can withstand light chopping, rolling dough, and hot plates.
Modern HDB kitchens must also cater to digital lifestyles, making it highly beneficial to incorporate hidden power outlets, USB charging ports, or even wireless charging pads into the cabinet side or the edge of the table. This allows the table to transition seamlessly from a breakfast bar to a temporary home office or study nook. Ensure that all electrical installations comply with local safety regulations, utilizing splash-proof covers and keeping outlets positioned a safe distance away from water sources like the sink.
Inside the cabinet compartments, prioritize adjustable shelving over fixed shelves. This flexibility allows you to customize the internal height of the cabinets as your storage needs change over time, making it easy to accommodate tall blender jars, stacked dinnerware, or bulk grocery purchases. Utilizing wire baskets, pegboard organizers, and pull-out trays within these shelves will further enhance accessibility, ensuring that items stored at the very back of deep cabinets do not get forgotten.
Selecting Materials and Hardware for Daily Use
The humid, high-traffic, and warm environment of a Singaporean kitchen demands careful material and hardware selection. Choosing materials based solely on their aesthetic appeal or generic names can lead to premature wear, warping, or delamination.
Selecting materials for a humid, high-traffic Singaporean kitchen requires a realistic approach to durability. Remember that a material’s name alone—whether it is “solid wood,” “quartz,” or “compact laminate”—does not automatically prove its resistance to moisture, heat, or scratches. You must actively check the manufacturer’s specifications and care labels for the specific product brand and grade being used. Before applying any specialized cleaning solutions, polishes, or sealants to your completed surfaces, always check the applied product’s label and follow the treated item’s manufacturer instructions to prevent surface degradation.
To make a small HDB kitchen feel larger and brighter, utilize visual space enhancement techniques in your material choices. Light-colored finishes, such as soft whites, creams, and pale wood grains, reflect natural light deeper into the space, creating an airy feel. High-gloss laminates can also help reflect light, though they tend to show fingerprints more easily than matte finishes. Incorporating a reflective backsplash, such as tinted mirror glass or polished ceramic tiles, behind the cabinet unit can visually double the depth of a narrow kitchen, making the entire room feel significantly more spacious.
The longevity of any moving cabinet configuration depends entirely on its hardware. Never skimp on mechanical components: specify heavy-duty hinges, soft-close drawer slides, and high-quality gas struts or tension adjusters for fold-down mechanisms. Soft-close hinges prevent doors and drawers from slamming, protecting the cabinet joints from structural fatigue over time. For fold-down tables, high-performance gas struts are essential to control the descent of the table, preventing it from dropping abruptly and causing injury or damage.
Finally, always verify the certified weight capacity of all mechanical slides, hinges, and support legs against the intended load of the table. A table used for food preparation must not only support its own weight but also the downward pressure of someone kneading dough, leaning on the edge, or placing heavy cast-iron cookware on the surface. Ensure your carpenter uses hardware rated for at least 50kg to 100kg of static load, depending on the size and design of the table, to guarantee long-term safety and stability.
Avoiding Common Layout Mistakes and Safety Risks
Designing custom carpentry for a tight space leaves very little room for error. Avoiding common layout mistakes and prioritizing structural safety during the planning phase will save you from costly remedial renovations and potential hazards.
One of the most frequent mistakes is blocking primary cooking zones or disrupting the natural flow of the kitchen work triangle. A permanently deployed table or a bulky cabinet peninsula should never obstruct the direct path between the stove, sink, and refrigerator. If you must walk a convoluted path around your table cabinet to transfer a hot pot from the stove to the sink, the layout is fundamentally flawed. Ensure that even when the table is fully extended, there is still a clear, unobstructed path for the cook to move safely.
Underestimating the weight load and leverage of fold-down or cantilevered tables poses a severe safety risk. When a table is extended, any weight placed on the outer edge exerts immense leverage on the wall mounting points. If the cabinet is not anchored securely to a structural wall using heavy-duty masonry anchors, or if the cabinet frame itself is constructed from weak, low-density materials, the entire unit can tear away from the wall, leading to catastrophic failure and severe injury. Always ensure that structural loads are transferred down to the floor via sturdy legs or a reinforced cabinet base whenever possible.
Proper ventilation and heat clearance are also critical safety considerations, particularly if your kitchen table cabinet is positioned near a gas hob, induction cooker, or built-in oven. Appliances generate significant heat and steam during operation, which can damage adjacent cabinet laminates, cause wood to warp, or even pose a fire hazard if proper clearances are not maintained. Check the manufacturer’s installation manuals for all cooking appliances to ensure you maintain the required side and rear air gaps, and avoid placing folding table mechanisms directly adjacent to high-heat zones.
Lastly, establish a strict stop-work boundary for your DIY or custom carpentry planning. If your planned cabinet layout conflicts with structural columns, concealed electrical wiring, or complex plumbing lines, you must halt immediately. Never attempt to cut into structural concrete walls or modify major electrical and plumbing systems yourself. At this stage, you must consult a qualified interior designer, a professional carpenter, or an HDB-registered contractor who can safely assess the structural integrity of your flat, obtain the necessary permits, and execute the installation safely and legally.
Frequently Asked Questions (FAQ)
Do I need HDB approval to install a custom kitchen table cabinet?
Standard, non-structural carpentry work—such as building a freestanding kitchen cabinet, mounting wall shelves, or installing a custom kitchen table cabinet—generally does not require formal HDB approval or a renovation permit. However, if your design requires hacking existing walls to create an open-concept layout, relocating water pipes, or modifying the flat’s electrical wiring, you must apply for an HDB renovation permit. All such works must be executed by an HDB-registered contractor to ensure compliance with Singapore’s public housing safety standards and structural guidelines.
What is the standard height for a kitchen table cabinet used for both dining and prep?
Navigating the ergonomic difference between standing prep work and seated dining can be challenging. Standard kitchen countertops are typically built to a height of 850mm to 900mm to allow for comfortable standing food preparation without bending over. In contrast, standard dining tables are much lower, typically around 750mm, designed for use with standard chairs. To bridge this gap, you can design your kitchen table cabinet at counter height (850mm to 900mm) and pair it with adjustable bar stools or counter-height chairs. Alternatively, you can opt for a two-tiered peninsula design, where a 900mm high prep counter seamlessly transitions down to a 750mm high dining surface.
Community discussion
Share your experience or ask a question. Comments are reviewed before publication.