
Configuring a USM Haller modular cabinet for your home is an exercise in both creative design and structural planning. This iconic modular system allows you to build a highly customized storage solution—whether it is a low-slung media console, a towering bookshelf, or a compact bedside table. By combining chrome-plated steel tubes, brass connector balls, and powder-coated steel panels, you can create a piece of furniture tailored to your exact spatial constraints and aesthetic preferences.
However, because the system is completely modular, successful configuration requires a systematic approach. You must carefully plan your dimensions, weight distribution, and accessibility before purchasing. This guide walks you through the essential steps to design a stable, functional, and beautiful cabinet that fits your home perfectly.
Understanding the Core Components of a USM Cabinet
To design a functional USM Haller cabinet, you must first understand the three fundamental building blocks that make up its structural system. These components work together to create a rigid, self-supporting grid that can be expanded or modified over time.
Products mentioned in this guide
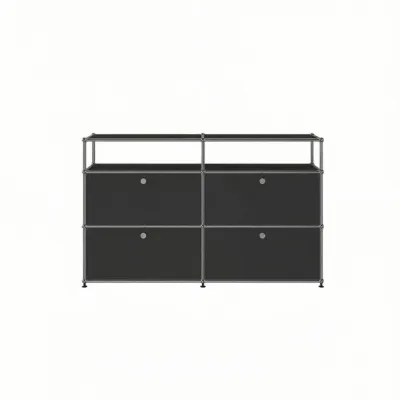
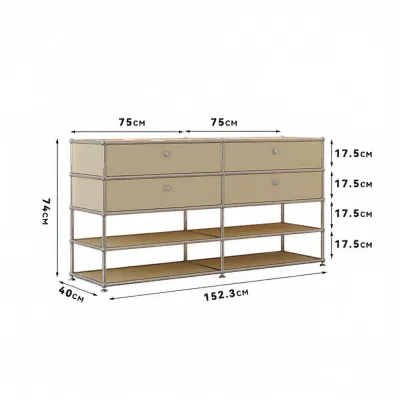
5 Lazada user ratings
Everything about this purchase was smooth — from ordering to delivery. The quality is exactly as described. Thumbs up!
Always reliable, always good quality. This purchase was no exception. Very satisfied customer here.
Bought this as a gift and the recipient loved it. Great quality and reliable. Highly recommend!
Honestly one of my best online purchases. Everything was seamless from order to delivery.
Prices are valid at publication and may change. Please refer to the product page for the latest price.
The first component is the chrome-plated steel tube, which serves as the structural framework. Available in various standard lengths, these tubes define the overall height, width, and depth of each individual bay. Because they carry the weight of the structure and its contents, choosing the correct lengths is the first step in establishing the scale of your cabinet.
The second component is the patented brass connector ball. These small, threaded spheres act as the joints or structural nodes of the cabinet. Each ball can receive tubes from up to six different directions, enabling you to build outward in three dimensions. The connection mechanism inside the tubes screws directly into these balls, creating an incredibly strong joint that keeps the framework rigid under load.
The third component consists of the metal panels and doors. Made from powder-coated steel, these panels slide into the grid to form the shelves, side walls, back walls, and doors of your cabinet. They are available in a wide range of signature colors, allowing you to create a solid monochromatic look or a vibrant, multi-colored statement piece. For display purposes, glass panels can also be integrated into the frame to showcase decorative items while protecting them from dust.
Assessing Your Room Dimensions and Storage Needs
Before you begin selecting components or using an online configuration tool, you must thoroughly assess the physical space where the cabinet will stand. Because USM cabinets are rigid and sit flush against walls, precise measurements are critical to avoiding installation issues.

Start by measuring the available floor space and ceiling height. Pay close attention to architectural details such as skirting boards, electrical outlets, light switches, and window frames. Skirting boards can prevent a cabinet from sitting completely flush against a wall, which is an important consideration if you plan to anchor a tall unit. Additionally, ensure that the cabinet will not block access to essential wall outlets or interfere with the swing of nearby doors.
Next, consider the logistics of delivering and installing the cabinet in your home. Fully assembled USM units are exceptionally heavy and do not flex. You must verify the dimensions of your building’s lift, corridors, stairwells, and front doorway to ensure the delivery team can safely transport the cabinet to your room. If access is tight, you may need to arrange for the cabinet to be assembled on-site, which requires sufficient floor space in the target room.
Once the physical space is verified, define what the cabinet will hold. Categorize your storage items by size, weight, and frequency of use. Heavy books, vinyl records, and media equipment require sturdy support and specific bay heights. If you plan to store electronic devices, you will need to plan for cable routing and heat dissipation.
Finally, check the manufacturer’s guidelines regarding weight limits and structural spans. Standard metal shelves have specific load capacities, and overloading them can cause visible sagging or compromise the stability of the entire unit. If you intend to store exceptionally heavy items, you may need to integrate additional support tubes or choose smaller bay widths to distribute the weight safely.
Step-by-Step Configuration Process
Configuring your USM cabinet is a systematic process that builds from the ground up. By following a logical sequence, you can ensure that the structural foundation is secure before you make decisions about aesthetics and internal organization.
Step 1: Establish the Base and Vertical Framework
The first step in the physical configuration is selecting the appropriate base for your cabinet. USM Haller offers several options, including standard leveling feet, castors, and base plates. Leveling feet are highly recommended for most home environments, as they can be adjusted individually to compensate for uneven floors, ensuring the cabinet remains perfectly level and stable. Castors are excellent if you require mobility, but they alter the weight capacity and stability of the unit, making them unsuitable for very tall configurations.
Once the base is selected, you must calculate the vertical and horizontal tube lengths to establish the structural grid. The grid is typically measured in standard modular dimensions. When planning the height, consider the ergonomic reach of the users; frequently accessed items should be placed at comfortable heights, while seasonal storage can go in the upper or lower bays.
As you build upward, structural stability must remain your primary concern. Tall or narrow configurations have a higher center of gravity and pose a tip-over risk, especially in homes with active pets or young children. To mitigate this risk, plan to anchor any unit over a certain height directly to the wall. Additionally, placing heavier items in the bottom bays helps lower the center of gravity and improves overall stability.
Step 2: Select Enclosures, Panels, and Doors
With the structural grid established, you can begin defining how each bay will function by selecting panels, doors, and open spaces. This step determines both the visual appeal and the practical utility of your cabinet.
Solid metal panels are the standard choice for creating enclosed storage. Placing solid panels on the sides, back, and bottom of a bay creates a secure compartment that conceals clutter and keeps your belongings organized. If you wish to display items such as art pieces, books, or collectibles, you can leave specific bays completely open or use clear glass panels to create a dust-free display case.
Doors and drawers add another layer of functionality. Drop-down doors are a popular option; they open downward and, when fully extended, can serve as a temporary writing surface or a platform for sorting items. However, ensure there is adequate clearance in front of the cabinet so that open doors do not block walkways. For deeper storage, extension doors or pull-out drawers allow you to access items at the back of the cabinet without reaching deep into the bay.
Aesthetic balance is also key during this stage. Mixing open bays with closed compartments creates a dynamic visual rhythm that prevents a large cabinet from looking too heavy or imposing in a room. You can also experiment with color placement, using neutral tones for the main structure and popping a single bay with a bold accent color.
Step 3: Integrate Internal Fittings and Accessories
The final stage of the configuration process involves customizing the interior of each bay to maximize its storage efficiency. Internal fittings allow you to tailor the cabinet to highly specific tasks, from home office organization to media management.
To make the most of vertical space within a single bay, consider adding internal shelves. These shelves divide the bay into smaller compartments, which is ideal for storing flat items like documents, laptops, or table linens. For office setups, integrated file organizers and drawer inserts keep stationery and paperwork neatly sorted.
If your USM cabinet will house electronics, such as a television, gaming console, or audio receiver, cable management is essential. Look for specialized back panels with pre-cut cable outlets to route power cords and AV cables neatly out of sight. Additionally, ensure that electronic components have sufficient ventilation; leaving the back of a media bay open or using perforated panels can help prevent heat buildup and protect your devices from overheating.
Always verify the compatibility of internal fittings with your chosen bay dimensions. Some accessories are designed specifically for certain tube lengths or depths, so double-checking these specifications before finalizing your design prevents assembly issues later.
Validating Your Design and Finalizing the Order
Before placing your order, it is crucial to perform a final validation of your design to ensure it is safe, functional, and ready for your home. A well-planned configuration prevents costly mistakes and ensures a smooth installation process.
Begin by reviewing your design against the manufacturer’s structural and safety specifications. Double-check that the height-to-depth ratio is safe and that you have accounted for all necessary wall anchors, leveling feet, and weight-bearing supports. If your configuration is complex, large, or features asymmetrical layouts, consulting an authorized dealer or using a certified online configurator in Singapore is highly recommended. These specialists can review your design, identify potential structural weaknesses, and ensure that every single connector ball, tube, and panel is correctly specified.
Next, consider the delivery and assembly logistics. Because of the weight and complexity of the system, professional assembly by certified technicians is strongly advised for most configurations. Professional installers have the specialized tools required to tension the joints correctly and can safely handle the heavy steel components. They will also ensure that the cabinet is perfectly leveled and securely anchored to your wall if required.
Finally, keep in mind the future potential of your modular cabinet. One of the greatest advantages of the USM Haller system is its longevity and adaptability. As your living situation or storage needs change, the cabinet can be completely reconfigured, expanded, or split into smaller units. Knowing that your investment can evolve with you over decades makes the careful planning and configuration process well worth the effort.
Frequently Asked Questions (FAQ)
Can I reconfigure my USM cabinet after it is assembled?
Yes, the defining feature of the USM Haller system is its complete modularity. You can disassemble, expand, or completely change the layout of your cabinet at any point in the future. However, because the tubes and connector balls are joined under high tension to ensure structural stability, standard household tools are not suitable for the job. Reconfiguration requires specialized USM tools or the assistance of certified technicians to prevent scratching the chrome surfaces or stripping the internal threads. You can source additional tubes, panels, and connectors through authorized dealers when you are ready to expand your setup.
Do I need professional help to assemble a large USM cabinet?
While it is technically possible to assemble very small, simple configurations yourself if you have the correct tools, professional assembly is highly recommended for larger or more complex units. Fully assembled steel panels and tubes are extremely heavy, and aligning them precisely requires experience. Professional installers in Singapore ensure that the cabinet is built to exact safety standards, is perfectly level on your flooring, and is securely anchored to the wall if the height requires it. Relying on certified assembly services also protects your investment and ensures compliance with manufacturer warranty guidelines.
Community discussion
Share your experience or ask a question. Comments are reviewed before publication.