
Building a bespoke display wall using a modular shelve display rack system is an excellent way to maximize vertical space, especially in space-constrained Singapore homes where every square meter counts. By combining different shelving components—such as open frames, closed cabinets, and drawers—you can design a highly personalized storage solution that adapts to your changing lifestyle. However, a successful custom installation requires more than simply buying a few random shelves and stacking them together. It demands rigorous spatial planning, a clear understanding of structural load limits, and an eye for visual balance.
To create a cohesive, safe, and visually striking display wall, you must carefully navigate the physical constraints of your room, select compatible components, and follow correct assembly sequences. Whether you want to showcase a curated collection of art, store an extensive home library, or hide everyday household clutter, this guide provides the practical strategies needed to plan, design, and construct a stable and beautiful modular display system.
Planning Your Space and Display Requirements
Before purchasing any modular components, you must conduct a thorough assessment of your physical space to avoid costly delivery issues or layout mistakes. Start by measuring the precise width, height, and depth of the target wall. Do not rely on general floor plans; instead, use a metal measuring tape to capture the exact dimensions at multiple points along the wall, as walls are rarely perfectly straight. Ensure you account for the thickness of baseboards, which can prevent a flat-pack unit from sitting flush. Additionally, map out the locations of power outlets, light switches, internet ports, and wall-mounted air-conditioning units to ensure your planned layout does not block access to these essential features.
Products mentioned in this guide
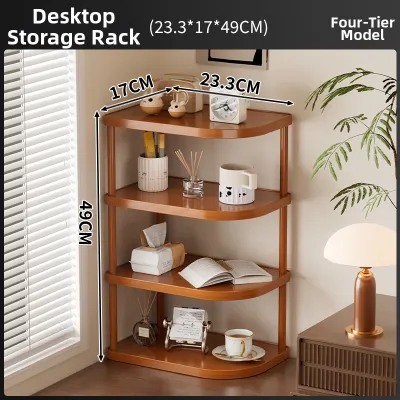
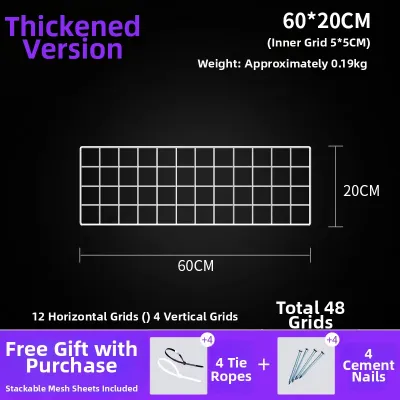
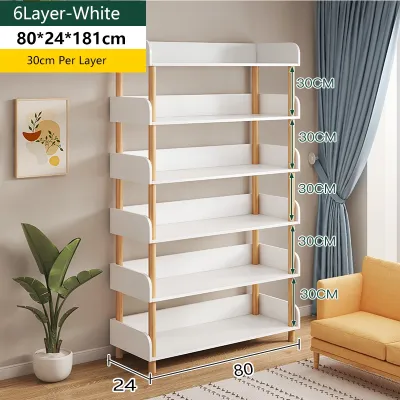
Prices are valid at publication and may change. Please refer to the product page for the latest price.
Logistical access is another critical factor that is frequently overlooked. Many high-rise apartments, particularly older HDB flats or boutique condominiums, have tight corridors, low lift ceilings, or narrow stairwells. Measure the height, width, and diagonal clearance of your building’s lift doors and interior cabin to ensure that long upright supports or bulky pre-assembled base cabinets can be safely transported to your unit. If a component is too large for the lift, you may face additional delivery surcharges or be forced to return the items altogether.
Next, analyze the specific objects you intend to display, as this directly dictates the load-bearing requirements and shelf depths of your modular setup. Heavy items, such as large books, ceramic pottery, or audio-visual equipment, require sturdy shelves with a high weight capacity and a depth of at least 30 to 40 centimeters. Conversely, lightweight collectibles, small framed photographs, or glassware can sit comfortably on shallower shelves measuring 20 to 25 centimeters deep. Estimate the total weight of your items to ensure you choose a system with appropriate structural ratings, preventing unsightly and dangerous shelf sagging over time.
Finally, translate your measurements into a workable blueprint. Sketching a basic grid layout on graph paper or using a free digital room planner allows you to visualize the final footprint of your shelve display rack configuration. This step helps you calculate the exact number of upright rails, brackets, shelves, and cabinet inserts you need to purchase, eliminating guesswork and ensuring a seamless assembly process.
Design Strategies for Mixing Shelve Display Rack Modules
A successful custom display wall must strike a delicate balance between functional utility and aesthetic appeal. By strategically mixing different types of modular components, you can create a dynamic focal point that serves your storage needs while elevating the overall interior design of your room.

Balancing Open Shelves and Closed Storage
Integrating both open shelving and closed storage modules is key to a balanced display wall. A wall of entirely open shelves can easily look cluttered and visually overwhelming, while one dominated by solid cabinets can feel heavy and make a small room feel even smaller.
To achieve visual harmony, place closed cabinets, drawer units, or sliding-door modules at the base of your display wall. Positioning these heavier, solid elements at the bottom anchors the entire design visually and provides a practical zone for hiding unsightly items, cables, and paperwork. This configuration also lowers the physical center of gravity of the entire structure, enhancing overall stability.
Reserve the middle and upper sections of the wall—typically from eye level upward—for open shelving. Use these open areas to display curated items, such as indoor plants, decorative vases, art pieces, or frequently accessed books. This arrangement creates a sense of openness and breathing room, allowing light to pass through the structure and making the entire space feel larger and more inviting.
Layering Different Depths and Heights
To prevent your display wall from looking flat or like a commercial retail rack, incorporate varying depths and heights. A single uniform depth across a massive wall can make the installation feel rigid and uninspired.
A highly practical approach is to use deeper base units, typically around 40 centimeters deep, at the floor level. This depth is ideal for housing larger items, media consoles, or deep storage baskets. As the system rises, transition to shallower upper shelves, ranging from 20 to 30 centimeters deep. This stepped transition prevents the upper portion of the wall from feeling top-heavy, maximizes floor space, and significantly reduces the risk of family members bumping their heads when leaning over the lower units.
Furthermore, you can break up rigid grid lines by mixing vertical and horizontal modules. Instead of running continuous horizontal shelves from wall to wall, insert vertical dividers, hanging rods, or asymmetrical box inserts at irregular intervals. These variations break the monotony of parallel lines and create natural focal points that draw the eye across the display.
When arranging your items, remember the importance of negative space. Leaving intentional empty gaps or lightly styled shelves within your modular grid is essential. It prevents the display from looking overcrowded, allowing individual decor pieces to stand out and giving the entire wall a sophisticated, professionally styled appearance.
Assembly Sequence and Structural Stability
Building a large, multi-component display wall requires a methodical approach to assembly. Skipping steps or failing to secure the structure properly can lead to structural failure, damaged property, or severe personal injury.
Step-by-Step Base Setup Always begin assembly from the bottom up, ensuring base modules are perfectly level. Floors are rarely completely flat, so use a spirit level to check alignment. If you detect any sloping, insert durable shims beneath the feet. Failing to level the base will cause minor alignment errors to compound as you build upward, resulting in crooked supports, jammed doors, and severe structural stress on upper joints.
Securing Hardware and Connectors As you stack subsequent layers, follow the manufacturer’s specified hardware sequence. Verify and tighten all connector hardware—such as cam locks, dowels, or interlocking brackets—at each stage. Do not rush or leave screws partially tightened. Over-tightening can strip threads or crack panels, while under-tightening compromises the frame’s overall structural integrity.
Mandatory Wall Anchoring Anchoring the entire structure to the wall is a mandatory safety step. Tall, heavy shelving units pose a significant tip-over hazard, especially in homes with children, pets, or high foot traffic. To anchor the system safely, first identify your wall type, as materials require completely different fastening hardware. Solid concrete or brick walls, standard in Singapore’s HDB flats and structural condo walls, require heavy-duty masonry wall plugs and a rotary hammer drill.
In contrast, drywall or partition walls require using a stud finder to locate internal wooden or metal studs. If studs are unavailable at your mounting locations, use heavy-duty toggle bolts or hollow-wall anchors. Never rely on standard plastic plugs or drywall screws, as they can pull out under heavy loads. If you are unsure of your wall’s composition or lack the specialized tools, stop immediately and consult a qualified professional.
Compatibility Rules and Mixing Restrictions
While the idea of mixing and matching different modular components is exciting, you must respect several hard physical boundaries to prevent structural failure or voiding product warranties.
First, avoid mixing interlocking connection systems, upright rails, or brackets from different brands or product lines unless they are explicitly certified by the manufacturers as universally compatible. Even if two systems look remarkably similar, minor discrepancies in hole spacing, bracket thickness, or metal alloys can prevent secure locking. Forcing incompatible brackets into upright slots can bend the metal, damage the powder coating, and lead to a catastrophic collapse of the shelves under load.
Second, never place heavy-duty, high-capacity modules on top of lightweight, low-capacity frames. The structural columns of the lower units must be rated to support not only the weight of the items placed on them but also the cumulative weight of all the modules stacked above them. Placing a heavy solid-wood cabinet on top of a thin, open wireframe will cause the lower frame to buckle, warp, or collapse entirely. Always place your heaviest, most robust modules at the very bottom of the stack.
Third, always refer to the manufacturer’s product label to verify the maximum weight limit per shelf and the total weight capacity of the entire unit. Distribute the weight of your items evenly across each shelf, placing the heaviest items closest to the vertical support columns rather than in the center of the shelf, where sagging is most likely to occur.
Finally, keep environmental factors in mind. In Singapore’s hot and highly humid tropical climate, material choice and surface finishes are paramount. A simple material name like “wood” or “metal” does not guarantee durability. For long-term resistance to warping, mold, and rust, verify the specific surface treatments applied to the components. Look for engineered wood with high-quality melamine or laminate finishes that seal the core material from moisture. For metal components, ensure they feature a durable powder-coated or rust-resistant finish, especially if the display wall is located near a window, balcony, or in a high-humidity area of the home.
Frequently Asked Questions (FAQ)
Can I mix modular shelving from different brands?
While you can place independent, freestanding modular units from different brands side-by-side to create a varied, eclectic visual effect, you should never structurally stack, interlock, or connect them unless they share an officially certified universal connector system. Forcing incompatible joints, brackets, or rails together compromises the structural safety of the entire installation. If you want to use multiple brands, keep them as completely separate, self-supporting units placed adjacent to one another, and ensure each unit is independently anchored to the wall.
How do I know if my wall can support a heavy display rack?
The load-bearing capacity of your wall depends entirely on its construction material. Solid concrete, brick, or masonry walls (highly common in Singapore HDB flats) can support extremely heavy loads, provided you use high-quality masonry drill bits and heavy-duty expansion anchors. Drywall or partition walls have much lower load capacities and require you to anchor the shelving brackets directly into the internal wooden or metal studs. Avoid using standard drywall toggles or plastic plugs for tall, heavy modular setups on drywall. If you are uncertain about your wall’s structural composition or load capacity, consult a licensed contractor before proceeding.
Community discussion
Share your experience or ask a question. Comments are reviewed before publication.