
To keep your storage cabinet looking pristine and structurally sound, a systematic approach to cleaning and polishing is essential. The process relies on a simple rule: always clean away dirt and grime before applying any polish or wax. Skipping this order traps dust under a sticky layer, dulling the finish over time. By identifying your cabinet’s material, preparing the right tools, and following a methodical step-by-step application, you can restore its original luster while protecting it from environmental wear.
Identify Your Cabinet Material to Choose the Right Products
Before applying any liquid or polish to your storage cabinet, you must determine exactly what material forms the outer surface. Using a heavy wax or oil on a synthetic surface will leave a greasy, dust-attracting film, while using harsh water-based cleaners on unfinished or delicate wood can cause swelling and warping.
Always start by checking the manufacturer’s care label, purchase invoice, or the product manual if available. These records provide the safest guidelines for your specific piece. If these are unavailable, examine the cabinet closely for observable material cues:
Products mentioned in this guide
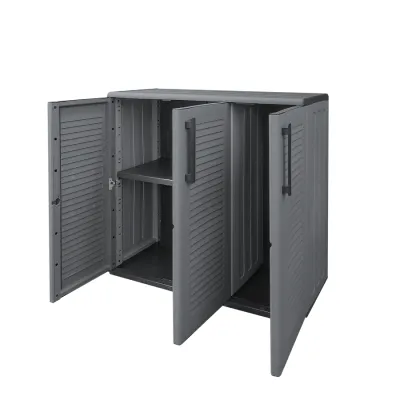
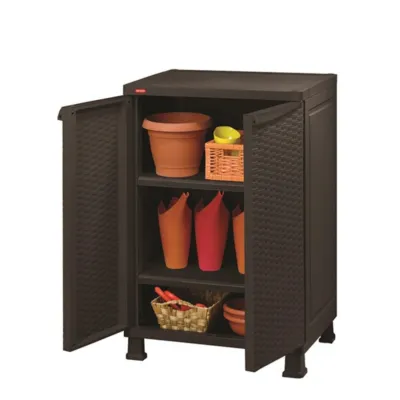
Prices are valid at publication and may change. Please refer to the product page for the latest price.
- Solid Wood: Look for unique grain patterns that do not repeat, visible joints, and natural imperfections. Solid wood feels warm to the touch and carries a distinct weight.
- Wood Veneer: Veneer consists of a very thin layer of real wood glued over a core material like MDF or particleboard. Check the edges and corners of the cabinet doors; if you see a thin seam or a slight separation where the wood pattern ends, it is likely veneer.
- Laminate or Melamine: These synthetic surfaces often feature a highly repetitive printed wood grain or a solid color. They feel smooth, plastic-like, and cool to the touch. They are highly resistant to water but vulnerable to heat and edge peeling.
- Metal: Typically steel or aluminum, metal cabinets are cold, highly durable, and often powder-coated or painted.
- Glass: Frequently used for cabinet door inserts or shelves, glass is easily identified by its transparency and smooth, non-porous surface.
Safety Boundary: If you cannot identify the material, if the existing finish is actively peeling, cracking, or flaking, or if the manufacturer explicitly warns against polishing, stop immediately. In these scenarios, use only a clean, dry or slightly damp microfiber cloth to remove dust. Applying commercial polishes to compromised finishes can cause irreversible staining or accelerate peeling.
Gather Your Cleaning and Polishing Supplies
Having the correct tools on hand prevents accidental scratches and ensures an even, streak-free finish. Prepare your workspace by laying down a drop cloth or old towel to protect your flooring from stray drips, especially if you are working on polished parquet or delicate tiles.

Assemble the following basic cleaning tools:
- Microfiber Cloths: Gather at least three or four clean, lint-free microfiber cloths. Microfiber is highly recommended because its tiny fibers grab dust particles without scratching delicate finishes.
- Soft-Bristle Brush: A clean, soft makeup brush, paint brush, or a vacuum cleaner equipped with a soft brush attachment is ideal for clearing dust from intricate carvings, panel grooves, and corners.
- Mild Dish Soap: A pH-neutral, gentle dishwashing liquid mixed with warm water is the safest cleaning agent for almost all sealed surfaces.
- Cotton Gloves: Wearing clean cotton gloves prevents your skin oils from leaving fresh smudges on freshly cleaned or polished surfaces.
For cabinets with confirmed wood or wood veneer surfaces, select a high-quality furniture polish, cream, or paste wax. Ensure the product is approved by your cabinet’s manufacturer.
Warning: Never use abrasive scrubbing pads, steel wool, or harsh household chemicals containing bleach, ammonia, or undiluted white vinegar. These substances can strip protective topcoats, dissolve glues in veneers, and leave permanent cloudy patches. Additionally, avoid silicone-based polishes; silicone can penetrate the finish and create a slick barrier that makes future refinishing or touch-ups extremely difficult.
Step-by-Step Guide to Cleaning the Cabinet
A thorough cleaning is the foundation of successful cabinet care. Removing surface oils, fingerprints, and dust ensures that any subsequent polish adheres properly and does not seal in existing grime. Follow this step-by-step sequence to clean your storage cabinet safely:
- Step 1: Clear and Prep. Empty the cabinet completely. Remove all stored items, drawers, and adjustable shelves to give yourself unhindered access to the interior and exterior surfaces. If the cabinet has removable metal hardware, such as brass handles or steel hinges, consider unscrewing them to clean them separately. If removing them is too difficult, cover them with low-tack painter's tape to protect them from moisture.
- Step 2: Dry Dusting. Use a dry microfiber cloth or a soft-bristle brush to remove loose dust, cobwebs, and debris from the top, sides, and interior corners of the cabinet. Always work from the top down so that falling dust is captured in later steps. Skipping this dry phase is a common mistake; dragging a wet cloth over a dusty surface creates an abrasive slurry that can leave fine scratches on the finish.
- Step 3: Prepare the Solution. Mix a few drops of mild dish soap into a bucket or bowl of warm water. The water should be lukewarm, not hot, as high temperatures can soften certain varnishes or weaken veneer adhesives.
- Step 4: Wipe Down. Dip a clean microfiber cloth into the soapy water and wring it out thoroughly. The cloth must be only slightly damp, never dripping wet. Wipe down the cabinet surfaces using gentle, circular motions, following the direction of the wood grain if applicable. Pay special attention to areas around handles where hand oils accumulate. Never allow water to pool in joints, seams, or carved details, as moisture can quickly seep into the wood fibers, causing the material to swell, warp, or split.
- Step 5: Address Stubborn Spots. For sticky residues, grease splatters, or dried spills, do not scrub aggressively. Instead, hold the damp cloth firmly over the spot for ten to fifteen seconds to soften the residue, then gently wipe it away. For particularly stubborn grime on sealed surfaces, use a tiny drop of undiluted mild soap directly on your fingertip, rub it gently over the spot, and immediately wipe it clean with a damp cloth.
- Step 6: Dry Thoroughly. Immediately follow the damp wipe with a separate, clean, dry microfiber cloth. Buff the entire cabinet dry to ensure no moisture remains on the surface or inside the crevices. This step is critical to preventing water rings, cloudy spots, and joint damage.
Step-by-Step Guide to Polishing the Cabinet
Polishing restores depth to wood finishes, hides minor surface scratches, and provides a thin protective barrier against dust and moisture. However, because modern cabinets often use synthetic coatings, polishing requires careful execution.
Pre-check: Polishing is strictly reserved for bare wood, sealed wood, or natural wood veneers that have been approved for such treatments by the manufacturer. If your storage cabinet is made of laminate, melamine, metal, glass, or has a high-gloss painted finish, skip this entire polishing section. These materials do not absorb polishes or oils; applying them will only leave a greasy, streaky film that actively attracts airborne dust.
If your wood cabinet is ready for polishing, proceed with these steps:
- Step 1: Spot Test. Before applying any polish to the visible areas of your cabinet, perform a spot test in an inconspicuous location, such as the inside of a door or the lower back panel. Apply a small drop of the product, rub it in, and let it dry completely. Check the area under good lighting for any adverse reactions, such as clouding, discoloration, stickiness, or an uneven sheen. If the finish looks clean and clear, it is safe to proceed.
- Step 2: Apply to the Cloth. Dispense a small, coin-sized amount of polish or wax directly onto a clean, dry microfiber cloth. Never spray or pour polish directly onto the cabinet surface. Applying product directly to the furniture leads to uneven distribution, oversaturation, and pooling in corners or carved details, which is incredibly difficult to clean out later.
- Step 3: Work the Polish In. Rub the polish into the cabinet surface following the direction of the wood grain. Use gentle, even, circular motions to spread the product, then finish with straight strokes along the grain to ensure uniform coverage. Work in small, manageable sections, such as one door or one side panel at a time.
- Step 4: Let it Set. Allow the polish to dry, cure, or haze according to the exact instructions on the product label. This typically takes anywhere from a few minutes to half an hour, depending on whether you are using a liquid polish, oil, or paste wax.
- Step 5: Buff the Surface. Take a fresh, dry, clean microfiber cloth and buff the surface thoroughly. Use firm, circular motions to remove any excess product and bring out a clean, deep shine. Flip the cloth frequently to a clean side to avoid simply spreading excess wax around.
Stop Condition: If at any point during the application the surface begins to feel tacky, looks streaky, or attracts dust immediately, stop applying the product. This indicates that the finish is already saturated or that the polish is incompatible with the cabinet’s topcoat. Immediately buff off the excess with a clean, dry cloth and consult the product label for removal instructions.
Routine Maintenance to Protect the Cabinet Finish
Preserving the beauty of your storage cabinet requires consistent, low-risk habits rather than frequent deep cleaning or heavy polishing. By establishing a simple maintenance routine, you can prevent wear and keep the finish looking fresh for years.
- Frequency Guidelines: Dust your cabinet weekly using a dry microfiber cloth or a soft duster. Deep clean with a damp, soapy cloth only when you notice built-up grime, sticky spots, or after heavy use. Polish the cabinet sparingly—typically only once or twice a year, or when the wood genuinely begins to look dry and dull. Over-polishing is a common mistake that leads to a thick, sticky buildup, which traps dirt and darkens the wood's appearance.
- Environmental Controls: Environmental factors play a massive role in furniture longevity, particularly in climates with high humidity and intense sunlight, such as Singapore. Position your storage cabinet away from direct sunlight to prevent the finish from fading, cracking, or yellowing. Avoid placing it directly beneath air-conditioning vents or next to humidifiers; rapid fluctuations in temperature and humidity cause wood to expand and contract, which can loosen joints, warp panels, and crack delicate veneers.
- Spill Management: Accidental spills should be addressed immediately. Blot—do not rub—liquids with a dry cloth as soon as they occur. Allowing water, coffee, or alcohol to sit on the surface can permanently damage the protective finish and leave unsightly white water rings.
- Interior Protection: Protect the interior shelves from scratches, heavy items, and leaks by using high-quality shelf liners or felt mats. If you store bottles of oils, perfumes, or cleaning agents inside the cabinet, place them on protective trays or coasters to catch any slow drips that could eat through the cabinet's interior finish.
Frequently Asked Questions (FAQ)
Can I use multi-purpose surface cleaners on my storage cabinet?
No, you should avoid using generic multi-purpose surface cleaners on your storage cabinet, especially if it is made of wood, veneer, or has a delicate painted finish. Multi-purpose cleaners often contain harsh solvents, alcohol, ammonia, or high alkalinity designed to cut through kitchen grease or bathroom grime. On furniture, these chemicals can quickly strip away protective wax coatings, dissolve clear varnishes, dull wood veneers, or leave a cloudy, unremovable residue on laminates. Stick to a highly diluted solution of mild dish soap and warm water, or use a product specifically formulated and approved for your cabinet’s exact material.
How do I remove sticky residue or old wax buildup?
To safely remove a sticky layer of old polish, finger oils, or wax buildup, start with the gentlest method possible. Dampen a clean microfiber cloth with warm water and a drop of mild, grease-cutting dish soap, wring it out until it is barely damp, and gently rub the sticky area in the direction of the wood grain. If the buildup is stubborn, you can create a very weak solution of equal parts warm water and white vinegar, but test it on an inconspicuous spot first, as vinegar’s acidity can dull some delicate finishes. Wipe the area with a clean, damp cloth to rinse, and dry it immediately with a soft towel. Never use abrasive scrubbers, steel wool, or strong solvents like mineral spirits or paint thinners unless the cabinet manufacturer explicitly approves them, as these will permanently strip the underlying finish.
Community discussion
Share your experience or ask a question. Comments are reviewed before publication.