
To find the perfect shoe racks and organizers for your home, you must balance the physical volume of your footwear with the structural and spatial limits of your entryway or closet. Choosing the wrong size leads to cluttered corridors, damaged shoes, or a rack that obstructs your daily path. By calculating your collection’s true physical footprint, factoring in air circulation for humid climates, and measuring your floor clearance down to the millimeter, you can select a storage system that keeps your home organized and your footwear preserved.
Assess Your Current and Future Shoe Collection
A successful storage plan begins with a comprehensive audit of your existing footwear. Gather every pair of shoes currently scattered around your home and group them by style, height, and width. This step is critical because a pair of flat sandals occupies significantly less vertical and horizontal space than structured leather formal shoes, high heels, or tall boots. Standard sneakers and flats generally require a height clearance of 10 to 15 centimeters, whereas high heels and ankle boots need 15 to 20 centimeters, and tall boots can require up to 45 centimeters of vertical space.
Next, consider how your household structure and daily habits influence your storage needs. In Singapore homes, daily footwear usually consists of lightweight sandals, school shoes, or running sneakers, while formal wear and seasonal travel boots are used less frequently. To keep your entryway clean and functional, plan to store off-season or rarely worn footwear in secondary locations, such as bedroom wardrobes or under-bed storage. This ensures your primary entryway rack is not packed to 100% capacity. Leaving at least 15% to 20% of the shelf space open is essential; it facilitates quick retrieval and promotes proper air circulation, which helps prevent mold and mildew growth in humid conditions.
Products mentioned in this guide
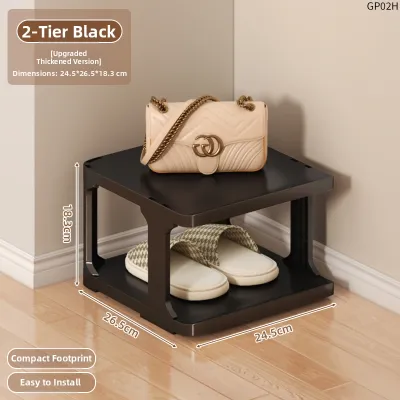
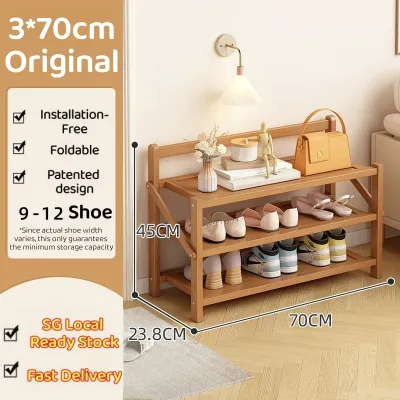
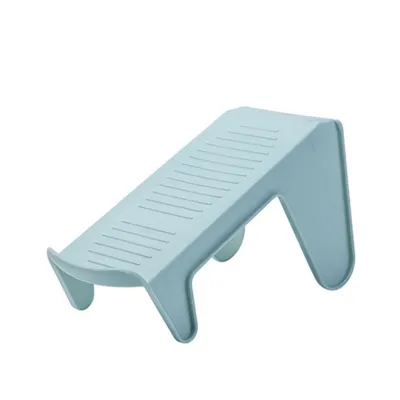
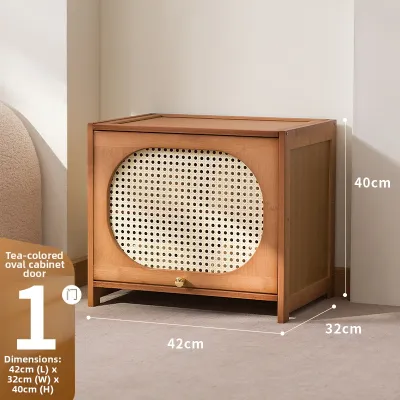
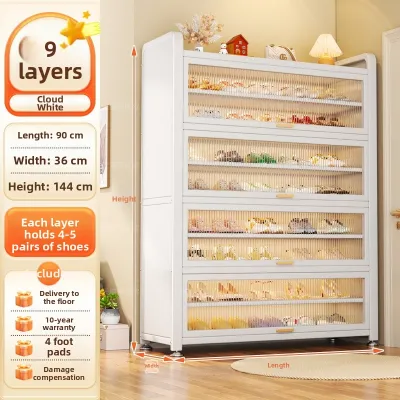
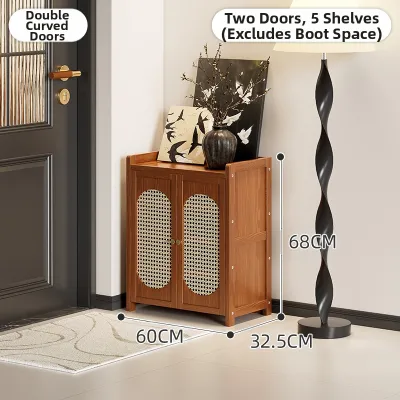
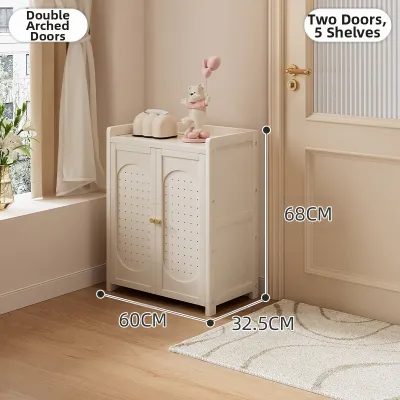
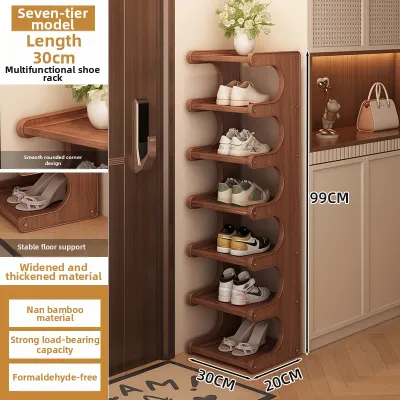
Prices are valid at publication and may change. Please refer to the product page for the latest price.
Finally, build a buffer into your capacity calculations. If your household currently owns 20 pairs of shoes, purchasing a rack designed for exactly 20 pairs will quickly lead to overcrowding when you purchase new shoes or host guests. Adding a 10% to 20% capacity buffer ensures your storage system remains functional for years to come. For a 20-pair collection, aim for a rack that can comfortably accommodate 22 to 24 pairs.
Measure Your Available Space Accurately
Before browsing online marketplaces or local furniture showrooms, you must establish the exact physical boundaries of your designated storage area. Eyeballing the space often leads to purchasing a unit that is slightly too wide or deep, resulting in a cramped entryway. Use a metal measuring tape to record the maximum width, depth, and height of the available footprint.

When measuring, look beyond the open floor space and account for fixed architectural details. Baseboards can prevent a flat-backed shoe cabinet from sitting flush against the wall, effectively adding 1 to 2 centimeters to the depth of the unit. Door frames, light switches, electrical outlets, and distribution board (DB) box doors must also remain entirely unobstructed. If your shoe rack blocks a wall outlet or prevents you from fully opening your DB box during an electrical emergency, it becomes a safety hazard rather than a convenience.
Evaluating Floor and Pathway Clearance
The entryway is the primary high-traffic zone of any home, making pathway clearance a vital safety consideration. When planning your shoe rack placement, measure the full swing radius of your front door and any adjacent closet or bedroom doors. A rack that sits too close to the door frame will obstruct the door’s movement, leading to constant scuffing of both the door and the furniture.
In typical Singapore HDB flats and condominium apartments, entryways and corridors are often narrow. To maintain a safe and comfortable walkway, aim for a minimum clear pathway width of 90 to 100 centimeters. If your corridor is particularly tight, standard freestanding shoe racks with a depth of 35 to 40 centimeters may restrict movement. In these scenarios, prioritize slim-profile shoe cabinets with tilting compartments, which often have a depth of just 15 to 24 centimeters, keeping the pathway clear and reducing tripping hazards.
Maximizing Vertical and Wall Space
When floor space is limited, shifting your storage strategy upward is the most efficient way to increase capacity. Tall, narrow freestanding shoe towers leverage vertical space without expanding the physical footprint on your floor. However, you must balance this with visual weight; a very tall, dark cabinet in a small entryway can make the space feel cramped and dark. Choosing light-colored finishes or open-framed wire racks can help maintain an airy, open aesthetic.
If you decide on wall-mounted organizers or floating shelves, you must verify the structural integrity of your walls. In Singapore, internal walls can be made of solid masonry (concrete or brick) or lightweight drywall. Masonry walls can support heavy loads when paired with the correct wall plugs and screws, whereas drywall requires anchoring directly into metal studs or using specialized heavy-duty hollow-wall anchors. Always consult your building guidelines and check the product manual for specific wall-mounting instructions and hardware requirements before drilling.
Match Capacity to Shoe Racks and Organizers
Translating your shoe count into a physical furniture configuration requires looking past simple marketing labels. Manufacturers often calculate a rack’s capacity based on standard, narrow flat shoes, such as women’s flats or low-profile sneakers. If your collection consists of bulky running shoes, wide men’s formal shoes, or high-top sneakers, the actual number of pairs you can fit will be significantly lower than the advertised capacity.
To bridge this gap, measure the average width of your shoes. A standard pair of men’s shoes typically requires 22 to 25 centimeters of horizontal shelf space, while women’s shoes require 18 to 22 centimeters. Divide the total width of the rack’s shelves by these averages to determine a realistic capacity for your specific collection, rather than relying solely on the manufacturer’s tier count.
Standard Freestanding Shoe Racks
Traditional freestanding shoe racks with fixed horizontal shelves are highly efficient for uniform collections. If your household primarily wears flat sneakers, sandals, and school shoes, a basic three- or four-tier open rack provides easy access and excellent ventilation. These open designs are highly practical for daily-use shoes, allowing damp footwear to dry quickly in Singapore’s humid climate.
However, if your collection includes a mix of high heels, ankle boots, and flat shoes, fixed shelves can lead to wasted vertical space or force you to bend your shoes to fit. For diverse collections, look for freestanding units with adjustable or removable shelves. This flexibility allows you to customize the height of each tier to match your footwear. Keep in mind that removing a shelf to accommodate tall boots will reduce the overall number of tiers, thereby lowering the total pair capacity of the unit.
Space-Saving and Wall-Mounted Organizers
For exceptionally tight spaces, specialized organizers offer creative storage solutions. Over-the-door hanging organizers, wall-mounted slotted racks, and pull-out slim drawers are excellent for utilizing underused surfaces. These solutions work best for lightweight daily footwear, such as flip-flops, canvas slip-ons, and children’s shoes, keeping them off the floor and neatly organized.
Despite their convenience, these organizers have strict physical limitations. Never use over-the-door fabric pockets or adhesive-mounted plastic racks for heavy items like steel-toed work boots, heavy leather dress shoes, or wet athletic footwear. Excessive weight can strain door hinges, tear fabric seams, or cause adhesive backings to fail, potentially damaging your walls or doors. Always check the manufacturer’s maximum load specifications per tier or pocket before loading them with heavy shoes.
Stackable and Modular Shoe Storage
Modular and stackable storage systems provide a highly customizable solution that can grow alongside your collection. These systems typically consist of individual interlocking plastic boxes, stackable wire frames, or wooden cubes that you can arrange horizontally or vertically to fit your specific space. This modularity is ideal for walk-in wardrobes, under-stairs storage, or awkward entryway corners.
While modular systems offer great flexibility, they require careful assembly and monitoring to remain safe. As you stack units higher to increase capacity, the center of gravity shifts, making the assembly more susceptible to tipping. Always follow the manufacturer’s maximum stacking height limits and use the provided interlocking clips or connector brackets to secure the units together. If you stack modular boxes higher than chest level, you must anchor the system to the wall using anti-tip hardware to prevent accidental collapses.
Avoid Common Sizing and Capacity Mistakes
One of the most frequent errors when buying shoe racks and organizers is ignoring the physical depth of your footwear. Standard shoe cabinets often feature a depth of 30 to 35 centimeters. If someone in your household wears larger shoe sizes (such as US size 11 or European size 45 and above), their shoes may overhang the shelves. This prevents cabinet doors from closing properly or causes shoes to stick out into the pathway, creating a constant tripping hazard. Always measure the longest shoe in your collection and compare it to the internal depth specification of the furniture.
Overcrowding is another common mistake that leads to damaged footwear and daily frustration. Squeezing too many pairs onto a single shelf causes shoes to rub against each other, leading to scuffs, dirt transfer, and deformed shoe shapes. This is particularly problematic for delicate materials like suede, leather, or patent finishes. Proper spacing—leaving about 2 to 3 centimeters between each pair—preserves the structural shape of your shoes and makes daily selection effortless.
Additionally, do not dedicate 100% of your entryway footprint solely to shoe storage. A functional entryway requires a “drop zone”—a small surface area or adjacent hooks for keys, mail, umbrellas, and shoehorns. Choosing a shoe cabinet with a flat top surface or integrated drawers allows you to manage these daily essentials without cluttering your living space. Finally, never assume universal fit; always adjust the advertised capacity downward if your collection features bulky, wide, or high-top shoes.
Evaluate Structural Stability and Safety for Your Load
A fully loaded shoe rack can hold a surprising amount of weight. For example, twenty pairs of heavy leather boots and sneakers can easily weigh 15 to 25 kilograms. Before purchasing, check the manufacturer’s product specifications for the maximum weight capacity per shelf and for the entire unit. Do not assume a rack is sturdy simply because it is made of wood or metal; joint construction, shelf thickness, and overall design play a massive role in load capacity.
For tall, narrow freestanding units or heavily loaded racks, structural stability is a critical safety concern, particularly in homes with young children or pets. Children may attempt to climb open shelves, which can easily cause a top-heavy rack to tip over. To mitigate this risk, choose units with a low center of gravity or a wider base. More importantly, always install the anti-tip safety kits or wall-anchoring brackets included with your furniture, securing them firmly into wall studs or solid masonry.
When assembling your shoe rack, carefully inspect the joints and hardware. Loose screws or poorly aligned brackets can weaken the frame over time, leading to wobbling or structural failure under a full load. If you notice any wobbling after assembly, re-tighten all connections and verify that the unit is resting on a completely level floor surface. Regular maintenance, such as checking and tightening hardware once a year, ensures your storage solution remains safe and stable.
Frequently Asked Questions (FAQ)
How many pairs of shoes can fit on a standard 3-tier shoe rack?
While a standard 3-tier shoe rack is often marketed to hold 9 to 12 pairs of shoes, this estimate assumes standard, flat footwear like sandals or low-profile flats. If your collection includes bulky running sneakers, wide men’s dress shoes, or boots, the actual capacity typically drops to 6 to 8 pairs. To avoid overcrowding, measure the exact horizontal width of the shelves before buying; a standard pair of men’s shoes requires about 22 to 25 centimeters of shelf space, while women’s shoes require 18 to 22 centimeters.
Are over-the-door shoe organizers safe for heavy boots?
No, over-the-door shoe organizers are generally not safe or suitable for heavy footwear like work boots, leather riding boots, or thick winter boots. These organizers are designed for lightweight items such as slippers, sandals, canvas sneakers, and children’s shoes. Storing heavy boots in them can strain your door hinges, tear the fabric pockets or plastic sleeves, and cause the hanging hooks to bend or slip off the door frame. For heavy footwear, always use sturdy freestanding shelves or wall-anchored racks, and check the manufacturer’s weight limit label.
Community discussion
Share your experience or ask a question. Comments are reviewed before publication.