
Selecting the ideal shoe rack for your closet is a balancing act between the physical limits of your storage space and the actual dimensions of your footwear collection. A poorly sized rack can lead to jammed closet doors, scuffed walls, or shoes crammed together, which damages their shape and material. By taking precise measurements of your closet and auditing your shoe collection, you can find an organizing system that maximizes storage efficiency while keeping your daily routine smooth and unobstructed.
Measure Your Available Closet Space
To begin, you must determine the exact physical boundaries of the area where you plan to place the shoe rack. Use a metal measuring tape rather than a flexible fabric one, as metal tapes remain rigid over long distances and provide more accurate readings. Measure the width of the designated floor or shelf space from one side to the other. Next, measure the depth from the back wall to the front edge of the closet frame or door track. Finally, measure the vertical height from the floor to the lowest obstruction, such as a hanging clothes rod or an overhead shelf.
Do not assume your closet walls are perfectly square. Older homes and even modern apartments can have slight structural variations, so it is wise to take measurements at three different points—top, middle, and bottom—and use the smallest dimension as your guide. You must also account for architectural obstacles that can interfere with the rack’s placement. Baseboards along the bottom of the wall can prevent a flat-backed shoe rack from sitting flush against the wall, effectively pushing the unit forward by a centimeter or two. Take note of door hinges, light switches, electrical outlets, and ventilation grilles that must remain accessible and unobstructed.
Products mentioned in this guide
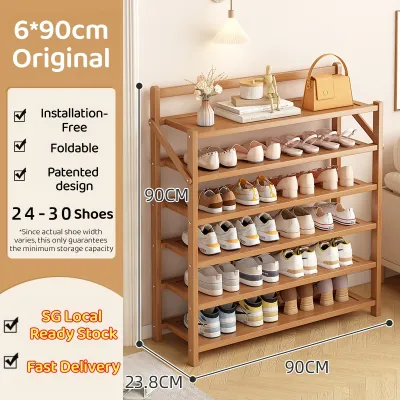
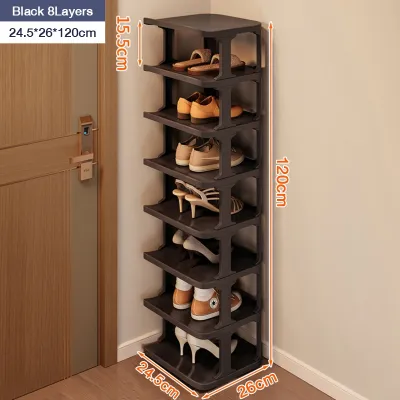
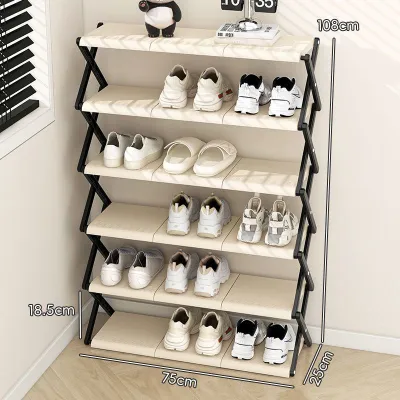
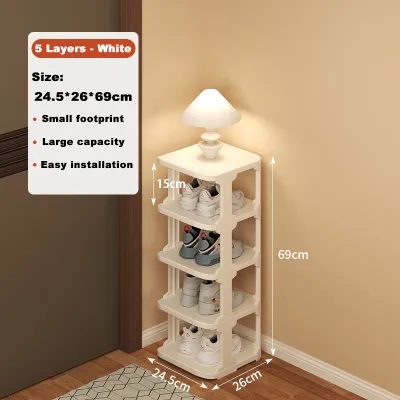
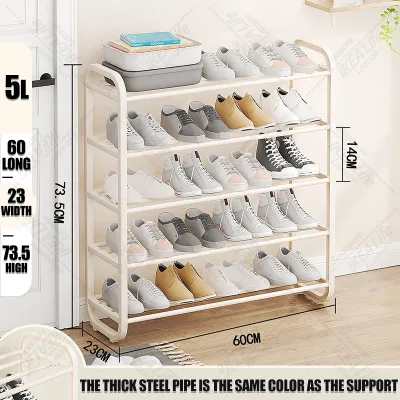

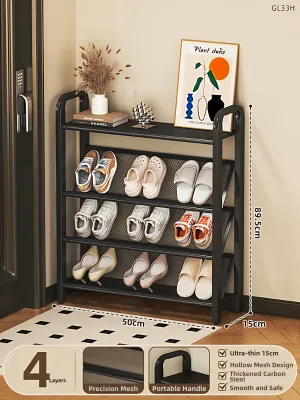
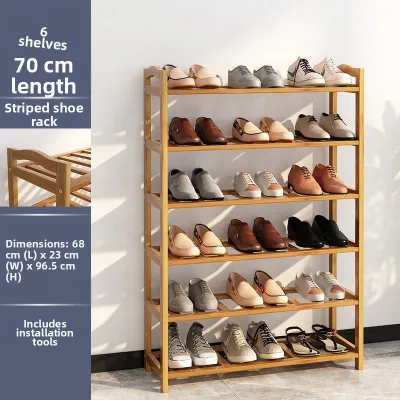
Prices are valid at publication and may change. Please refer to the product page for the latest price.
Door clearance is another critical factor that many homeowners overlook. If your closet has sliding doors, remember that they overlap when opened, meaning you can only access one half of the closet at a time. The shoe rack must fit comfortably within these opening limits without blocking the sliding mechanism. For bi-fold doors, calculate the space the doors occupy when folded inward, as they can easily catch on the front corners of a shoe rack that is too wide or too deep. If you have traditional hinged doors, ensure the rack does not impede their swing path, and verify that you have enough physical space to stand in front of the open closet to retrieve your shoes.
Assess Your Shoe Collection and Capacity Needs
Before looking at product listings, you need a clear understanding of what you are storing. Begin by gathering all your footwear and counting the total number of pairs. It is highly recommended to add a buffer of 10% to 20% to this total to accommodate future purchases, seasonal footwear changes, or guests’ shoes if the closet is near an entryway. This buffer ensures your new storage solution remains functional for years to come rather than becoming instantly overcrowded.

Next, categorize your footwear by type and physical height. Flat shoes, sandals, and flip-flops require very little vertical clearance, often needing only 10 to 12 centimeters of height per tier. On the other hand, chunky sneakers, high heels, and ankle boots require significantly more vertical space, typically between 15 and 25 centimeters. If you own tall boots, they will require specialized tall compartments, or you may need to store them horizontally on a wider shelf. Grouping your shoes by height helps you determine how many high-clearance and low-clearance shelves you actually need.
To determine the necessary shelf depth, measure the length of the longest pair of shoes in your collection, which is typically a pair of men’s dress shoes or athletic sneakers. If your longest shoes measure 30 centimeters from heel to toe, a shoe rack with a shelf depth of only 25 centimeters will cause the shoes to overhang. This overhang can prevent closet doors from closing properly or lead to shoes constantly falling off the shelves. For a clean look and secure storage, the shelf depth should ideally match or exceed the length of your longest shoes.
You should also decide on your storage strategy based on how often you wear each pair. Everyday shoes, such as work flats or daily trainers, should be placed on open, easily accessible shelves at a comfortable height. Seasonal footwear, formal shoes, or delicate materials that are only worn occasionally can be stored in stackable, clear plastic shoe boxes. If you plan to use boxes, remember that they require more physical space than loose shoes, so you must factor the dimensions of the boxes into your overall capacity calculations.
Match Shoe Rack Dimensions to Your Space
Once you have your spatial measurements and shoe inventory, you can begin matching these requirements to specific shoe rack configurations. If you are working with a narrow closet or a tight corner, a tall, vertical tower rack is an excellent choice. These units utilize vertical wall space, allowing you to store a significant number of shoes on a minimal footprint. Conversely, if you have unused space beneath hanging clothes, a wide, low-profile rack with two or three tiers is more appropriate, as it keeps your shoes organized without interfering with your hanging garments.
Prioritize shoe racks that offer adjustable or modular shelving. A fixed-shelf rack forces you to adapt your shoes to the rack, which often results in wasted vertical space above flat shoes and squeezed, damaged heels on taller boots. Adjustable shelves allow you to customize the height of each tier, maximizing storage efficiency. Modular systems are also highly beneficial, as they let you expand your storage vertically or horizontally by adding extra units as your collection grows.
When evaluating product specifications, always verify the difference between the rack’s external footprint and its internal usable storage dimensions. The external dimensions tell you if the rack will physically fit inside your closet, but the internal dimensions tell you how many shoes you can actually store. The frame, side panels, and support legs can easily consume several centimeters of width, reducing the actual shelf space available for your shoes. Always calculate your capacity based on the internal shelf width rather than the overall external width.
If you are dealing with a particularly shallow closet, consider tiered or slanted shoe racks. Slanted shelves hold shoes at an angle, which significantly reduces the depth profile of the rack, making it possible to fit shoes into spaces that would otherwise be too narrow. However, keep in mind that slanted shelves require more vertical clearance between tiers because the shoes stand taller when angled. Ensure that slanted shelves feature a raised front lip or a non-slip surface to prevent your shoes from sliding off onto the floor.
Check Installation and Clearance Requirements
Before finalizing your purchase, consider the practical aspects of installing and using the shoe rack. Many organizers are delivered flat-packed and require assembly. Ensure you have a clear, flat area outside the closet to assemble the unit. Attempting to assemble a complex wooden or metal rack inside a cramped closet can lead to scratched walls, damaged closet doors, or assembly errors due to poor visibility and restricted movement.
Stability is a major safety consideration, particularly for tall, freestanding shoe racks. As you load a tall rack with shoes, it can easily become top-heavy, especially if heavier boots and sneakers are placed on the upper shelves. Check if the rack includes wall-anchoring hardware, and verify that your closet walls are suitable for mounting. Anchoring the rack to the wall prevents accidental tip-overs, protecting both your footwear and anyone accessing the closet.
Once the assembled rack is placed in the closet, perform a final clearance check with your shoes on the shelves. Verify that the depth of the rack, combined with any minor shoe overhang, allows the closet doors to close completely and smoothly. If the doors rub against the shoes, it can cause scuff marks on leather or fabric and put unnecessary strain on the door hinges or tracks.
Air circulation is another vital factor, particularly in enclosed closets or humid environments. Shoes naturally absorb moisture and perspiration during wear, and storing them in a stagnant, unventilated space can lead to mold, mildew, and persistent odors. To prevent this, choose a shoe rack with open-slat shelves, wire grids, or mesh panels rather than solid wood or plastic shelves. These open designs allow air to circulate freely around your footwear, helping them dry out quickly and keeping your closet smelling fresh.
Common Sizing Mistakes to Avoid
One of the most common mistakes when buying a shoe rack is relying solely on the manufacturer’s advertised pair capacity. A product labeled as a “20-pair shoe rack” is often tested using small, narrow shoes, such as women’s flats or children’s footwear. If your collection consists of wide athletic sneakers, men’s dress shoes, or boots, the actual capacity of the rack may be significantly lower. Always calculate capacity yourself by comparing the physical width of your shoes against the internal shelf dimensions.
Another frequent error is forgetting to account for shoe overhang. If you choose a rack with a shelf depth that is shorter than your longest shoes, the shoes will stick out over the edge. While a small amount of overhang is acceptable on open shelves, it can be disastrous in a closet with sliding or hinged doors, as the protruding shoes will block the doors from closing. Always measure your longest shoes and ensure the rack’s depth, plus any overhang, fits within your closet’s clear depth.
If you prefer to keep your shoes in their original cardboard boxes or clear plastic storage bins, you must measure the dimensions of the boxes rather than the shoes themselves. Shoe boxes are always wider, taller, and deeper than the shoes they contain. Storing boxed shoes on a standard shoe rack often results in boxes hanging off the edges or failing to fit between the shelves vertically.
Finally, do not overlook the floor space consumed by the rack’s base frame or stabilizing feet. Some shoe racks feature flared legs or wide base bars designed to improve stability. While these features are excellent for safety, they increase the overall footprint of the rack. If your closet space is tight, a rack with a flared base may not fit, even if the shelves themselves are within your measured limits. Always check the maximum external dimensions, including the very bottom of the frame, before making your decision.
Frequently Asked Questions (FAQ)
How many pairs of shoes can a standard shelf hold?
To find the true capacity of a shelf, you should measure the width of an average pair of your shoes. For most adults, a pair of shoes occupies between 18 and 25 centimeters of shelf width, depending on the style and size. Divide the usable internal width of the shelf by this average shoe width to determine the capacity. For example, a shelf with an internal width of 80 centimeters will comfortably hold about three to four pairs of average-sized shoes. Keep in mind that bulky footwear like winter boots or wide sneakers will reduce this number, while slim sandals may allow you to fit more.
Should I leave extra space between the shoe rack and the closet wall?
Yes, it is highly recommended to leave a small gap of approximately 1 to 2 centimeters between the shoe rack and the closet walls. This minor clearance prevents the rack from scraping or scuffing the paint or drywall when you are loading and unloading shoes. Furthermore, in humid climates, this gap is essential for promoting air circulation behind the rack, which helps prevent trapped moisture, mold, and musty odors from developing in the dark corners of your closet. Ensure this gap is factored into your initial measurements, especially if you have thick baseboards or wall-mounted closet tracks.
Community discussion
Share your experience or ask a question. Comments are reviewed before publication.