
Finding the perfect balance between a growing shoe collection and the limited square footage of a modern home can be a significant organizational challenge. Hanging shoe racks offer an elegant, vertical solution that reclaims valuable floor space in entryways, bedrooms, and closets. However, selecting the right capacity is not simply a matter of buying the largest rack available; it requires a systematic evaluation of your footwear types, daily habits, and the physical boundaries of your living space.
To make an informed decision, you must analyze both the physical dimensions of your shoes and the structural capacity of your doors or walls. A rack that is too small leaves your entryway cluttered, while an overloaded rack can damage door hinges or prevent doors from closing properly. By aligning your storage capacity with your actual spatial constraints, you can create a streamlined, highly functional home organization system.
Assessing Your Shoe Collection Requirements
Before browsing online marketplaces or visiting local home furnishing stores, you need an accurate inventory of the footwear you intend to store. Begin by gathering all the shoes currently scattered around your home and sorting them into daily essentials and seasonal or occasional wear. Your daily essentials—such as work shoes, school shoes, and frequently used sneakers—should occupy the most accessible zones of your new hanging rack, while formal heels or seasonal sandals can be designated for less accessible tiers.
Products mentioned in this guide
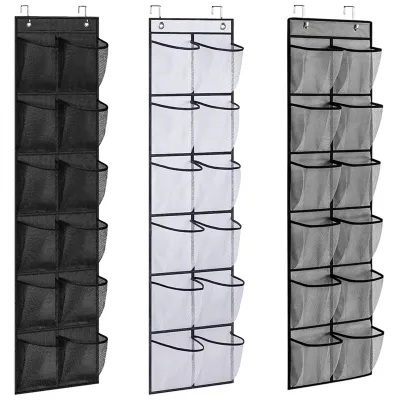
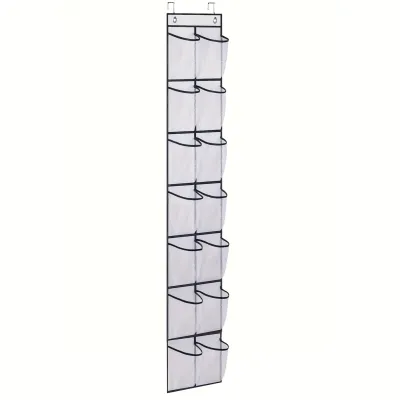


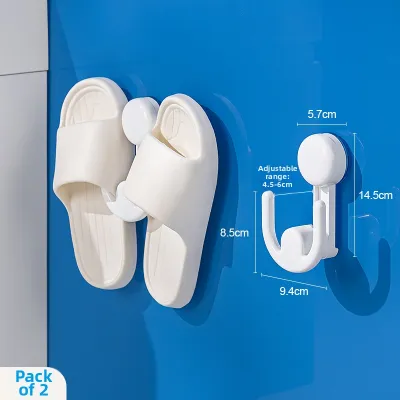
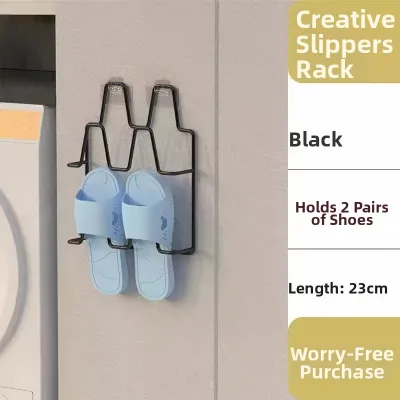
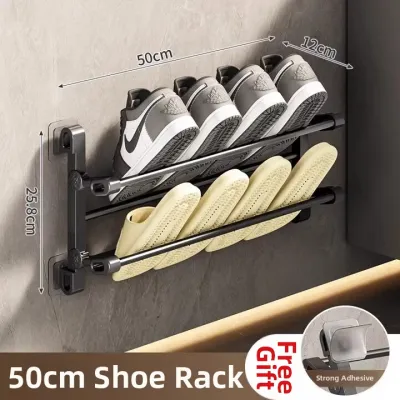
Prices are valid at publication and may change. Please refer to the product page for the latest price.
Next, group your shoes by their physical profile heights to understand the specific spacing your rack must accommodate. Flat shoes, flip-flops, and low-profile slip-ons require very little vertical clearance, allowing you to maximize tier density in those sections. Conversely, high-top sneakers, platform shoes, and ankle boots demand significantly more vertical clearance, which will quickly exhaust the space of a standard, uniformly spaced rack. Measuring the height of your tallest everyday shoes ensures you do not purchase a rack that forces you to bend or crush your footwear.
Finally, factor in future collection growth rather than planning solely for your current inventory. If you are an avid shoe enthusiast or have a growing family in a busy household, your collection is highly likely to expand over the coming seasons. Selecting a hanging shoe rack with slightly more capacity than your current count—or choosing a modular system that allows you to add tiers later—prevents the immediate frustration of outgrowing your new storage solution within a few months.
Measuring Your Available Hanging Space
The physical dimensions of your intended hanging location dictate the absolute limits of your shoe rack’s size and capacity. Start by measuring the total vertical clearance from the top of your hanging point, such as the top edge of an HDB bedroom door or a closet rod, down to the floor or the top of the baseboard. This measurement establishes the maximum allowable length of the rack, ensuring that the lowest tier does not drag on the floor or obstruct cleaning.

Horizontal width and depth are equally critical measurements that are frequently overlooked. Measure the width of your door panel or wall space, leaving a comfortable margin on both sides so the rack does not interfere with the door frame, handle, or light switches when the door is opened. Additionally, consider the depth of the rack when fully loaded with shoes; a rack that projects too far forward can block narrow walkways, strike adjacent walls, or prevent a wardrobe door from opening to its full angle.
The structural material of your mounting surface determines the type of hanging hardware you must use and the maximum weight the installation can safely support. For instance, many modern internal doors are hollow-core doors, which have limited weight-bearing capacity and may warp under heavy loads if not fitted with wide, weight-distributing over-door hooks. Solid wood doors, concrete entryway walls common in Singapore apartments, and drywall partitions each require specific mounting anchors to ensure the rack remains securely attached without causing structural damage.
Selecting Tier Count and Shelf Spacing
Once you have documented your shoe inventory and spatial measurements, you can calculate the optimal tier count for your hanging shoe rack. To find the maximum viable tier count, divide your available vertical clearance by the average height of your shoe categories, factoring in the thickness of the shelves or pockets. For example, if you have a standard door height and primarily store low-profile flats, you can comfortably accommodate a high tier count, whereas a collection dominated by high-top sneakers will require fewer, taller tiers within the same vertical space.
If your collection is diverse, prioritizing adjustable or varied-spacing designs is highly recommended over fixed, uniform configurations. Some hanging organizers feature adjustable fabric shelves or removable wire tiers, allowing you to customize the vertical clearance of individual sections to match your changing wardrobe. This flexibility ensures that you do not waste valuable vertical space on empty air above low-profile shoes while struggling to squeeze taller footwear into cramped compartments.
While maximizing capacity is often the primary goal, you must balance total storage volume with daily accessibility and physical comfort. The most frequently used shoes should always be positioned at waist-to-shoulder height, where they can be retrieved and put away with minimal effort. Lower tiers should be reserved for less common items or lightweight footwear, ensuring you do not have to bend down repeatedly, while the highest tiers should remain within a safe, comfortable reach.
Verifying Weight Limits and Installation Safety
A fully loaded shoe rack can accumulate significant weight, making structural safety and weight limits a primary concern during the selection process. Always cross-reference the manufacturer’s stated weight capacity for the rack frame with the load limits of your specific mounting hardware. Over-the-door hooks and wall anchors must be rated to support not only the static weight of the rack and shoes but also the dynamic forces exerted when the door is swung open or closed.
To maintain stability and protect your home’s fixtures, plan your weight distribution strategically when loading the rack. Place your heaviest footwear, such as leather boots, heavy-soled sneakers, and formal shoes, on the lower or middle tiers of the rack to keep the center of gravity low. This distribution minimizes the pendulum effect when the door moves, reducing strain on the top hinges and preventing the rack from pulling away from the wall or door surface.
Additionally, verify whether your chosen rack includes protective padding, felt backing, or non-slip rubber grips on the over-door hooks and rear frame. These protective features are essential for preventing unsightly scratches, paint chips, and dents on your doors, especially on laminated or painted surfaces. Non-slip grips also serve a functional purpose by keeping the rack centered and preventing it from sliding horizontally along the top of the door during daily use.
Avoiding Common Capacity and Space Mistakes
One of the most frequent mistakes when purchasing an over-the-door hanging shoe rack is failing to measure the door thickness and the clearance gap at the top of the door frame. If the over-door hooks are too narrow, they will not fit over the door panel; if they are too thick, they can scrape against the door frame, preventing the door from closing properly. Checking these clearances beforehand ensures a smooth, damage-free fit that preserves the door’s full functionality.
Another common pitfall is overloading fabric or mesh pocket organizers beyond their structural limits. While fabric pockets are excellent for lightweight shoes like sandals and slippers, stuffing them with heavy running shoes or bulky boots can cause the seams to tear, the pockets to sag, and the entire organizer to stretch out of shape. For heavier footwear collections, rigid wire or plastic hanging frames are generally more durable and maintain their structural integrity over time.
Finally, avoid the temptation to choose a fixed-tier rack with uniform, narrow spacing simply because it boasts a high tier count on paper. While a 10-tier rack with tight spacing might seem like an efficient choice, it often results in wasted vertical space if your shoes do not fit into the designated slots, forcing you to store larger shoes sideways or leave tiers entirely empty. Opting for a configuration that matches your actual shoe profiles will always yield a more efficient and usable storage system.
Frequently Asked Questions (FAQ)
Can I hang a shoe rack on a sliding wardrobe door?
Hanging a shoe rack directly on a sliding wardrobe door is generally not recommended due to the tight clearance tolerances of sliding track systems. The added depth of the rack and shoes will likely obstruct the adjacent sliding panel, preventing the wardrobe from opening fully or causing the doors to scrape against each other. Furthermore, the concentrated weight of a loaded shoe rack can strain the sliding door rollers and tracks, leading to misalignment or premature wear. Instead, consider mounting the rack on an internal wardrobe wall, hanging it from an internal closet rod, or utilizing a hinged door elsewhere in the room.
How do I keep a hanging shoe rack from swinging when the door opens?
To prevent a hanging shoe rack from swinging, clattering, or scratching the door surface when it is opened and closed, you can use simple stabilization methods. Many high-quality racks come with built-in bottom anchors or screw holes to secure the lower frame directly to the door. If you prefer a damage-free rental-friendly solution, you can apply heavy-duty double-sided adhesive tape, hook-and-loop strips, or adhesive plastic hooks to the bottom and contact points of the rack frame. This keeps the organizer flush against the door panel, eliminating noise and ensuring a stable, premium feel during daily operation.
Community discussion
Share your experience or ask a question. Comments are reviewed before publication.