
Choosing the right expandable shoe shelf requires matching your current and future shoe count with the physical dimensions of your available floor or closet space. By evaluating your collection’s volume, measuring your installation area accurately, and checking the shelf’s minimum and maximum extension limits, you can select a unit that maximizes storage without compromising stability or accessibility. An expandable design offers the unique advantage of adapting to changing storage needs, but it must fit within your physical spatial constraints when fully extended.
Assess Your Shoe Collection and Capacity Needs
To determine the right shelf size, begin by conducting a thorough inventory of your current shoe collection. Lay out all your footwear and count the total number of pairs you need to store. Factor in a buffer of at least twenty percent for future acquisitions to avoid outgrowing your new storage solution quickly.
Next, categorize your footwear by style, height, and bulk. Flats and sandals require minimal vertical clearance, whereas high-top sneakers, running shoes, and boots demand significantly more vertical and horizontal space. If your collection consists primarily of bulky athletic shoes or boots, you will need a shelf with greater tier spacing or one that offers adjustable height options.
Products mentioned in this guide
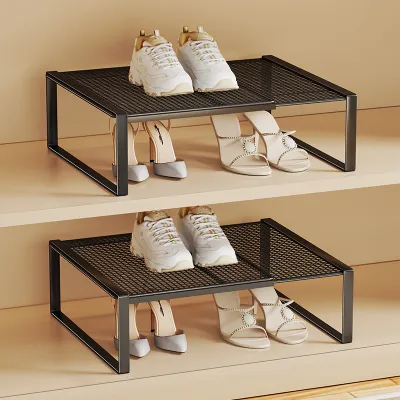
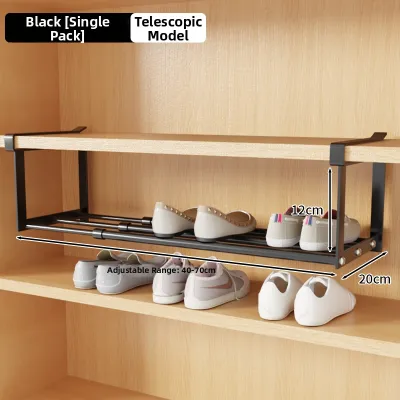
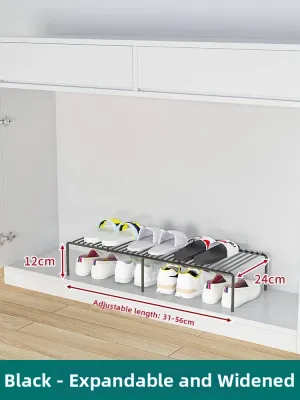
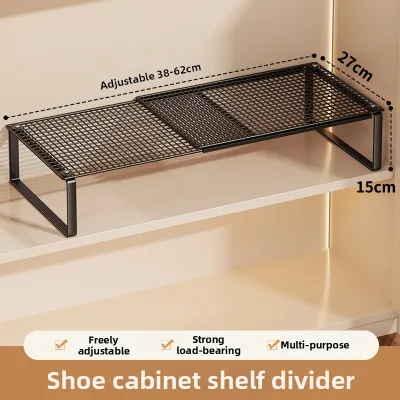
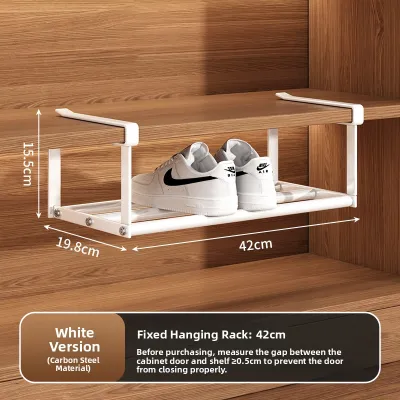
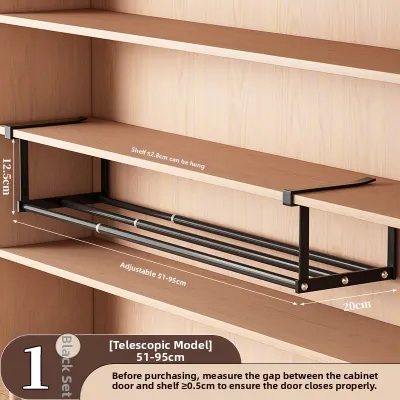
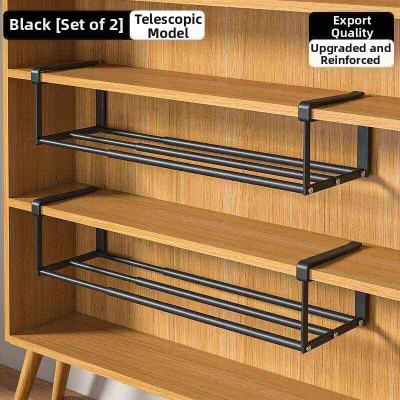
Prices are valid at publication and may change. Please refer to the product page for the latest price.
When browsing expandable shoe shelves, pay close attention to the manufacturer’s stated pair capacity. This estimate is typically based on standard flats or loafers; wide-soled sneakers or formal shoes will reduce the actual capacity. To get an accurate estimate, measure the width of three or four of your widest pairs placed side-by-side, and use this average width to calculate how many pairs will realistically fit across the shelf’s minimum and maximum extended widths.
Measure Your Available Closet or Entryway Space
Before purchasing any storage unit, you must map out the exact physical boundaries of the area where the shelf will sit. Use a metal measuring tape to record the maximum width, depth, and height of the designated floor space. This prevents the frustration of buying a unit that is too large or awkwardly proportioned for your space.

In compact living environments, such as apartments or condominiums, entryways are often narrow corridors where every centimeter counts. When measuring your space, do not just focus on the floor area; you must also account for baseboards, door swings, and walking clearance. A shelf that juts out too far can obstruct pathways or block doors. Ensure there is sufficient walking clearance in front of the shelf once loaded.
If you plan to install the expandable shelf inside a built-in wardrobe or closet, vertical and depth measurements are critical. Measure the height from the floor to the lowest hanging clothes or the next fixed shelf to ensure the shoe rack will fit without crushing your garments. Ensure the wardrobe depth accommodates both the shelf and any shoe overhang so sliding doors can close properly.
Match Shelf Dimensions and Expandability Features
Once you have your space measurements and shoe capacity requirements, you can begin matching them to the specifications of different expandable shoe shelves. Every expandable model has a minimum (collapsed) width and a maximum (extended) width. Your goal is to find a model where your available space falls comfortably within this range. Avoid using the shelf at its absolute maximum extension, where structural integrity is most tested.
The extension mechanism is a key feature to evaluate. Most expandable shelves use sliding metal rails that glide inside one another, while others utilize interlocking plastic or metal frames. Look for mechanisms that slide smoothly without catching, yet lock securely into place once you reach the desired width. Look for sliding rails with tension locks or screw-in fasteners to prevent accidental collapsing when adding or removing shoes.
Tier spacing and overall height are just as important as width. Standard shelves offer fifteen to twenty centimeters of clearance between tiers. For taller footwear, look for models with adjustable tier heights or removable bars. This flexibility allows you to customize the shelf layout, perhaps dedicating the bottom tier to boots and the upper tiers to lighter, lower-profile shoes.
Evaluate Stability, Weight Capacity, and Floor Protection
An expandable shoe shelf must be robust enough to support the weight of your collection without sagging or tipping over. When fully extended, the center of the horizontal bars becomes the weakest link, so check the manufacturer’s specified weight limit per tier. Keep in mind that heavy leather boots, work shoes, and thick-soled sneakers can add up to a significant amount of weight when multiple pairs are lined up together.
To ensure long-term durability, look for shelves constructed from sturdy materials such as powder-coated steel, chrome-plated metal, or heavy-duty aluminum. Avoid thin plastic or lightweight wire frames that can sag in the middle, which can permanently bend the sliding rails and ruin the expansion mechanism.
Stability is also a safety concern, particularly if you choose a tall, multi-tier shelf. Top-heavy shelves can tip over if bumped. Look for units with a wide, stable base or wall-anchoring hardware for added security. Additionally, check the feet of the shelf. Non-slip rubber or silicone foot pads are essential for preventing the shelf from sliding around on smooth tile or laminate floors, and they protect delicate parquet or vinyl surfaces from scratches and scuffs.
Common Sizing and Placement Mistakes to Avoid
One of the most common mistakes when buying an expandable shoe shelf is assuming that the advertised maximum capacity applies to all shoe types. A shelf rated for twelve pairs may only hold eight pairs of bulky running shoes. Calculate your capacity needs based on the actual width of your footwear.
Another frequent oversight is ignoring the depth of the shelf. Shoes often overhang the front and back of the bars by several centimeters. This overhang can block closet doors or create tripping hazards in narrow hallways. Always add at least five to ten centimeters to the depth of the shelf when planning your layout to account for shoe overhang.
Finally, many homeowners fail to test the clearance of nearby doors and drawers before finalizing the placement of their shoe shelf. A shelf placed too close to a bedroom door or a kitchen cabinet can prevent those doors from opening fully, leading to daily annoyance and potential damage to both the furniture and the door frames. Physically open and close all adjacent doors while measuring the proposed shelf area to ensure completely unobstructed movement.
Frequently Asked Questions (FAQ)
Can I connect two expandable shoe shelves together for more capacity?
Whether you can connect two expandable shoe shelves depends entirely on the manufacturer’s design. Some models are specifically engineered to be stackable or linkable, featuring interlocking joints or connecting clips that allow you to join multiple units safely. If explicitly labeled as stackable, you can expand your storage vertically or horizontally by purchasing additional units of the same model.
However, you should never attempt to stack or link shelves that are not designed for combined use. Forcing independent units together compromises structural integrity, creating severe stability risks and tipping hazards. A makeshift stack is highly prone to tipping over, which can cause injury or damage your floors and footwear. If you need more capacity than a single unit can provide and the model is not stackable, it is much safer to purchase a larger, dedicated multi-tier rack or place two separate units side-by-side.
How much extra space should I leave around the shoe shelf for airflow?
To maintain a fresh and hygienic storage environment, it is highly recommended to leave some clearance around your shoe shelf for proper ventilation. While there is no strict, universal measurement, leaving a gap of at least five centimeters between the shelf and the wall allows air to circulate freely, preventing moisture and odor buildup.
Proper airflow is especially important in enclosed spaces like built-in wardrobes, walk-in closets, or humid climates where stagnant air can lead to mold and mildew growth on leather and fabric shoes. Avoid packing shoes too tightly on the shelf, and open closet doors periodically or use moisture-absorbing sachets to maintain a dry environment.
Community discussion
Share your experience or ask a question. Comments are reviewed before publication.