
Selecting the correct 3M Bumpon requires matching the variant’s geometry and adhesive properties to your specific furniture application. Rather than relying on generic assumptions, the right choice depends on measuring your contact surfaces, evaluating the weight distribution, and verifying the environmental conditions where the furniture will be used. This guide walks you through the diagnostic steps to identify the optimal size, shape, and thickness for cabinet doors, drawers, table legs, and other household surfaces.
Identify Your Furniture Application and Surface Type
Before choosing a bumper, you must diagnose the exact contact points where the furniture meets another surface. Flat surface contacts, such as cabinet doors closing against frames or drawer fronts hitting the cabinet carcass, require thin, low-profile bumpers that absorb impact without creating a noticeable gap. In contrast, point or line contacts, such as the bottom of chair legs, heavy table bases, or glass tabletops resting on metal frames, require more robust bumpers that can support continuous downward pressure.
The material of the contact surface plays a critical role in how well the bumper adheres. Common furniture materials include finished wood, powder-coated metal, glass, and various plastics. Each of these materials has a different surface energy, which affects adhesive bonding. For instance, smooth glass surfaces provide an excellent bond for most adhesives, while textured plastics or oily wood finishes can prevent the adhesive from making full contact.
Products mentioned in this guide
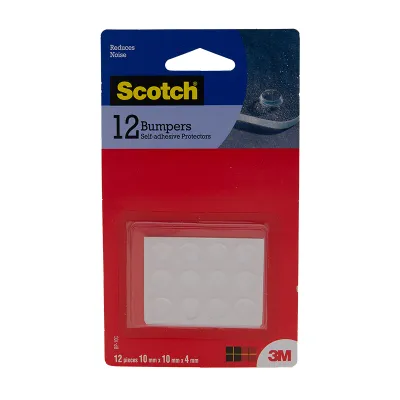
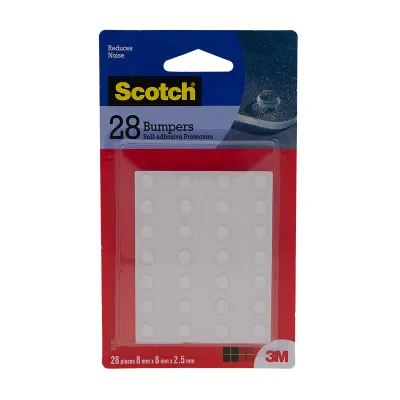
![[SG] Scotch™ Bumpons Circle - 10mm 12/P [EVERGREEN STATIONERY]](https://img.lazcdn.com/g/p/512c50a2e8841f35eb1bd5f00735382e.png_400x400q80.png_.webp)
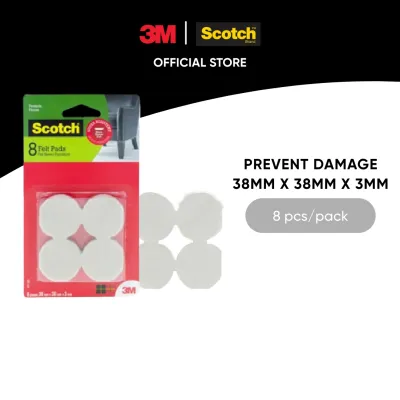
Prices are valid at publication and may change. Please refer to the product page for the latest price.
Additionally, you must measure the available contact area precisely. The selected bumper must fit entirely within the boundaries of the contact surface. If a bumper is too large and overhangs the edge of a chair leg or cabinet corner, it will catch on passing objects, collect dust, and eventually peel off. Ensure there is a margin of at least one to two millimeters around the bumper to prevent overhang and ensure the adhesive is fully sealed against the surface.
Match Bumpon Shapes to Contact Points
The geometry of a 3M Bumpon determines how it distributes force and how it behaves under impact. Hemispherical profiles are the most common choice for standard cabinet doors and drawers. Because they have a rounded top, they make contact at a single point, which provides excellent sound dampening and cushioning. The dome shape allows the bumper to compress slightly upon impact, absorbing the energy of a slamming door and preventing annoying rattling.

Cylindrical profiles feature a flat top and straight sides. These are ideal for applications requiring a larger surface contact area, such as the feet of small desktop appliances, cutting boards, or lightweight tabletop items. The flat top distributes the weight of the object across a wider area, providing greater stability and preventing the furniture from rocking or sliding.
Square profiles offer the maximum surface contact area and are highly suited for heavy-duty applications or where alignment with straight edges is important. If you are placing bumpers along the bottom edge of a heavy wooden chest or a square metal frame, square bumpers align perfectly with the corners, providing a clean, professional look while offering high load-bearing capacity.
Tapered or specialized shapes, such as hexagons or deeply recessed profiles, are designed for specific industrial or custom furniture applications. These are useful when the bumper must fit into a pre-drilled groove, a recessed pocket, or an irregular contact surface. Choosing the correct shape ensures that the force exerted on the bumper is distributed evenly across its adhesive backing, which prevents premature adhesive failure or material deformation over time.
Determine the Correct Size and Thickness
To select the correct size, start by measuring the physical dimensions of the furniture legs or contact panels. The diameter of the bumper should always be comfortably smaller than the contact area. For example, if a chair leg has a circular bottom with a diameter of 20 millimeters, a bumper with a diameter of 12 to 15 millimeters is ideal. This ensures the bumper remains centered and fully adhered without any risk of shifting past the edge.
Next, assess the required buffer gap or clearance. For cabinet doors, a very thin bumper (around 1.5 to 2.0 millimeters thick) is usually preferred so the door sits flush with the cabinet frame when closed. For glass tabletops resting on a wooden or metal base, a thicker bumper (3.0 to 5.0 millimeters) may be necessary to provide adequate clearance, prevent the glass from touching the hard frame directly, and allow for slight leveling adjustments.
The weight and impact force of the furniture must also guide your size selection. Heavier items, such as large wooden cutting boards or heavy ceramic vases, require larger diameters or thicker profiles to distribute the downward pressure. If a bumper is too small for a heavy object, the polyurethane material will compress completely, losing its cushioning properties and potentially causing the adhesive to squeeze out from the sides. Always verify the recommended load limits on the product packaging labels to ensure the bumper can support the weight.
Never stack multiple bumpers on top of each other to achieve a desired height. Stacking creates an unstable column that is highly susceptible to lateral forces, causing the bumpers to shear off or tilt, which can make your furniture unstable. If you need more clearance, purchase a single bumper with a thicker profile rather than attempting to layer multiple thin ones.
Verify Adhesive Compatibility and Environmental Conditions
The longevity of a 3M Bumpon depends heavily on the bond between its adhesive backing and the furniture surface. Before application, inspect the surface for porosity, roughness, or protective coatings. Highly porous surfaces, such as unfinished wood, or surfaces with oily finishes and certain varnishes, may prevent the adhesive from bonding securely. In some cases, these surfaces may require a light sanding or the application of a compatible sealant before the bumper can be attached.
Environmental conditions within the room also dictate the type of adhesive you should choose. High humidity environments, such as bathrooms or kitchens, can weaken standard adhesives over time. Similarly, elevated temperatures near kitchen appliances, radiators, or heating vents can cause some adhesives to soften and slip. When selecting bumpers for these areas, cross-reference the product packaging for specific temperature and moisture resistance ratings.
3M Bumpons typically feature either a rubber-based or an acrylic-based adhesive. Rubber-based adhesives offer quick initial adhesion and bond well to a wide variety of surfaces, including low surface energy plastics. However, they are more sensitive to high temperatures and UV light. Acrylic adhesives, while taking longer to reach full bond strength, offer superior resistance to heat, moisture, and UV exposure, making them the preferred choice for outdoor furniture, bathrooms, or areas exposed to direct sunlight.
Application Checklist and Maintenance
To ensure the maximum performance of your adhesive bumpers, follow a structured installation process. First, clean the target surface thoroughly using isopropyl alcohol or a mild, residue-free cleaner. Avoid using household glass cleaners or multi-surface sprays, as these often leave behind a thin chemical film that prevents the adhesive from bonding properly. Allow the surface to dry completely before proceeding.
When applying the bumper, peel it carefully from the backing liner, taking care not to touch the adhesive surface with your fingers, as skin oils can degrade the bond. Place the bumper precisely on the target spot and apply firm, direct pressure with your thumb for at least five to ten seconds. This pressure-sensitive adhesive requires physical force to flow into the microscopic imperfections of the surface. Allow the adhesive to cure undisturbed; check the product packaging for the recommended curing timeframe, which is typically 24 hours to achieve maximum bond strength.
Establish a routine to inspect the bumpers periodically, especially on frequently used furniture like dining chairs or heavy drawers. Over time, polyurethane can flatten, harden, or degrade due to continuous load and environmental exposure. If you notice a bumper has flattened significantly, shifted from its original position, or hardened to the point where it no longer dampens sound, peel it off and replace it to maintain continuous protection for your floors and furniture.
Frequently Asked Questions (FAQ)
Can I use multiple small Bumpers instead of one large one for heavy furniture?
Yes, you can use multiple smaller bumpers to support heavier items, but they must be spaced evenly to ensure balanced weight distribution. If you place them unevenly, the bumper closest to the center of gravity will bear the majority of the load, causing it to compress prematurely and fail. For optimal stability, place a bumper at each corner or space them symmetrically along the perimeter of the contact surface.
How do I remove old 3M Bumpers without damaging the wood finish?
To remove an old bumper safely, begin by gently peeling it back from one edge using your fingernail or a flat plastic scraper. If the adhesive is stubborn, apply mild heat using a hairdryer on a low setting to soften the bond before peeling. To clean up any remaining sticky residue, use a mild adhesive remover or a drop of mineral oil on a soft cloth, testing it first on an inconspicuous area of the wood to ensure it does not damage the finish.
Community discussion
Share your experience or ask a question. Comments are reviewed before publication.