
Calculating the right shoe rack capacity for your household involves balancing your family’s footwear collection with the physical constraints of your home’s entryway. In Singapore, where space in HDB flats and condominiums is highly optimized, choosing a storage solution that is too small leads to cluttered floors, while an oversized unit can block vital walkways. To find a suitable fit, you must systematically audit your current shoe inventory, measure your available floor space, and match these numbers to the physical dimensions of different rack configurations.
Assess Your Current and Future Shoe Collection
To establish a realistic baseline for your storage needs, begin by gathering and counting every pair of shoes owned by each household member. It is helpful to categorize these shoes into distinct groups based on how often they are worn and their physical size. Daily footwear, such as school shoes, work heels, and everyday sneakers, should be prioritized for the most accessible tiers. Specialty items, such as running shoes, hiking boots, football cleats, and formal dress shoes, can be allocated to higher or lower shelves, or even stored in secondary closets if space is tight.
Do not forget to account for future growth in your collection. A household’s shoe inventory is rarely static; children grow quickly and require larger shoe sizes, while lifestyle changes or new hobbies can lead to additional footwear purchases. Adding a buffer of 15% to 20% to your current total count is a practical way to ensure your new shoe rack remains functional for years to come. If your household currently owns 20 pairs of shoes, planning for a capacity of 24 to 25 pairs will prevent the rack from overflowing in the near future.
Products mentioned in this guide
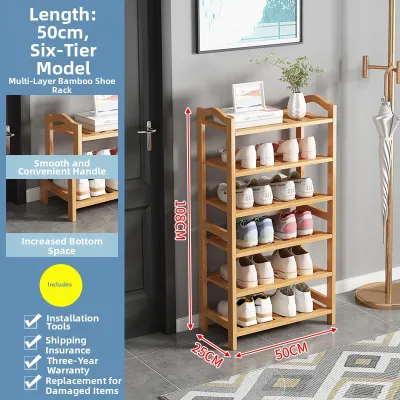
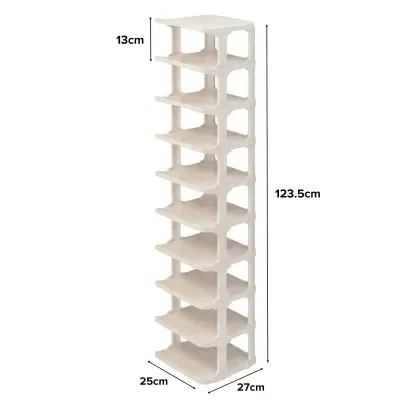
![[SG Stock] Algo 5/7/9 Shoe Organizer Shoe Rack with Umbrella Holder](https://img.lazcdn.com/g/p/37eeb610f3ec8f550b3bc2f2a7277767.jpg_400x400q80.jpg_.webp)
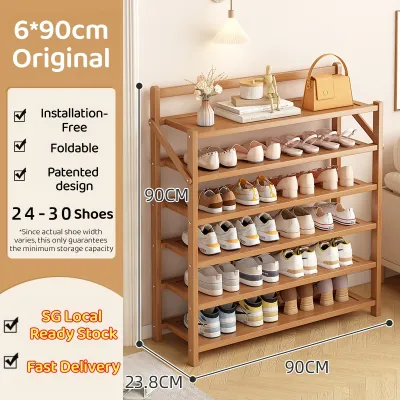
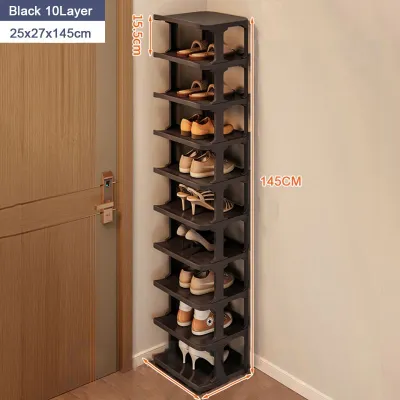
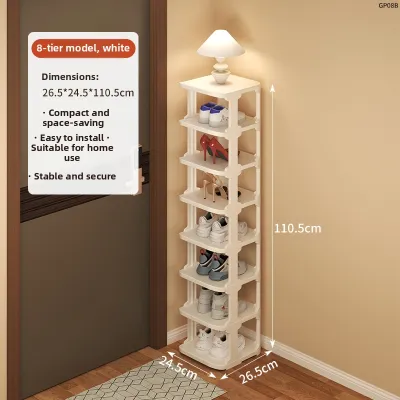
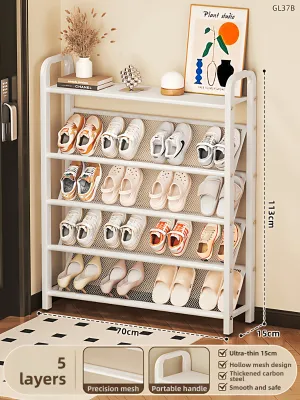
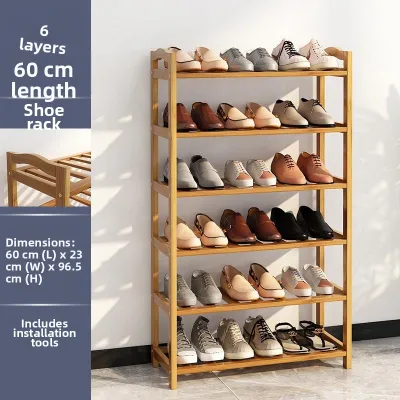
Prices are valid at publication and may change. Please refer to the product page for the latest price.
Additionally, differentiate between bulky footwear and flat items during your audit. High-top sneakers, platform shoes, and ankle boots occupy significantly more vertical and horizontal space than flat sandals, flip-flops, or canvas slip-ons. Grouping your shoes by their height and width profile helps you determine whether you need a standard rack with uniform spacing or a highly customizable unit with varying shelf heights.
Measure Your Available Floor and Entryway Space
Before purchasing any storage furniture, you must accurately measure the physical space where the shoe rack will stand. Use a metal measuring tape to record the maximum width, depth, and height of the designated area. Entryways in Singapore apartments are often narrow, meaning that even a few centimetres of excess depth can make a space feel cramped or restrict movement.

Pay close attention to clearance requirements for door swings and walkways. The main entrance door, the metal security gate, and nearby doors—such as those leading to a bomb shelter, utility closet, or kitchen—must be able to open and close fully without striking the shoe rack. Furthermore, ensure that the depth of the rack does not encroach on the main corridor. A clear, unobstructed path is essential for daily foot traffic and is a critical safety requirement for emergency evacuations.
Ventilation is another crucial factor to consider, particularly in Singapore’s warm and humid climate. If you opt for a closed shoe cabinet to keep your footwear out of sight, ensure there is a gap of at least 1 to 2 centimetres between the back of the cabinet and the wall to promote air circulation. This small gap helps prevent moisture buildup, which can lead to mold growth and unpleasant odors inside the cabinet.
Finally, compare vertical versus horizontal space utilization based on your entryway layout. If your floor area is highly restricted, a tall, narrow shoe tower or a wall-mounted rack is an excellent way to maximize vertical space up to the ceiling. Conversely, if you have a wider entryway, a low, horizontal shoe bench provides convenient storage while offering a stable surface to sit on while putting on your shoes.
Match Shoe Volume to Rack Dimensions and Tiers
Once you have your total shoe count and space measurements, you can translate these figures into specific rack configurations. To estimate how many pairs of shoes will fit on a single tier, you need to understand the average horizontal width of your footwear. On average, a pair of men’s shoes requires about 22 to 25 centimetres of width, while women’s shoes require approximately 18 to 22 centimetres. Children’s shoes are much narrower, typically taking up 12 to 15 centimetres per pair.
By dividing the internal width of a shoe rack’s shelf by the average width of your shoes, you can calculate the capacity per tier. For example, if a shoe rack has an internal shelf width of 80 centimetres, it can comfortably accommodate three pairs of large men’s shoes or four pairs of smaller women’s shoes. If you have a mix of shoe sizes, you can plan for an average of three to four pairs per tier for a standard family household.
Adjusting tier spacing is essential for accommodating taller footwear. Standard shoe racks typically feature a fixed shelf height of 15 to 18 centimetres, which is ideal for flats, sandals, and low-profile sneakers. However, if your collection includes high-top sneakers, mid-calf boots, or high heels, you will need greater vertical clearance. Look for shoe racks that feature adjustable or removable shelves, allowing you to customize the height of individual tiers to fit your tallest shoes without wasting valuable space.
For households with evolving storage needs, modular, stackable, or expandable shoe racks offer excellent flexibility. These designs allow you to start with a compact two-tier or three-tier unit that fits your current space and collection. As your household grows or your shoe collection expands, you can easily stack another unit on top or extend the rack horizontally, avoiding the need to purchase an entirely new piece of furniture.
Evaluate Stability, Assembly, and Safety Conditions
Ensuring that your shoe rack is stable and safe is just as important as finding the right capacity. High-capacity shoe racks, especially tall, freestanding models, can become top-heavy when fully loaded with heavy footwear like work boots or leather dress shoes. Always consult the manufacturer’s manual or product specifications to verify the maximum weight capacity per tier and the overall weight limit of the unit.
To prevent tipping accidents, check if the manufacturer includes wall-anchoring hardware, or purchase suitable brackets separately. Securing tall shoe cabinets or vertical racks to the wall is highly recommended, particularly in households with young children or active pets who might pull on the shelves. Wall anchoring provides peace of mind and ensures the unit remains upright even under a full load.
Additionally, inspect the floor surface where you plan to place the shoe rack. Entryway floors, especially near tiled thresholds or main doors, may not be completely level due to construction tolerances or drainage slopes. A shoe rack placed on an uneven surface will wobble, putting unnecessary stress on the joints and fasteners, which can cause the frame to warp or weaken over time. To address this, look for shoe racks equipped with adjustable leveling feet, or use small shims to stabilize the unit on uneven tiles.
Frequently Asked Questions (FAQ)
How do I store tall boots on a standard tiered shoe rack?
Storing tall boots on a standard shoe rack can be challenging due to the limited vertical clearance between tiers. The most effective solution is to choose a shoe rack with adjustable or removable shelves, which allows you to remove a shelf entirely to create a double-height tier for your boots. If your rack has fixed shelves, you can store your boots on the very top tier where there are no height restrictions. Using plastic boot shapers or inserts will keep the shafts upright, preventing them from creasing or falling over onto adjacent shoes.
What should I check before placing a shoe rack near the main entrance door?
Before positioning a shoe rack near your main entrance door, verify that the unit’s depth does not interfere with the full swing path of both the wooden door and the metal gate. There should be enough clearance for residents and guests to enter and exit comfortably without squeezing past the furniture. Additionally, ensure the rack does not block access to utility meters, electrical distribution boards (DB boxes), or water valves often located near the entryway. Finally, check that the placement complies with local estate guidelines, keeping common corridors clear of obstructions to maintain safe emergency exit routes.
Community discussion
Share your experience or ask a question. Comments are reviewed before publication.