
Building a freestanding room divider shelf from modular cubes is an excellent, non-permanent way to zone open-plan spaces, create private study corners, or add functional storage to your home. Unlike heavy, solid-wood partitions, modular cube systems offer the flexibility to customize the height, width, and overall shape of your divider to suit your specific room layout. To ensure the structure remains safe, stable, and visually appealing, you must follow a systematic assembly process. This involves careful spatial planning, constructing a perfectly level foundation, systematically interlocking the vertical columns, and securing the unit against tipping hazards. By taking a methodical approach, you can create a sturdy, professional-looking partition that enhances both the utility and flow of your living space.
Planning Your Room Divider Layout and Space
Before unboxing your modular cube units, it is essential to thoroughly plan the layout and assess the physical space where the room divider will stand. Begin by using a steel measuring tape to determine the exact dimensions of the available floor area. Measure the total width and depth of the footprint where the divider will sit, ensuring there is ample clearance for walkways and doors. In typical residential layouts, maintaining a clear path of at least 90 centimeters around the divider ensures comfortable foot traffic and prevents accidental bumps. Additionally, measure the ceiling height to establish a safe vertical limit for your configuration, keeping in mind that a freestanding divider should never be built so high that it becomes top-heavy or interferes with ceiling fans, light fixtures, or air conditioning units.
Once you have your measurements, sketch a grid layout on paper or use a digital planning tool to visualize the final shape of the divider. A visual grid allows you to experiment with different configurations, such as a stepped stair-step design, a classic rectangular wall, or a low-profile console divider. During this planning phase, consult the manufacturer’s documentation to verify the maximum recommended stacking height and weight limits for freestanding setups. Most modular systems have strict limits on how high they can safely stand without direct wall anchoring, often capping freestanding configurations at four or five cubes high.
Products mentioned in this guide
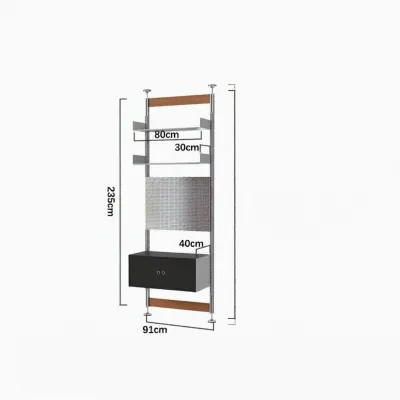
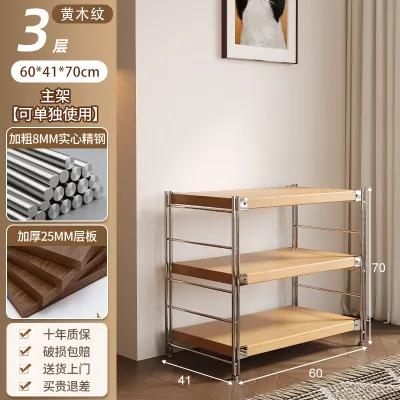
Prices are valid at publication and may change. Please refer to the product page for the latest price.
Finally, account for architectural details that might affect the placement of your divider. Check the thickness of your baseboards or skirting boards, as these can prevent the bottom connectors from sitting flush against an adjacent wall, leaving a small gap at the back. If you plan to position the divider near a wall for added lateral support, this gap must be factored into your stability calculations. Ensure the chosen location does not block essential electrical outlets, light switches, or ventilation grilles, allowing your home to remain fully functional once the partition is in place.
Tools and Hardware Required for Assembly
Gathering all necessary tools and hardware before starting the assembly process prevents frustrating interruptions and ensures a smoother, more efficient build. Begin by unboxing all components and laying them out systematically on a clean, flat surface. Group the panels by size and material, and organize the multi-angle connectors, locking pins, and joint caps into separate containers. Cross-reference every item with the manufacturer’s packing list to confirm that you have all the required pieces to complete your planned layout, as missing a single connector can halt your progress mid-build.

While many modular cube kits are marketed as tool-free, having a few basic household items on hand will significantly ease the assembly process. A lightweight rubber mallet is highly recommended for tapping panels securely into the connector slots without scratching the surfaces or cracking the plastic joints. To protect your flooring from scratches and minimize noise during assembly, lay down a soft microfiber cloth, a large blanket, or the flattened cardboard packaging from the product box.
Additionally, identify any safety hardware included in the package, such as anti-tip straps, wall-mounting brackets, or adhesive stabilizing pads. If your planned layout exceeds the safe freestanding height threshold, or if you live in a household with active pets or young children, these stabilizing components are mandatory. If the included wall anchors are not suitable for your specific wall material—such as drywall, brick, or concrete—plan to purchase appropriate heavy-duty anchors from a local hardware store, typically costing around S$5 to S$15, to ensure a secure connection.
Step-by-Step Assembly Process
Assembling a modular room divider requires a disciplined, bottom-up workflow to ensure structural integrity. Trying to build individual columns separately and join them later often results in misaligned joints and a warped frame that is difficult to correct. Instead, you should construct the divider systematically, completing one horizontal level at a time or following the manufacturer’s specific interlocking sequence.
Pay close attention to the orientation of the connector joints as you progress. Most modular connectors feature circular hubs with slots facing in multiple directions; aligning these slots correctly is crucial for ensuring that the panels slide in smoothly and lock securely. Forcing a panel into a misaligned connector can stress the plastic, leading to hairline fractures that compromise the load-bearing capacity of the entire divider.
Constructing a Stable Base Layer
The stability of your entire room divider depends heavily on the quality of its foundation. Begin by assembling the very first row of cubes directly on the floor in the exact location where the divider will stand, as moving a fully assembled unit can strain the joints. Place the bottom connectors on your protective cloth, ensuring their flat sides face downward toward the floor. Slide the bottom horizontal panels and the first set of vertical panels into the connector slots, pushing them inward until they are partially seated.
Once the first row is loosely framed, use a rubber mallet to tap each connector firmly. Work your way from one end of the row to the other, tapping at a 45-degree angle over the joints until you hear a solid, dull thud, which indicates the panels are fully seated in the slots. Next, place a spirit level across the top of the horizontal panels to check for flatness. If your floor is slightly uneven—a common occurrence near balcony doors or wet areas—you may need to place thin, non-slip furniture shims under the low-lying connectors to level the base, provided the manufacturer’s instructions permit their use.
Before moving on to the next level, perform a physical check of every joint in the base layer. Grasp the vertical panels and give them a gentle tug to ensure they do not wiggle or slide out of the connectors. A perfectly square, level, and rigid base layer prevents cumulative alignment errors as you build upward, ensuring that the upper tiers do not lean or twist.
Stacking and Locking the Vertical Columns
With a solid foundation established, you can begin stacking the subsequent rows of cubes. Install the next set of multi-angle connectors onto the exposed top edges of the vertical panels from the base layer. Next, slide the horizontal shelf panels into the side slots of these connectors, effectively capping the first tier of cubes and creating the floor for the second tier. Repeat this process by inserting the next set of vertical panels into the top slots of the connectors.
As you stack each level, apply even, downward pressure to snap the panels into place. If you encounter resistance, do not force the panel or strike it with excessive force, as this can shatter the connector or bend the panel frame. Instead, remove the panel, check for any debris or manufacturing burrs inside the connector slot, realign the components, and try again. Using a rubber mallet with gentle, controlled taps is much more effective than applying brute force.
To maintain structural alignment, periodically step back several paces to inspect the divider from different angles. Check that the vertical columns remain perfectly plumb and that the horizontal shelves form straight, unbroken lines across the width of the unit. If you notice any leaning or bowing, address it immediately by re-tapping the affected joints before adding more weight or height to the structure.
Finishing the Top Row and Final Connections
The final step of the physical assembly involves capping the top row of cubes to close the structure and give it a polished, cohesive appearance. Most modular kits include specialized top connectors that have flat, smooth upper surfaces without exposed slots, preventing dust accumulation and creating a cleaner silhouette. Install these top caps onto the uppermost vertical panels, ensuring they are aligned with the rest of the hardware.
Once all panels and connectors are in place, conduct a thorough perimeter check of the entire room divider. Walk around the unit and press firmly on every joint, listening for any clicks that indicate a previously loose connection has finally locked into place. Gently shake the divider from the sides to check for any internal play or rattling; a well-assembled modular unit should feel solid and move as a single, cohesive structure.
After confirming the structural integrity, use a clean, slightly damp microfiber cloth to wipe down all panels and connectors. This removes any fingerprints, dust, or manufacturing residues that accumulated during the assembly process. Avoid using wet cloths or dripping sponges, especially on engineered wood or laminated panels, as excess moisture can seep into the joints and cause the material to swell or delaminate over time.
Ensuring Stability and Preventing Tipping
Because a room divider stands freely in space rather than flat against a wall, ensuring its stability is paramount to preventing serious tipping hazards. Always adhere strictly to the manufacturer’s safety guidelines regarding maximum freestanding heights. If your divider is configured in a high-traffic area, near walkways, or in a home with children or pets, you must take extra precautions to secure the unit, even if it falls within the recommended freestanding limits.
If your divider exceeds the safe freestanding threshold, or if it feels slightly unstable due to its height-to-depth ratio, installing an anti-tip kit is highly recommended. These kits typically consist of durable nylon straps or metal cables that connect the top corners of the divider to a nearby structural wall or column. Secure the wall-side bracket using appropriate anchors, ensuring it is screwed directly into a wall stud or solid masonry for maximum holding power. This anchor prevents the unit from tipping forward if someone accidentally leans on it or pulls on a shelf.
Another highly effective strategy for enhancing stability is optimizing weight distribution. Always place your heaviest items, such as large books, heavy storage bins, or dense decorative objects, in the bottom row of cubes. This lowers the overall center of gravity of the divider, making it significantly more resistant to tipping. As you move up the columns, gradually decrease the weight of the items, reserving the top shelves for lightweight decor, small plants, or leaving them entirely empty to maintain a light, airy feel.
If the divider continues to wobble or lean persistently despite your best efforts to level the floor and tighten all connectors, do not attempt to load it with items or use it as a partition. A persistent wobble indicates a structural issue, such as a warped panel, a defective connector, or an inherently unstable configuration. In such cases, stop the assembly, disassemble the unstable sections, and consult the manufacturer’s customer support for guidance or replacement parts.
Styling and Balancing Your New Room Divider
Once your modular room divider is fully assembled and secured, styling it correctly is key to maintaining both its structural balance and its aesthetic appeal. Because a room divider is visible from multiple sides, the way you arrange items within the cubes will define the visual flow of the room. Aim for a balanced distribution of weight and visual density across the entire width of the unit, avoiding clustering all heavy or dark items on one side, which can make the structure look lopsided and put uneven stress on the joints.
To control the flow of light and maintain a sense of openness, consider mixing open-back and closed-back cube configurations. Leaving several cubes completely empty or styling them with minimalist, transparent glass decor allows natural light to filter through the divider, keeping both divided zones feeling bright and spacious. For areas where you require privacy—such as separating a home office from a living room—use fabric, plastic, or woven storage bins that fit snugly inside the cubes to block the line of sight while providing hidden storage for clutter.
Always respect the manufacturer’s specified weight capacity for individual cubes, which typically ranges from 5 to 15 kilograms depending on the materials used. Avoid overloading any single shelf, as prolonged excessive weight can cause the panels to sag, warp, or slip out of their connectors over time. By distributing your belongings thoughtfully and keeping the overall load well within safe limits, you ensure that your new room divider remains a safe, functional, and beautiful feature in your home for years to come.
Frequently Asked Questions (FAQ)
Can I reconfigure the shape of my room divider after assembly?
Yes, one of the greatest advantages of modular cube systems is their ability to be disassembled and reconfigured into new shapes as your spatial needs change. Before attempting to alter the structure, completely empty all shelves to prevent damage or injury. Use the connector removal tool provided in your kit, or gently pry the connectors apart using a flat, non-marring tool, taking care not to bend or snap the interlocking tabs on the panels. It is highly recommended to sketch your new layout on paper first to ensure you have enough connectors and panels, and to verify that the new configuration will remain structurally stable and balanced.
How do I clean and maintain the plastic or metal connectors?
To keep your modular room divider looking its best and functioning safely, clean the connectors and panels regularly using gentle methods. Dust the joints with a soft-bristled brush or a dry microfiber cloth to prevent dirt buildup in the slots. For deeper cleaning, wipe the connectors with a cloth lightly dampened with water and a mild, non-abrasive dish soap; avoid harsh chemical solvents, bleach, or abrasive scrubbing pads, as these can degrade plastic connectors or strip the protective paint from metal joints. Periodically inspect the connectors every few months, especially during seasonal changes in indoor humidity and temperature, and firmly press or tap any joints that may have loosened slightly over time due to structural shifting.
Community discussion
Share your experience or ask a question. Comments are reviewed before publication.