
Maximizing vertical storage is a smart way to keep your home organized, especially when living in compact urban spaces like Singapore’s HDB flats or condominiums. A rotating bookshelf offers an elegant, space-saving solution by utilizing a 360-degree spinning mechanism, allowing you to access hundreds of books from a single static corner. By combining pre-fabricated modular shelving components with heavy-duty rotating hardware, you can build a custom, high-capacity bookcase tailored to your aesthetic preferences and spatial constraints without the need for advanced carpentry skills.
This step-by-step guide walks you through the entire process of planning, sourcing, and assembling your own DIY rotating storage unit. Using modular cubes or stackable shelving elements simplifies the construction process, ensuring clean lines and structural uniformity. With the right tools, careful measurements, and proper safety checks, you can create a durable, highly functional piece of furniture that maximizes every square centimeter of your living area.
Planning Your Space and Choosing the Right Rotating Bookshelf Components
Before purchasing any materials, you must carefully evaluate the physical space where your rotating bookshelf will stand. Unlike static bookcases that sit flush against a wall, a rotating unit requires a circular clearance zone to spin freely. To calculate the required clearance, you need to determine the diagonal measurement of your modular shelving unit. For a square bookshelf, the diagonal clearance is calculated by multiplying the width of one side by 1.414. For example, if your modular shelving unit is 40 centimeters wide on each side, it will require a clear circular path with a diameter of at least 57 centimeters to rotate 360 degrees without scraping your walls, doors, or adjacent furniture.
Products mentioned in this guide




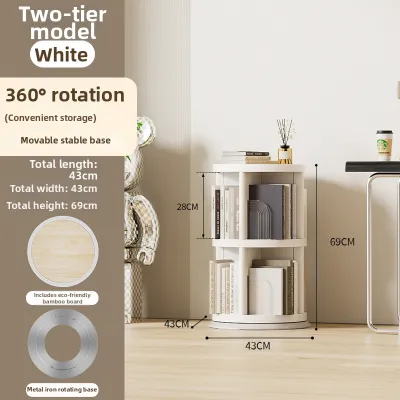

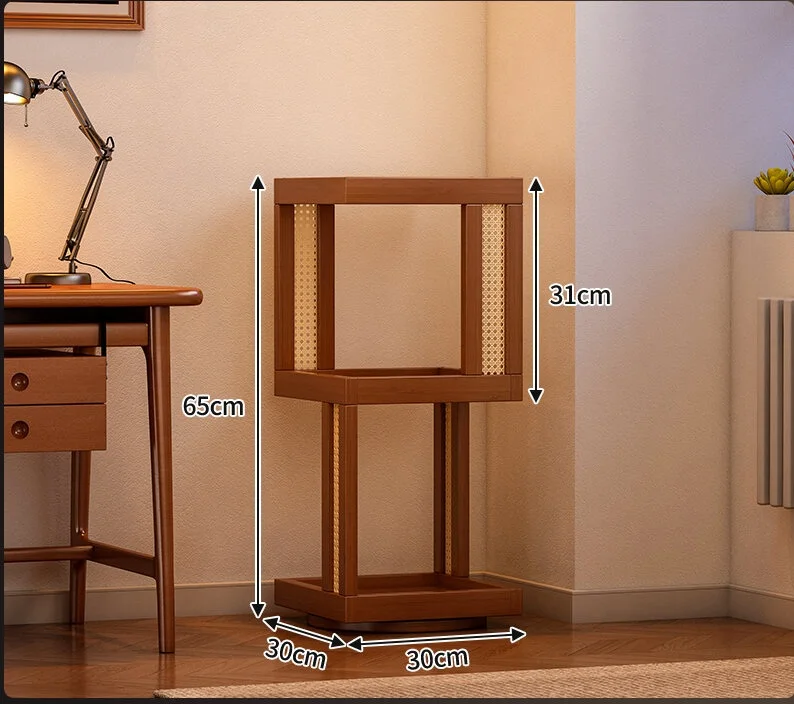

Prices are valid at publication and may change. Please refer to the product page for the latest price.
In typical compact homes, corners are the most common location for these units, but you must also account for baseboards, wall plugs, and light switches. Ensure there is a safety buffer of at least 3 to 5 centimeters beyond the calculated diagonal rotation path to prevent accidental finger pinches or wall scuffs. Additionally, consider the logistics of assembly and transport. If you plan to move the completed unit between rooms or to a new home in the future, verify that its finished dimensions can easily pass through your doorways and fit inside passenger lifts.
Calculating the potential weight of your book collection is another critical planning step. Books are deceptively heavy; a standard shelf filled with dense hardcovers can easily weigh between 15 to 25 kilograms per linear meter. Estimate the total weight of the books you intend to store, and use this figure to select a rotating base and modular shelving components that can safely support the load. Always choose a heavy-duty steel ball-bearing turntable (often referred to as a lazy Susan mechanism) with a weight rating that exceeds your estimated total load by at least 30 percent to ensure smooth, long-term operation.
When selecting modular shelving components, look for systems made from high-density materials like thick plywood, solid wood, or high-quality engineered boards. Avoid thin, low-grade particle boards that are prone to sagging, especially in humid tropical climates where moisture can weaken unsealed wood fibers over time. Check the manufacturer’s specifications for each modular component to verify its individual load capacity and structural joinery.
Essential Tools and Materials Checklist
To ensure a smooth and efficient assembly process, gather all necessary tools and materials before you begin. Having the correct hardware on hand prevents mid-project delays and guarantees a safer, more robust build.

Primary Materials
- Modular shelving units: Cube organizers or stackable wooden shelves with finished back panels.
- Heavy-duty rotating base: A steel ball-bearing lazy Susan turntable (minimum 300mm diameter for stability).
- Mounting baseboards: Two pieces of thick, high-grade plywood (at least 18mm to 25mm thick) cut to match or slightly exceed the footprint of your shelving unit.
- Fasteners: Heavy-duty wood screws (various lengths), machine bolts with locking nuts, and steel L-brackets for structural reinforcement.
Required Tools
- Power drill and driver bits: For drilling pilot holes and driving screws efficiently.
- Spirit level: To ensure the base and shelves are perfectly horizontal.
- Measuring tape and pencil: For precise centering and alignment markings.
- Clamps: To hold wooden components securely in place during drilling.
- Safety gear: Safety glasses and a dust mask for protection during drilling and sanding.
Step-by-Step Assembly Guide
Constructing your rotating bookshelf requires a systematic approach to ensure the spinning mechanism is perfectly aligned with the vertical shelving frame. Any misalignment can cause uneven wear on the bearings, leading to a stiff rotation or an unstable, tilting structure.
Step 1: Preparing the Rotating Base and Mounting Board
The foundation of your rotating bookshelf consists of a sandwich-like structure: a bottom baseboard that rests on the floor, the rotating bearing plate in the middle, and a top mounting board that supports the actual shelving unit. Start by locating the exact center of both your top and bottom plywood baseboards. Use a measuring tape to draw diagonal lines from corner to corner; the point where the lines intersect is the precise center.
Place your heavy-duty rotating bearing plate over the center point of the bottom baseboard. Align the mounting holes of the bearing plate with your center markings. Use a pencil to mark the screw holes onto the wood. Before drilling, check the manufacturer’s instructions for the recommended pilot hole size to prevent the plywood from splitting. Drill the pilot holes, then secure the bottom ring of the rotating mechanism to the bottom baseboard using strong wood screws or machine bolts.
Next, you must attach the top mounting board to the upper ring of the rotating mechanism. This step often requires accessing the screws from the underside of the assembly. Many heavy-duty bearings feature access holes that allow you to drive screws into the top board through the bottom plate. Once secured, place the entire base assembly on a flat floor and use a spirit level across multiple angles. The platform must be perfectly level; any slope will cause the bookshelf to drift or spin on its own under the pull of gravity.
Step 2: Assembling the Modular Shelving Frame
With the rotating base prepared, you can now assemble your modular shelving units. Lay down a clean blanket or cardboard on your floor to protect the finish of the shelving panels during assembly. Follow the manufacturer’s instructions carefully to assemble the individual modular cubes or vertical shelves.
As you connect the panels, ensure that every interlocking joint, cam lock, or screw is fully tightened. For added structural integrity, you may apply a small bead of high-quality wood glue to the dowels or joints before fastening them, provided the manufacturer’s instructions allow it. This extra step significantly reduces lateral sway once the bookshelf is loaded and in motion.
Pay special attention to the back panels of your modular units. In many modular systems, back panels are thin sheets of hardboard slid into grooves. For a rotating bookshelf, these back panels are structurally vital because they prevent the frame from racking (leaning sideways). Ensure the back panels are securely nailed, screwed, or glued into place. If your modular units are open-backed, consider adding metal corner braces or installing a custom plywood backboard to provide the necessary lateral stability.
Step 3: Securing the Frame to the Rotating Base
Once your modular shelving frame is fully assembled and dry, it is time to mount it onto the prepared rotating base assembly. This step requires precision to ensure the weight of the shelves is perfectly centered over the rotating bearing. An off-center installation will place uneven leverage on one side of the bearing, causing friction, noise, and premature hardware failure.
Carefully lift the assembled modular frame and place it on top of the baseboard assembly. Measure the distance from the outer edges of the shelving frame to the edges of the baseboard on all four sides. Adjust the frame until these measurements are identical, indicating that the unit is perfectly centered. Clamp the shelving frame to the baseboard to prevent it from shifting during the fastening process.
To secure the frame, use heavy-duty steel L-brackets on the interior corners of the bottom shelves, anchoring them directly into the thick plywood mounting board. Alternatively, you can drive heavy-duty wood screws upward through the bottom of the mounting board into the solid vertical panels of the shelving frame. You must double-check the length of your screws before driving them; ensure they are long enough to grip the shelving frame securely but short enough that they do not penetrate through the baseboard and strike the rotating metal bearing below. Any contact with the bearing will lock the mechanism and damage the hardware.
Crucial Safety Checks and Stability Testing
Before filling your new rotating bookshelf with your favorite novels, you must conduct thorough safety and stability tests. A tall, heavy, moving structure poses inherent safety risks if not properly balanced and verified.
Begin the loading process gradually. Never load the top shelves first, as this raises the center of gravity and makes the unit highly susceptible to tipping. Start by placing your heaviest books, such as encyclopedias, textbooks, or large binders, on the very bottom shelves. This anchors the unit, keeping the center of gravity as close to the floor as possible. Once the bottom is securely weighted, gradually add medium-weight books to the middle shelves, and reserve the lightest paperbacks or decorative items for the uppermost levels.
As you load each level, gently spin the bookshelf a few degrees in both directions. Listen closely for any unusual scraping, grinding, or clicking noises coming from the bearing plate. A smooth, quiet glide indicates proper alignment and load distribution. If you notice any resistance, wobbling, or leaning, stop loading immediately. Unload the books and inspect the baseboard to ensure it remains perfectly level and that no screws have backed out or warped the mounting plates.
If the structure feels top-heavy or exhibits a slight wobble during rotation, redistribute the weight. Move heavier items from the outer edges closer to the center axis of rotation, and transfer more weight to the bottom compartments. Finally, establish a strict household safety rule: never allow children or pets to climb on, hang from, or use the rotating bookshelf as a toy. Because this is a freestanding, rotating unit, it cannot be anchored to a wall like standard bookcases, making parental supervision and correct weight distribution paramount.
Organizing for Balance and Long-Term Maintenance
Maintaining your DIY rotating bookshelf ensures it remains a safe and smooth-spinning centerpiece in your home for years to come. Proper load management and simple preventative care will protect both the wooden frame and the mechanical bearings.
When organizing your books, aim for symmetrical balance across all sides of the unit. If you have a four-sided modular design, try to distribute the total weight evenly among all four faces. Concentrating all your heavy books on one side while leaving the other sides empty creates an eccentric load. This uneven distribution forces the bearing balls to grind harder on one side of the track, which can warp the metal plates, strip the mounting screws, or cause the bookshelf to lean permanently.
Dust and debris are the primary enemies of mechanical bearings. Fine dust, pet hair, and floor fibers can easily migrate into the exposed track of your rotating base. Once inside, this debris mixes with the bearing grease, creating a gritty paste that increases friction and jams the mechanism. Vacuum around the base of the bookshelf regularly using a narrow crevice tool to pull dust away from the bearing track. Avoid spraying wet lubricants like standard WD-40 into the bearing, as they attract dust; instead, use a specialized dry silicone lubricant spray if the rotation begins to feel stiff.
Finally, establish a periodic maintenance schedule. Every six months, empty the bookshelf and check the tightness of all structural fasteners. The vibrations and kinetic forces generated by regular spinning can gradually loosen wood screws, L-brackets, and modular connectors over time. Tighten any loose hardware immediately to keep the joints rigid and prevent the frame from developing structural play.
Frequently Asked Questions (FAQ)
Can I use any standard lazy Susan bearing for a bookshelf?
No, standard plastic or light-duty aluminum lazy Susan bearings designed for kitchen cabinets or dining tables are not suitable for a bookshelf. They are rated only for light kitchen items and will quickly deform or fail under the heavy weight of books. You must specifically source a heavy-duty, flat-profile steel ball-bearing turntable rated for furniture use, with a certified weight capacity of at least 150 to 200 kilograms.
How do I prevent the bookshelf from tipping over when spinning?
To prevent tipping, you must maintain a low center of gravity by storing your heaviest items on the lowest shelves and keeping the top shelves light. Additionally, ensure the plywood baseboard has a wide footprint that matches or slightly exceeds the width of the shelving unit. Always assemble the unit on a perfectly level floor and verify that the rotating mechanism is flat using a spirit level before loading.
Community discussion
Share your experience or ask a question. Comments are reviewed before publication.