
Building a custom storage solution does not have to mean dealing with heavy wooden planks or complex metal framing. A modular acrylic shelf offers a lightweight, visually clean, and highly adaptable alternative that fits perfectly into modern minimalist interiors. By utilizing pre-fabricated modular components, you can assemble a custom shelving system tailored to your specific space and storage needs without the need for professional installation.
Successfully assembling an acrylic shelf relies on understanding the unique material properties of acrylic. Unlike wood or metal, acrylic is highly transparent, relatively flexible, and prone to scratching or cracking if handled incorrectly. Achieving a stable, durable, and polished result requires careful preparation, precise alignment, and gentle handling during the assembly process.
Planning Your Modular Acrylic Shelf Design
Before purchasing components or beginning assembly, you must thoroughly measure your designated space. Use a reliable measuring tape to determine the available width, depth, and height of the area where the shelf will stand. If you live in a high-rise apartment or HDB flat in Singapore, remember to measure your doorways, lift entryways, and narrow corridors to ensure the packaged modular components can be easily transported into your home.
Products mentioned in this guide
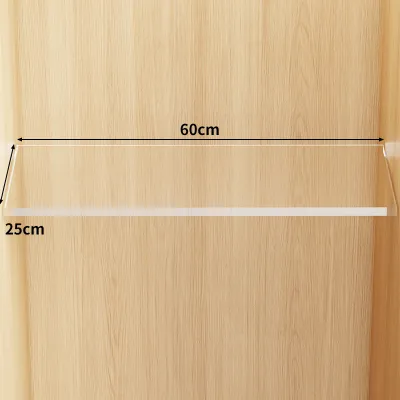
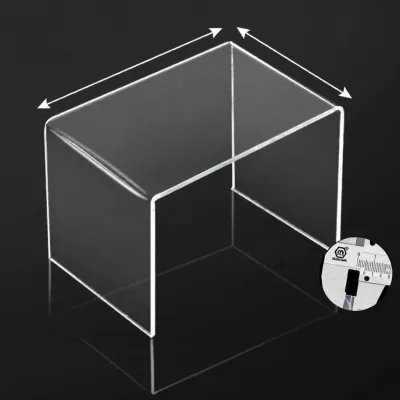
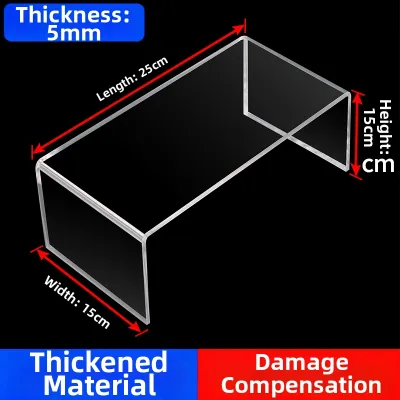
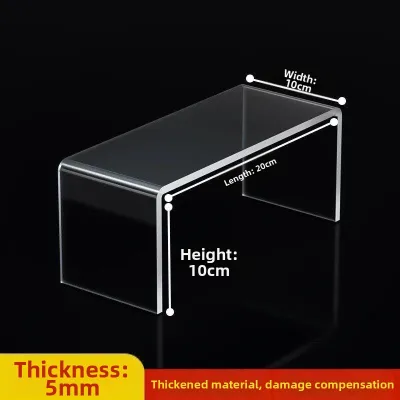
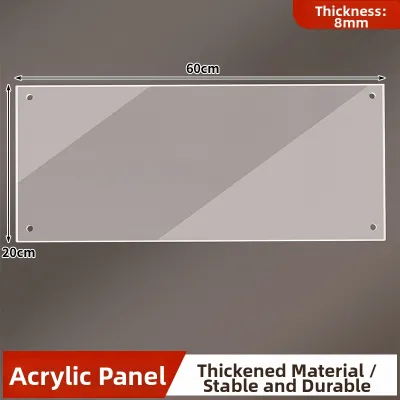
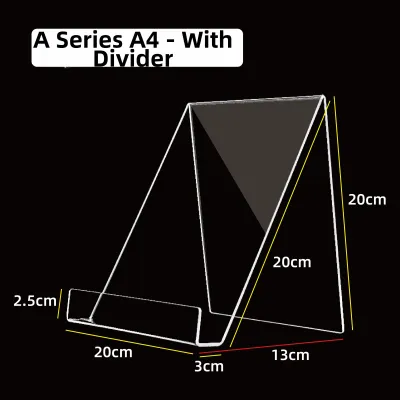
Prices are valid at publication and may change. Please refer to the product page for the latest price.
Next, evaluate which modular configuration best suits your functional needs and room layout. Modular systems typically allow for two primary layouts: vertical stacking or side-by-side expansion. Vertical stacking is highly effective for maximizing vertical space in compact rooms, but it requires careful attention to height limits and wall anchoring. Side-by-side configurations distribute weight over a larger floor area, providing excellent structural stability and easier access to items.
Because acrylic is completely transparent, you must also consider the visual and physical balance of your design. A transparent acrylic shelf can make a small room feel significantly larger and less cluttered, but it also leaves all stored items fully visible. To maintain both aesthetic harmony and structural balance, plan to place larger, heavier items on the lowest levels and lighter, decorative objects on the upper tiers. This distribution keeps the center of gravity low, preventing the unit from becoming top-heavy.
Tools and Materials Needed for Acrylic Assembly
When unboxing your modular kit, verify that you have all the necessary components before starting. A standard modular acrylic kit typically includes pre-cut acrylic panels, specialized connectors—such as interlocking plastic slots, metal brackets, or nylon screws—and base feet or support blocks. Organizing these parts by size and function beforehand will streamline the assembly process.

To complete the build safely and accurately, gather the following essential tools:
- A standard measuring tape to verify panel spacing.
- A spirit level to ensure every shelf is perfectly horizontal.
- Several clean, non-abrasive microfiber cloths to handle the panels and clean up dust.
- A soft, clean blanket or yoga mat to cover your assembly floor.
Avoid using standard household tools that are not designed for plastics. Never use standard wood or metal drill bits, as their aggressive cutting angles can easily catch and shatter acrylic. Additionally, keep harsh chemical solvents, glass cleaners containing ammonia, and abrasive scrubbing pads far away from your workspace, as these will cause permanent surface damage.
Step-by-Step Assembly Instructions
Step 1: Preparing the Workspace and Components
To prevent scratching the highly polished surfaces of your acrylic panels, clear a large, flat area on your floor. Lay down a clean, soft blanket, a thick bedsheet, or a large piece of clean cardboard to act as a protective barrier. Even tiny particles of dust or grit on a bare floor can grind into the acrylic under the weight of assembly, leaving permanent scratches.
Carefully unpack each acrylic panel and inspect them for any transport damage, such as hairline cracks, deep scratches, or chipped corners. Most modular acrylic panels are shipped with a thin protective paper or plastic film adhered to both sides. Do not peel this film off entirely yet; instead, peel it back only around the edges where the connectors and joints will attach. Keeping the main faces covered shields the plastic from accidental scratches during handling.
Step 2: Assembling the Base and Vertical Supports
Always begin your construction from the ground up to establish a stable foundation. Lay out the base panels or feet on your protected workspace. Connect the lowest vertical support panels to the base using the designated modular joints or brackets provided in your kit.
Once the first set of vertical supports is attached, place a spirit level across the top edges to verify that the structure is perfectly level and plumb. If your floor is slightly uneven, adjust the leveling feet if your kit includes them. An unlevel base will cause the entire shelving unit to lean, placing uneven, diagonal stress on the joints, which can lead to structural failure over time.
When securing the connectors, tighten them with care. If your kit uses screws, turn them until they are snug, then stop. Because acrylic is a brittle material, over-tightening screws or forcing misaligned joints will create intense localized pressure, resulting in immediate cracking or long-term stress fractures.
Step 3: Installing the Horizontal Shelves
With the base and lower vertical supports secured, begin installing the horizontal shelves layer by layer. Carefully slide the horizontal acrylic panels into the designated slots, or secure them to the brackets on the vertical supports, depending on your kit’s design.
Ensure that each horizontal panel sits completely flush within its joints without binding or sticking. If a panel does not slide in smoothly, do not force it down. Forceful impacts can chip the edges of the acrylic. Instead, slightly loosen the nearby vertical connectors to allow for minor alignment adjustments, slide the shelf into place, and then gently re-tighten the connectors.
Before moving upward to the next level, double-check that all interlocking joints and brackets on the current level are fully engaged. There should be no visible gaps between the panels and the connectors, ensuring the weight of the shelf is distributed evenly across the support structure.
Step 4: Final Adjustments and Stability Check
After assembling all levels of your modular acrylic shelf, perform a thorough stability check before placing any items on it. Place your hands on the middle shelves and apply gentle lateral pressure to perform a shake test. Watch for any wobbling, swaying, or clicking sounds coming from the joints.
If you detect any movement, locate the source of the play. Slightly loosen the affected connectors, realign the panels to ensure they are seated deeply in their slots, and snug the screws back down. Making these minor adjustments ensures the frame remains rigid and safe.
Finally, assess whether your shelving unit requires anti-tip wall anchors. If your completed shelf stands taller than 1.2 meters, is relatively narrow, or is placed in a high-traffic area, anchoring is highly recommended. Use specialized wall brackets designed for your specific wall type—such as masonry plugs for concrete walls common in Singapore homes—to secure the top of the shelf safely to the wall.
Safe Usage and Maintenance for Acrylic Shelves
To ensure your acrylic shelf remains clear, stable, and structurally sound for years to come, you must follow proper loading and maintenance practices. Acrylic behaves differently than wood or glass under load, and improper care can quickly ruin its pristine appearance.
Weight Distribution Guidelines Unlike tempered glass, acrylic is highly flexible and will bow (sag) if subjected to excessive or poorly distributed weight. To prevent permanent bowing, always place your heaviest items on the bottom shelf, positioning them as close to the vertical supports as possible. Keep lighter items on the upper shelves and place them toward the center. Avoid concentrated point loads; instead, distribute weight evenly across the entire surface of each shelf.
Cleaning and Dusting Protocol Acrylic attracts dust easily due to static electricity. To clean your shelf, gently wipe the surfaces with a clean, dry microfiber cloth. For deeper cleaning, mix a few drops of mild dishwashing liquid with warm water, dampen a soft microfiber cloth with the solution, and wipe the panels down gently. Never use ammonia-based window cleaners, standard glass sprays, acetone, or abrasive sponges. These chemicals break down the acrylic polymer, causing permanent cloudiness and micro-scratches.
Environmental Considerations In Singapore’s tropical climate, indoor spaces can experience intense sunlight and warmth near windows. While high-quality acrylic is generally UV-resistant, prolonged exposure to direct, harsh afternoon sunlight and high temperatures can accelerate the yellowing of the plastic and cause subtle warping over time. Position your modular acrylic shelf away from direct window sunlight and heat-emitting appliances to preserve its crystal-clear transparency.
Frequently Asked Questions (FAQ)
Can I drill new holes into my modular acrylic shelves?
Drilling into acrylic carries a high risk of cracking, chipping, or completely shattering the material if done incorrectly. Standard metal or wood drill bits are designed to grab material as they cut, which easily fractures brittle plastics. It is highly recommended to rely solely on the pre-drilled holes and modular slots provided by the manufacturer.
If modifying the shelf is absolutely unavoidable, you must use specialized plastic drill bits, which have a sharper, neutral tip angle designed to scrape rather than gouge. Place a solid wood backing board directly underneath the acrylic panel and clamp it tightly to prevent the plastic from cracking as the drill bit exits. Run your drill at a very low speed, apply minimal downward pressure, and consult your manufacturer’s guidelines before making any permanent modifications.
How much weight can a standard acrylic shelf hold?
The weight capacity of an acrylic shelf varies widely depending on the thickness of the acrylic panel, the horizontal span of the shelf, and the specific support connectors used. A thicker panel (such as 8mm or 10mm) can support significantly more weight over a wider span than a thin 4mm panel. Always check the manufacturer’s specification label or product manual for the exact load limits of your specific kit.
To ensure safety, monitor your shelf for visual cues of overloading. If you notice any visible bowing or sagging in the center of a panel, or if you spot tiny, spiderweb-like stress marks (crazing) forming around the metal brackets or screw holes, the shelf is overloaded. Remove the items immediately and redistribute the weight to prevent permanent structural warping or joint failure.
Community discussion
Share your experience or ask a question. Comments are reviewed before publication.