
A cluttered workspace can disrupt your focus and slow down your daily productivity. Building a custom desk organizer shelf using modular components allows you to design a storage system tailored precisely to your workflow, equipment, and desk dimensions. Instead of settling for a pre-assembled unit that might not fit your monitor or stationery, a modular approach gives you the flexibility to expand, adjust, and configure your storage as your needs change.
By taking control of the layout, you can designate specific zones for your laptop, documents, writing tools, and personal items. This guide walks you through the entire process, from measuring your desk space and selecting compatible components to assembling the structure securely and maintaining its stability over time. With a few basic tools and a clear plan, you can transform your desk into an organized, efficient workstation.
Planning Your Desk Organizer Layout and Space
Before purchasing any modular pieces, you must carefully assess your physical workspace to ensure the completed shelf fits comfortably. Start by clearing your desk and measuring the total available surface depth, width, and vertical clearance. If your desk sits beneath overhead cabinets, wall-mounted shelves, or a low window frame, note the maximum height your new organizer can reach without causing obstruction.
Products mentioned in this guide
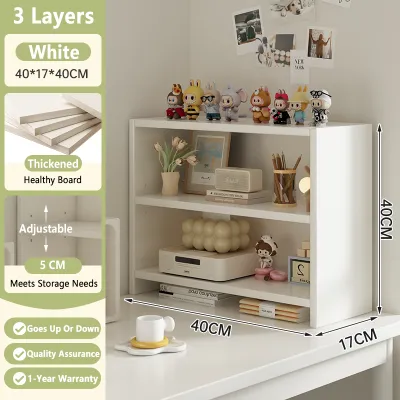
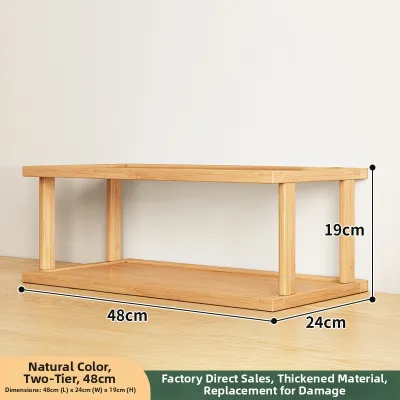
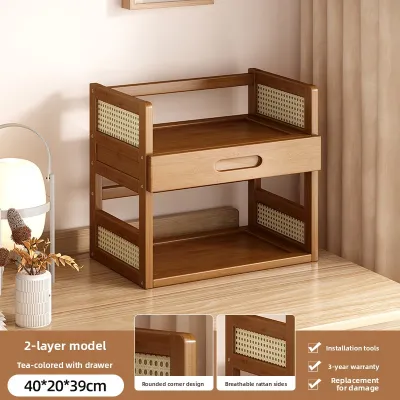

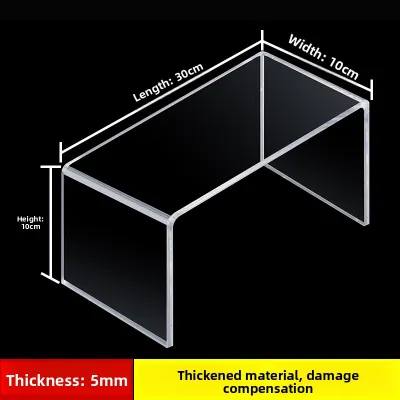
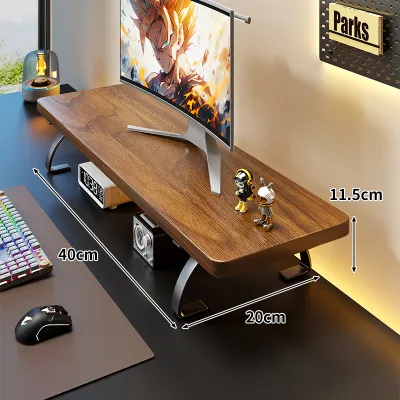
Prices are valid at publication and may change. Please refer to the product page for the latest price.
Next, identify the specific items you need to store and determine their spatial requirements. For example, if you plan to place a computer monitor on or beneath one of the shelves, measure the monitor’s height, width, and base depth to ensure adequate clearance. If you have large files, binders, or textbooks, measure their height and depth to select modules that can accommodate them without hanging over the edges.
Always review the product packaging, labels, or manufacturer specifications for the exact dimensions and footprint of each modular component. Compare these measurements against your desk layout plan to verify that the combined modules will not crowd your keyboard, mouse, or primary working area. Leaving a few centimeters of breathing room around the edges of the shelf unit will prevent your desk from feeling cramped and allow for easier cleaning.
Selecting Modular Components and Assembly Tools
Modular desk organizers come in various configurations, including open cubes, shelving tiers, drawer inserts, and pegboard backings. When selecting your components, consider how you intend to use each section. Open cubes are excellent for books or decorative items, while shelving tiers work well for paper trays and laptops. Drawer inserts are ideal for concealing small stationery items, cables, and personal belongings that might otherwise create visual clutter.

Compatibility is the most critical factor when choosing modular pieces from different collections or brands. Verify the connector types, interlocking joints, and alignment pins specified by the manufacturer to ensure all parts fit together seamlessly. It is generally safest to select components from the same product line, as this guarantees matching dimensions, consistent finishes, and reliable structural connections.
Gather all necessary assembly tools before you begin building to avoid interruptions. Most modular kits require only basic hand tools, such as a manual screwdriver, a measuring tape, and a soft rubber mallet to gently tap interlocking joints into place. Avoid using high-powered electric drills unless specifically recommended by the manufacturer, as excessive torque can easily strip screw holes or crack lightweight materials.
Step-by-Step Assembly of the Modular Shelf
To build a sturdy and reliable desk organizer, always begin by establishing a stable foundation. Lay out all the components on a flat, clean surface, such as a large table or a carpeted floor, to protect the finish from scratches. Identify the base pieces and assemble the bottom tier first, ensuring that all joints are fully seated and level before you attempt to build upward.
As you progress, connect the vertical supports and horizontal panels strictly according to the manufacturer’s assembly guide. Pay close attention to the orientation of each piece, as some panels may have specific front-facing edges, pre-drilled holes, or cable routing channels that must align correctly. Forcing a piece into place can damage the connectors, so if a component does not slide in smoothly, stop and double-check the instructions.
Check the alignment of the structure frequently as you add each new layer. Use a small spirit level or a leveling app on your smartphone to verify that the shelves are perfectly horizontal and the vertical supports are plumb. Tighten all fasteners, screws, or locking cams securely before moving on to the next tier, as correcting a skewed frame becomes much more difficult once the entire unit is fully assembled.
If you encounter any resistance or if the parts do not fit flush, do not apply excessive force. Misaligned pieces are usually a sign that a previous step was completed incorrectly or that a connector is oriented the wrong way. Disassemble the affected section gently, inspect the joints for any debris or manufacturing defects, and reassemble the parts carefully according to the diagrams provided.
Configuring Internal Storage and Customization
Once the main structure of your modular shelf is assembled, you can begin customizing the internal layout to suit your daily workflow. Install adjustable dividers or add-on drawer modules to separate pens, paperclips, sticky notes, and other small stationery items. Placing these dividers at varying intervals allows you to create dedicated slots for mail, notebooks, and tablet devices.
Managing electronic cables is essential for maintaining a clean and organized desk surface. Route power cords, charger cables, and USB lines through the designated gaps, grommets, or cutouts at the back of the modular panels. If your shelf unit does not have built-in cable management, you can attach compatible adhesive cable clips or hook-and-loop straps to the underside or rear of the shelves to keep cords hidden and tangle-free.
To protect both your shelf surface and your items, consider using non-slip liners or felt pads inside drawers and on open shelves. Choose liners that are compatible with the specific material of your shelf, whether it is finished wood, laminate, or plastic, and follow the manufacturer’s care instructions. These liners prevent small items from sliding around when you open drawers and help dampen the sound of placing keys or metal tools on the shelves.
Stability Checks and Ongoing Maintenance
Before placing any items on your newly built desk organizer, perform a thorough stability check. Place the empty unit in its final position on your desk and gently shake it from side to side and front to back to check for any wobbling. If the shelf rocks, verify that the desk surface itself is level, and adjust any built-in leveling feet on the organizer if they are provided.
Next, verify that the total weight of your items does not exceed the manufacturer’s stated weight capacity per tier or for the overall unit. Overloading a modular shelf can cause the panels to sag, weaken the joints, or even lead to a structural failure. Distribute the weight evenly across each shelf, placing heavier items toward the supports rather than in the center of a long span.
To keep your modular desk organizer safe and functional over time, schedule periodic maintenance checks. Daily use and temperature fluctuations can cause screws, cam locks, and dowels to loosen gradually. Every few months, take a few minutes to inspect the joints and gently retighten any loose fasteners, ensuring you do not overtighten and strip the material.
Frequently Asked Questions (FAQ)
Can I rearrange the modular components after the initial assembly?
Yes, most modular desk organizers are designed with reconfigurability in mind, utilizing reusable connectors, dowels, or interlocking joints. However, the ease of rearrangement often depends on the materials used in construction. For example, frequently disassembling and reassembling units made of particleboard or medium-density fiberboard (MDF) can strip the pre-drilled screw holes, reducing the overall stability of the joints over time. If you plan to change your layout often, look for systems that use metal-to-metal connectors or tool-free interlocking tabs, and always consult the manufacturer’s guidelines regarding reconfiguration limits and warranty conditions.
How do I prevent a tall modular desk shelf from tipping over?
Preventing a tall modular desk shelf from tipping over requires careful weight distribution and, in some cases, physical anchoring. Always place your heaviest items, such as books, heavy binders, or printers, on the bottom tiers to maintain a low center of gravity. If your modular unit is exceptionally tall or has a narrow base, consider using anti-tip straps, adhesive brackets, or wall anchors to secure it to an adjacent wall or the desk frame itself. Additionally, verify that your desk surface is completely level, and make use of any adjustable leveling feet included with your modular kit to compensate for uneven flooring.
Community discussion
Share your experience or ask a question. Comments are reviewed before publication.