
Assembling modular shelving units is one of the most practical and rewarding DIY projects you can undertake to optimize your living or working space. By building the system yourself, you save on professional installation fees while gaining the flexibility to customize the layout to your exact storage needs. The entire process is highly manageable for beginners, requiring only a systematic approach: preparing your workspace, verifying your parts, assembling the frame from the ground up, and securing the structure for long-term stability.
Taking your time to understand the assembly mechanics ensures a sturdy, level, and safe finished product. While the prospect of unboxing dozens of panels and connectors might feel overwhelming at first, breaking the task down into logical phases makes it straightforward. With patience, a few basic hand tools, and attention to leveling, you can successfully construct a durable shelving system that stands the test of time.
Pre-Assembly Preparation: Setting Up Your Workspace and Checking Parts
Before you open a single box, you must prepare the physical environment where the assembly will take place. Clear a flat, spacious floor area that is significantly larger than the fully assembled dimensions of the shelving unit. It is highly recommended to lay down a soft protective barrier, such as a large clean rug, yoga mats, or the flattened cardboard packaging from the product itself. This simple step prevents you from accidentally scratching your home’s flooring—especially delicate materials like parquet, polished marble, or luxury vinyl tiles—and protects the finish of the shelving panels during handling.
Products mentioned in this guide
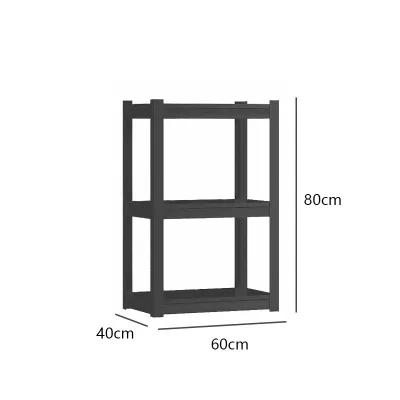
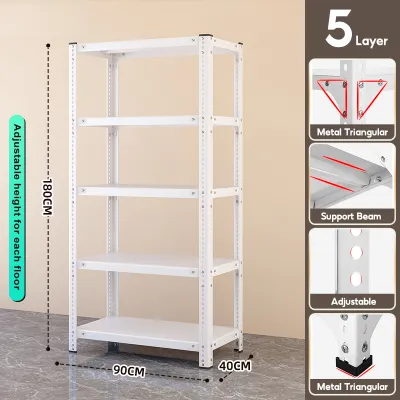
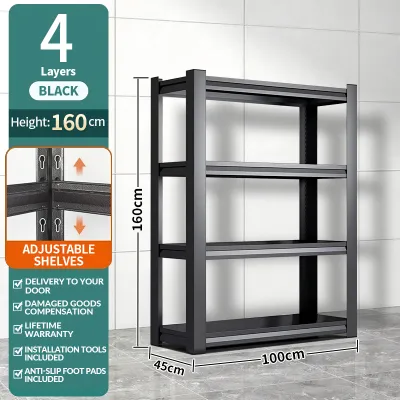
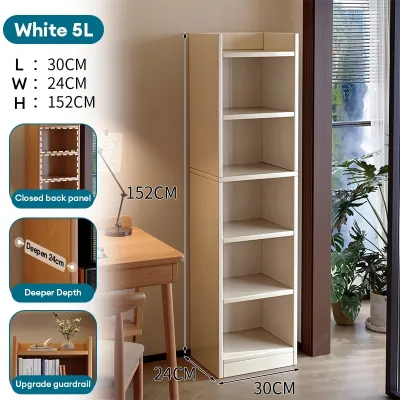
Prices are valid at publication and may change. Please refer to the product page for the latest price.
Once your workspace is ready, unbox all components carefully and conduct a thorough inventory against the manufacturer’s instruction manual. Avoid the temptation to dump all the hardware into a single pile; instead, group identical screws, wooden dowels, cam locks, brackets, and shelf pins into separate small containers or bowls. This organization prevents small items from rolling away and saves you substantial time when searching for specific fasteners during the build process.
During the inventory phase, inspect every panel, post, and frame connector for any signs of transit damage. Look closely for cracked wooden panels, chipped laminate finishes, or bent metal frames, as these defects can seriously compromise the structural integrity of the completed unit. If you discover any damaged load-bearing parts, do not attempt to assemble the shelving; contact the manufacturer or retailer for replacement parts before proceeding. Finally, place a spirit level on the floor area where the shelving will ultimately stand to note any slope or unevenness that you will need to compensate for during the final steps.
Essential Tools You Need Before You Start
Having the correct tools on hand before you begin prevents mid-assembly interruptions and reduces the risk of damaging your new furniture. Most modular shelving systems are designed to be built using standard household hand tools. You will typically need a high-quality Phillips-head screwdriver, a flat-head screwdriver, an adjustable wrench, a measuring tape, and a rubber mallet. The rubber mallet is particularly crucial for modular designs, as it allows you to tap interlocking joints and dowels firmly into place without marring or denting the finished surfaces.

Another indispensable tool is a spirit level, which is required to verify that your shelving remains perfectly plumb and square throughout the building process. Relying solely on visual estimation often results in a subtle lean that places uneven stress on the joints, eventually leading to structural failure or warping. A measuring tape is also necessary to confirm clearances and check the squareness of the frame as you progress.
While a power drill is incredibly helpful for home improvement tasks, it is generally not recommended for the primary assembly of freestanding modular units. The high torque of a power drill can easily strip screw holes in engineered wood or crack plastic modular connectors. Keep the power drill aside for later, as it will only be necessary if you need to drill pilot holes into your walls for anti-tip safety anchors.
To protect both your tools and the shelving hardware, always match the size of your screwdriver or hex key to the exact dimensions of the fasteners provided. Using a screwdriver that is too small or too large will strip the screw heads, making it nearly impossible to tighten them fully or remove them in the future if you ever need to disassemble the unit for relocation.
Step-by-Step Assembly Process for Modular Shelving
Step 1: Organize and Build the Base Frame
The foundation of your modular shelving unit dictates the stability and alignment of the entire structure. Begin by identifying the bottom panels, base rails, or lower frame pieces as indicated in your manual. Lay these pieces out in their correct orientation on your protected workspace floor. If your modular unit features adjustable leveling feet or casters, screw them into the pre-drilled holes on the underside of the base panels at this stage.
Carefully connect the first set of vertical posts or side panels to the base assembly. When installing these initial fasteners, tighten them only until they are finger-tight or slightly loose. Keeping the joints slightly flexible allows you to adjust the frame easily. Before moving forward, use your measuring tape to check that the base is perfectly square by measuring diagonally from corner to corner in both directions; the two diagonal measurements must be identical. If they are not, gently nudge the frame until they match, then lightly snug the base fasteners without locking them down completely.
Step 2: Install Vertical Supports and Crossbars
With a square base established, you can begin building the vertical skeleton of the shelving unit. Insert the main vertical poles or side panels into the base connectors, ensuring they are oriented correctly according to the manual’s diagrams. Pay close attention to any pre-drilled holes for shelf pins or back panels, making sure they all face the correct direction before securing them.
As you raise the structure, attach the horizontal crossbars, back braces, or tension wires that provide lateral stability. Depending on the specific design of your modular shelving, you will experience different types of assembly feedback. For metal snap-together systems, listen for a distinct, secure “click” that confirms the joint is locked. For wood-composite systems utilizing dowels and cam locks, ensure the panels fit completely flush against each other with no visible gaps before rotating the cam locks to secure them. If a joint feels tight or stubborn, use your rubber mallet to tap it gently into place, but never force a piece that clearly does not align, as this indicates a potential orientation error.
Step 3: Add the Shelving Tiers
Once the main vertical supports are securely in place, you can begin installing the individual shelf boards. Working systematically from the bottom tier upward, slide or rest each shelf onto its designated support pins, brackets, or horizontal frame rails. Installing the lower shelves first keeps the unit’s center of gravity low during assembly, reducing the risk of the frame tipping over while you work.
Use your spirit level to check each shelf both from left to right and front to back as you install them. If a shelf is not level, verify that the support pins or brackets are inserted into the corresponding holes on all sides. Continue to tighten the locking mechanisms or screws progressively, adhering to the “finger-tight until the end” rule. Keeping some play in the joints allows the frame to flex slightly and settle naturally into a perfectly square shape under its own weight.
Step 4: Secure the Top Tier and Finalize the Frame
Complete the physical structure of the shelving unit by attaching the top panel, upper vertical caps, or any decorative crown molding. This top piece binds the vertical supports together, locking the entire upper frame into a cohesive unit. Perform a final visual inspection of the entire structure from a distance to ensure it does not lean or appear skewed.
Once you are satisfied that the unit is completely square, plumb, and level, go back and systematically tighten every screw, bolt, and cam lock from the bottom up. Follow the manufacturer’s torque guidelines, tightening fasteners until they are snug and secure. Avoid over-tightening, especially when dealing with particleboard or medium-density fibreboard (MDF), as excessive force can strip the wood fibers and permanently weaken the joint.
Step 5: Wall Anchoring and Anti-Tip Safety
Safety is the most critical aspect of assembling any tall shelving unit. Any modular shelving system that exceeds a height of 75 centimeters—or a lower threshold if specified by the manufacturer—must be securely anchored to the wall to prevent accidental tipping. This is particularly important if the unit will hold heavy items or if it is installed in an environment where it might be bumped.
Before mounting the anchors, identify the construction material of the wall behind your shelving. In Singapore, most residential walls are either solid concrete, structural brick (common in HDB flats), or gypsum drywall partitions (frequently found in newer condominiums or office rooms). Solid concrete walls require masonry wall plugs and robust concrete screws, which require a hammer drill to install. Drywall partitions, on the other hand, require specialized hollow-wall anchors, such as toggle bolts or threaded dry-wall anchors, to distribute the weight safely across the plasterboard.
Align the shelving unit in its final position, mark the anchor bracket holes on the wall, and temporarily slide the unit away to drill the holes. Insert the appropriate anchors for your wall type, return the shelving unit to its position, and secure the anti-tip straps or brackets tightly to both the wall and the frame of the shelving. If you are unsure of your wall material, if the wall feels crumbly when drilling, or if you do not have the appropriate tools, stop immediately and consult a qualified local handyman or professional installer to complete the anchoring process.
Post-Assembly Verification and Safe Loading Practices
Before placing any items on your newly assembled modular shelving, you must verify its physical stability. Perform a gentle “shake test” by placing your hands on the mid-section of the frame and applying light pressure to check for lateral wobble or racking. If the unit sways significantly, re-check the tightness of all structural fasteners and ensure the back diagonal brace wires or panels are installed correctly.
Next, place your spirit level on the bottom and middle shelves to check for levelness. If your floor is slightly uneven, use the adjustable leveling feet on the base of the unit to compensate, turning them clockwise or counter-clockwise until the spirit level’s bubble is perfectly centered and all feet make firm contact with the floor. If your shelving unit does not feature built-in leveling feet, place rigid, non-slip plastic shims beneath the base corners to stabilize the unit, avoiding soft materials like folded cardboard or felt which compress over time.
When you are ready to load your shelves, always follow proper weight distribution principles to maintain structural balance. Place your heaviest items, such as large books, storage bins, or heavy appliances, on the lowest shelves to keep the center of gravity as low as possible. Lighter decorative items, files, and smaller objects should be reserved for the upper tiers.
Always check the manufacturer’s manual or product labels to identify the maximum load capacity per shelf and the total weight limit for the entire unit. Never exceed these specified limits, and do not make assumptions about load capacity based solely on the thickness of the shelves. Distribute the weight evenly across the width of each shelf rather than concentrating heavy loads in the center, which can cause the panels to sag and eventually crack.
Common Beginner Mistakes and How to Avoid Them
One of the most frequent errors beginners make is fully tightening all screws and fasteners too early in the assembly process. Locking the fasteners down immediately prevents the frame from shifting, which often makes it impossible to align the pre-drilled holes of subsequent shelves or top panels. Always keep all screws finger-tight until the entire structure is fully assembled, and only perform the final tightening once you have verified that the unit is square.
Another common mistake is forcing misaligned parts together. If a wooden panel, metal post, or connector does not fit smoothly, do not force it or strike it hard with a hammer, as this can easily split engineered wood, snap dowels, or strip metal threads. Instead, take a step back and check the orientation of the pieces; it is highly likely that a panel is upside down, backwards, or swapped with a similar-looking component.
Ignoring the spirit level is a shortcut that often leads to long-term structural issues. Even if a shelving unit looks straight to the naked eye, a minor tilt of just a few millimeters will place continuous, uneven stress on the joints once the shelves are loaded. This constant strain can cause fasteners to pull out of the wood or cause the entire frame to warp over time. Always use a spirit level at every stage of the build.
Finally, skipping the installation of wall anchors because the unit feels heavy and stable is a major safety hazard. A freestanding shelving unit may feel secure when empty, but once it is loaded with items, its center of gravity shifts upward, making it highly susceptible to tipping forward if pulled or bumped. Installing the provided anti-tip hardware is a quick, non-negotiable step that ensures your home remains safe.
Frequently Asked Questions (FAQ)
Can I assemble modular shelving on uneven floors?
Yes, you can safely assemble and position modular shelving on uneven floors, provided the unit is equipped with adjustable leveling feet. To do this, place the assembled shelving in its final location and place a spirit level on the bottom shelf. Gradually turn the adjustable leveling feet on the low side of the floor until the spirit level’s bubble is centered and the unit no longer rocks when gently pushed. If your shelving system does not have adjustable feet, you can slide rigid, non-slip plastic shims under the low corners of the base; avoid using soft materials like cardboard, wood scraps, or felt pads, as these will compress under load and cause the unit to become unstable over time.
Do I need a power drill for all modular shelving units?
No, you do not need a power drill for the freestanding assembly of most modular shelving units. In fact, using a power drill on the main frame can easily damage the furniture, as the high speed and torque can strip pre-drilled screw holes in particleboard or crack plastic modular connectors. Hand tools like a manual Phillips-head screwdriver and an Allen key allow for precise control and prevent over-tightening. A power drill is generally only required during the final safety stage to drill pilot holes into concrete, brick, or drywall for mounting the anti-tip wall anchors.
Community discussion
Share your experience or ask a question. Comments are reviewed before publication.