
Setting up a dedicated storage zone for school bags in a compact entryway helps streamline morning routines and keeps hallways clear. A modular shelving unit offers the flexibility to adapt to growing needs and tight spaces. By choosing a modular school bag rack, you can customize shelf heights, add hooks, and adjust the layout as your storage needs change over time. This guide walks you through measuring your space, assembling the unit safely, and configuring it for optimal daily use.
Assess Your Entryway Space and Rack Requirements
Before purchasing or assembling your modular school bag rack, it is essential to measure the intended area carefully. Use a metal tape measure to record the available width, depth, and height of the space. Be sure to account for baseboards, light switches, electrical outlets, and the swing radius of nearby doors. A rack that is even slightly too deep can obstruct a door from opening fully, creating a daily inconvenience in a high-traffic zone.
Evaluating the daily traffic flow through your entryway is crucial for maintaining a functional home. The entryway is a transition point where family members rush in and out, often carrying heavy items. To prevent bottlenecks, ensure there is enough clearance for at least one person to stand comfortably in front of the rack while another passes by. In tight hallways or compact apartments, a slim-profile rack with a depth of 30 to 40 centimeters is often the most practical choice.
Products mentioned in this guide
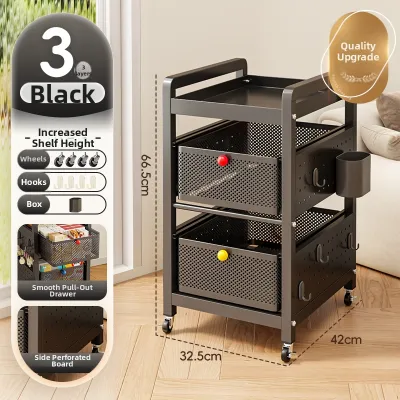
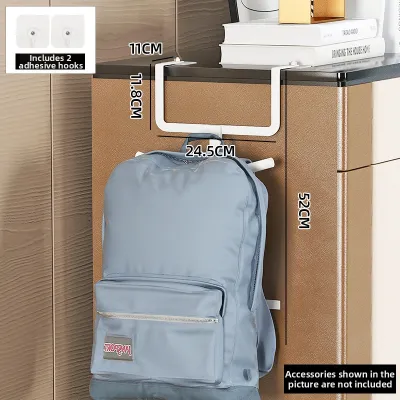
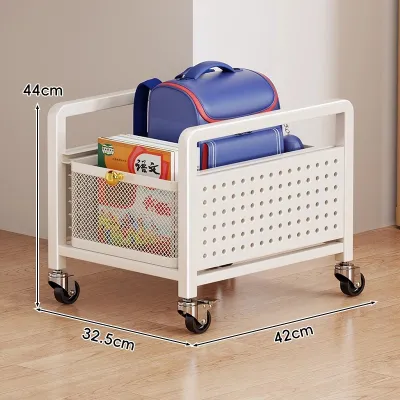
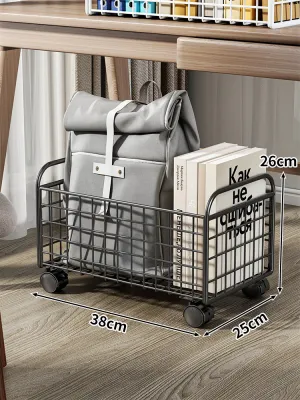
Prices are valid at publication and may change. Please refer to the product page for the latest price.
Next, calculate your specific storage capacity requirements based on your family’s daily gear. Count the number of school bags, backpacks, sports bags, and tuition bags that need a dedicated home. Do not forget to account for secondary items such as shoes, water bottles, umbrellas, hats, and keys. Knowing exactly what needs to be stored helps you determine the number of shelves, hooks, and bins your modular configuration will require.
Gather Tools and Prepare the Assembly Area
Having the right tools on hand before you begin makes the assembly process much smoother and prevents damage to the components. While many modular kits include basic tools like an Allen key, you will often need a few standard household tools. Keep a Phillips-head screwdriver, a rubber mallet, and a spirit level nearby to ensure a secure and level build. A rubber mallet is particularly useful for tapping interlocking joints together without scratching the finish.

Protecting your entryway floor during assembly is an important step that is easily overlooked. Hardwood, laminate, and tile floors can easily be scratched or dented by metal frames or wooden panels during the build process. Lay down a large protective mat, an old blanket, or flatten the cardboard packaging box to create a soft, clean working surface. This also helps keep small screws and dowels from rolling away.
Before joining any pieces, unpack all components and lay them out systematically. Group similar hardware items, such as screws, brackets, and dowels, into small containers or onto your protective mat. Cross-reference every part with the manufacturer’s inventory checklist to ensure nothing is missing. Identifying a missing screw or panel before you start is much better than discovering it halfway through the assembly.
Step-by-Step Assembly of the Modular Shelving Unit
Always begin the assembly process by building the base or bottom tier of the modular rack. This establishes a stable and level foundation that supports the weight of the entire structure. If your modular unit comes with adjustable leveling feet, screw them in fully at this stage. A solid, level base prevents the rack from leaning or wobbling as you add higher tiers.
Once the base is secure, systematically connect the vertical supports and horizontal shelves. Work your way from the bottom up, ensuring that each joint is properly aligned before tightening the hardware. When using screws or bolts, tighten them by hand until they are snug, but avoid over-tightening. Over-tightening can strip the pre-drilled threads in wooden panels or bend metal frames, compromising the structural integrity of the unit.
Use a spirit level at each major stage of the build to check for plumb and level alignment. Place the level on the bottom shelf, then on the vertical supports, and finally on the upper shelves as you add them. If you notice any misalignment, address it immediately by adjusting the leveling feet or slightly loosening and retightening the joints. Correcting alignment early prevents the rack from twisting or leaning.
After the main frame is assembled, attach any structural add-ons or stability components. This includes back braces, crossbars, or side panels that are designed to prevent lateral swaying. Even if these parts seem optional, they play a critical role in distributing weight and keeping the rack rigid under heavy loads. Follow the manufacturer’s instructions carefully to ensure these braces are installed in the correct orientation.
Configure the Shelves for School Bags and Accessories
One of the greatest advantages of a modular school bag rack is the ability to customize the layout to fit your specific needs. Start by adjusting the shelf heights to accommodate the largest backpacks in your household. Measure the height of the bags when fully packed with books and lunchboxes. Leave at least 5 to 10 centimeters of clearance above each bag so children can easily lift and drop their bags without scraping their hands.
Integrate modular accessories to maximize the efficiency of your storage station. Install hooks on the sides of the rack or on dedicated hanging rails to hold lightweight items like school hats, lanyards, raincoats, or empty lunch bags. Ensure these hooks are mounted at an accessible height for your children so they can hang their items independently. You can also add small modular bins or baskets on a middle shelf to hold keys, bus cards, and spare stationery.
To maintain a low center of gravity and ensure the stability of the rack, always place the heaviest items on the lower shelves. Heavy school backpacks filled with textbooks should sit on the bottom tier or the lowest adjustable shelf. This weight distribution keeps the unit grounded and significantly reduces the risk of tipping. Reserve the upper shelves for lighter items, such as hats, gloves, or decorative storage boxes.
Secure the Rack and Perform Safety Checks
Safety is a top priority when setting up furniture in a high-traffic entryway, especially in households with young children or pets. Tall, narrow, or heavily loaded racks can easily tip over if a child climbs on them or pulls on a heavy bag. Evaluate your wall type—whether it is drywall, masonry, or concrete—and install the appropriate anti-tip wall anchors provided by the manufacturer. Securing the rack to the wall is an essential step that should never be skipped.
Once the rack is fully assembled and anchored, perform a physical stability test. Gently apply pressure to the top and sides of the unit, pushing it from different angles to check for any wobbling or swaying. The rack should feel solid and firmly anchored to both the floor and the wall. If you detect any movement, inspect the wall anchors and tighten all connection points until the unit is completely stable.
Next, carefully inspect the entire unit for potential safety hazards. Run your hands along the edges, corners, and joints to check for exposed sharp edges, protruding screws, or pinch points. Tighten any loose hardware until it sits flush with the surface, and apply protective plastic caps over exposed bolt heads if they were included in your kit. This prevents clothing from snagging and protects hands from scratches.
Finally, review the manufacturer’s specified weight limits for individual shelves and the overall unit. Do not exceed these limits, as overloading can cause shelves to sag, joints to fail, or the entire rack to collapse over time. If your children’s school bags are exceptionally heavy, consider distributing the load across multiple lower shelves rather than stacking them all on a single level.
Organize and Maintain Your Entryway Bag Station
To keep your entryway organized and clutter-free, establish clear family rules for using the new bag station. Assign a specific shelf, cubby, or hook to each household member so everyone knows exactly where their belongings go. Children are much more likely to maintain this routine when they have a designated, easily accessible spot. You can use simple labels, name tags, or color-coded bins to make the system clear and engaging.
Entryway furniture is subjected to daily wear, dust, and moisture from wet bags or shoes. To keep your modular rack in excellent condition, schedule a quick maintenance check every few months. Inspect the hardware and tighten any screws or bolts that may have loosened from daily use. Wipe down the surfaces with a damp cloth, following the manufacturer’s care instructions for wood, metal, or plastic to prevent moisture damage or rust.
The beauty of a modular system is its ability to evolve alongside your family’s changing needs. At the start of a new school term or as your children grow, take the time to re-evaluate the configuration of the rack. You may need to raise a shelf to accommodate a larger backpack, add more hooks for sports gear, or introduce extra shoe trays. This adaptability ensures your school bag rack remains a functional asset for years to come.
Frequently Asked Questions (FAQ)
Can I assemble a modular rack without drilling into the wall?
Yes, many modular racks are designed to stand independently without being drilled into the wall. However, freestanding units have strict height and weight limitations to prevent tipping. If you choose not to anchor the rack, keep the configuration low to the ground and place the heaviest items on the bottom shelf to maintain a low center of gravity.
If the manufacturer’s instructions explicitly mandate wall anchoring for safety, skipping this step can create a serious tipping hazard and may void the product warranty. For tall, narrow, or top-heavy racks, wall anchoring is highly recommended to ensure a safe home environment, especially in households with children or pets.
How do I prevent the rack from scratching my entryway floor?
To protect your entryway floor from scratches, scuffs, and dents, apply adhesive felt pads or rubber caps to the bottom of the rack’s legs or vertical supports. These pads cushion the contact points and make it easier to slide the unit slightly if needed without damaging the surface.
Another effective solution is placing a durable entryway rug or a dedicated utility mat under the rack. This not only distributes the weight of the unit and its contents more evenly but also helps catch dirt, mud, and moisture from shoes and school bags before they reach your floor.
Community discussion
Share your experience or ask a question. Comments are reviewed before publication.