
Modular shelving systems offer an exceptionally versatile way to maximize vertical storage space, especially in space-conscious homes where floor area is at a premium. Unlike fixed furniture, these adaptable units can be tailored to fit awkward corners, accommodate changing storage needs, and scale up or down over time. However, a successful build requires more than just unpacking boxes and connecting parts. Proper assembly ensures your storage unit remains structurally sound, perfectly level, and safe for daily use. By taking a systematic approach to planning, assembling, and securing your shelving, you can create a highly functional storage solution that stands the test of time.
Plan Your Space and Shelf Configuration Before Assembly
Before unboxing any components, you must thoroughly evaluate the physical space where your shelving unit will stand. In many apartments, structural features like skirting boards, wall trunking, electrical outlets, and light switches can interfere with how a shelf sits against the wall. Use a metal measuring tape to record the absolute width, depth, and vertical clearance of your chosen spot. Remember to account for overhead obstructions such as ceiling beams, light fixtures, or wall-mounted air conditioning units. If your shelving is going into a tight corner or alcove, measure the space at multiple heights, as walls in residential buildings are rarely perfectly plumb.
Another critical logistical factor is ensuring you can physically transport the components to your assembly area. Flat-packed shelving cartons can be incredibly heavy and awkwardly long. Measure your doorway widths, hallway clearances, and even the interior dimensions of your residential lift to ensure the packages can be safely brought inside. If you are planning a high-capacity steel boltless rack, the individual uprights may not bend around tight corridor corners, making pre-purchase spatial checks essential.
Products mentioned in this guide
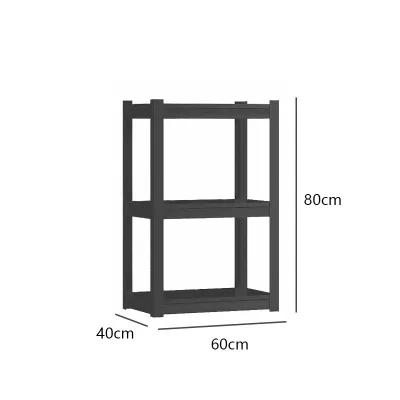
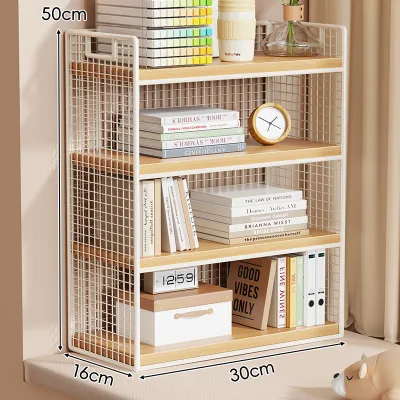
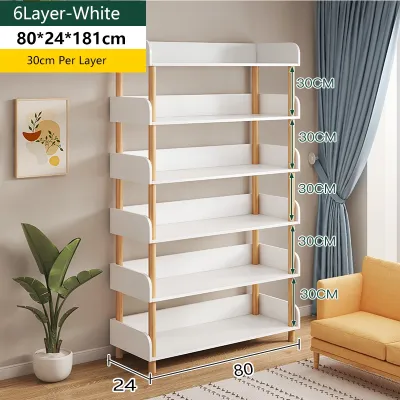
Prices are valid at publication and may change. Please refer to the product page for the latest price.
With your measurements in hand, sketch a basic layout of your desired configuration on paper. If your modular system offers varying shelf depths or widths, design a layout that places the widest and deepest modules at the very bottom. A wider base tapering to narrower upper tiers naturally lowers the center of gravity, significantly improving the overall stability of the structure. This planning phase is also the time to decide on shelf spacing based on what you intend to store, ensuring you do not waste vertical space.
A smart load distribution strategy is vital for preventing structural failure. Plan to store your heaviest items—such as bulk household goods, heavy kitchen appliances, or toolboxes—on the lowest shelves. Lighter items, decorative pieces, or frequently accessed storage boxes should occupy the middle and upper tiers. This deliberate weight distribution keeps the unit grounded and reduces the risk of top-heavy tipping.
Finally, select an assembly workspace that is as close to the final placement location as possible. Moving a fully assembled, multi-tiered shelving unit through narrow corridors or past delicate furniture is incredibly challenging and increases the risk of scratching your walls or damaging the shelf joints. Ensure there is at least one meter of open clearance around your assembly site so you can maneuver long upright poles and heavy shelves safely without hitting surrounding items.
Gather the Right Tools and Verify Your Components
Having the correct tools on hand before you begin prevents frustrating mid-build interruptions. While many modular kits claim to require no tools, a few basic household implements will make the process faster and much safer. Gather a high-quality rubber mallet, which is essential for tapping boltless joints securely into place without denting the metal or chipping the paint. You will also need a spirit level to verify alignment, a measuring tape for precise shelf spacing, and a sturdy step ladder if you are building a tall unit. If your system uses threaded fasteners, keep a set of hex keys or an adjustable wrench nearby.

Once your tools are ready, unbox all components and organize them systematically on the floor. Group identical parts together: vertical uprights, horizontal support beams, shelf panels, locking clips, joint connectors, and wall-mounting brackets. Locate the manufacturer’s instruction manual and cross-reference every item with the included parts list. Verifying the quantities of small fasteners, safety pins, or plastic clips now ensures you will not find yourself short of a critical structural component halfway through the assembly.
During this inventory check, inspect the condition of each part. Look for bent metal tabs, cracked plastic sleeves, or splintered wooden panels that may have occurred during transit. If your system features wood-based shelves, check the laminate finish or veneer to ensure there are no exposed edges, which can absorb moisture in humid environments. If any structural component is damaged, pause the build and contact the manufacturer for a replacement rather than attempting to force a compromised part into the frame.
Prepare your workspace by clearing the floor of any debris, toys, or dust. Lay down the empty cardboard packaging boxes or a soft moving blanket to cover the floor area. This protective layer is highly recommended for protecting delicate flooring materials—such as vinyl, laminate, or polished parquet—from being scratched by heavy metal uprights or dropped tools during the assembly process.
Assemble the Frame and Shelves Step-by-Step
Establish a Level Base and Vertical Supports
The safety and structural integrity of your entire shelving unit depend heavily on the quality of its foundation. Begin by attaching the protective plastic caps, rubber feet, or adjustable leveling feet to the very bottom of your vertical uprights. These feet serve a dual purpose: they prevent the hard metal or wooden edges of the uprights from gouging your flooring, and they distribute the weight of the loaded shelf more evenly across the floor surface.
Next, construct the bottom-most frame of the unit. Connect the lowest set of horizontal beams or side supports to the vertical uprights, positioning them as close to the floor as the system design allows. If you are assembling a boltless steel rack, align the rivets on the horizontal beams with the teardrop slots on the uprights, then tap them down firmly with your rubber mallet until they are fully seated at the bottom of the slots. For bolted systems, thread the fasteners in by hand, but do not tighten them completely yet.
Once the base rectangle is formed, place your spirit level across the horizontal beams. Check the level in two directions: from left to right, and from front to back. Residential floors, particularly near balcony doors, wet kitchen areas, or in older buildings, are frequently slightly sloped. If your modular system features adjustable leveling feet, thread them in or out to compensate for any floor unevenness until the spirit level bubble sits perfectly in the center. If your system lacks adjustable feet, you may need to relocate the unit to a flatter surface, as an unlevel base will cause the entire frame to lean, putting dangerous lateral stress on the joints as you build upward.
With the base level and stable, proceed to insert and secure the remaining vertical supports or upright extensions. Ensure that these vertical poles are completely plumb—meaning perfectly straight up and down. Use your spirit level against the side of each upright to verify this. If the uprights are leaning even slightly, the shelf slots will not align correctly, making it incredibly difficult to install the upper shelves. Secure any joint connectors or splicing sleeves according to the manufacturer’s directions, ensuring they are locked tight before moving on to the horizontal elements.
Install Shelves, Crossbars, and Bracing
With the vertical skeleton of your shelf standing true, you can begin installing the remaining horizontal shelf supports. Refer to your initial sketch and measure up from the base to mark the desired heights for each shelf level. Ensure that you install the shelf support brackets or clips at identical heights on all four uprights. If you are using a clip-on wire shelving system, snap the plastic split sleeves onto the designated groove on each pole, ensuring the “top” arrow on the sleeve points upward, then slide the shelf collar down firmly over the sleeves until they lock.
If your modular kit includes structural reinforcing elements—such as diagonal cross-bracing, back tension wires, or side support panels—install them as you build upward. These components are not merely cosmetic; they are engineered to resist lateral shear forces, which prevent the shelving unit from swaying or folding sideways when loaded. Skipping the installation of a diagonal brace drastically reduces the load capacity of the unit and can lead to sudden structural failure under weight.
As you place each shelf panel onto its horizontal supports, ensure it is fully seated and flush. For metal wire shelves, a firm downward push on the corners is usually enough to wedge them securely onto their plastic sleeves. For heavy-duty industrial racks, you may need to tap the shelf boards gently with your mallet to ensure they sit flat within the recessed lip of the horizontal beams. Double-check every single connection point to confirm that no clips have slipped or unhooked during the process.
Never attempt to force a component into place if it does not align naturally. If a shelf support or crossbar is resisting assembly, it is a clear warning sign that either the base frame is out of level, the vertical uprights are twisted, or the poles are not perfectly parallel. Forcing a misaligned part can bend the metal tabs, strip the screw threads, or crack the joints, permanently weakening the system. Instead, loosen the nearest fasteners slightly, realign the frame using your spirit level, tap the components gently into alignment, and then re-tighten.
Configure and Customize Your Modular Storage
One of the greatest advantages of a modular system is the ability to customize the layout to match your specific storage needs. Take the time to measure the height of the items you plan to store, such as plastic storage tubs, luggage, kitchen appliances, or file folders. Adjust your shelf heights so that there is a comfortable 3 to 5 centimeter clearance above the tallest item on each level. This small gap allows you to slide items in and out easily without scraping the shelf above or hurting your hands.
You can further enhance the functionality of your unit by integrating compatible modular accessories. Many systems support add-ons like pull-out wire baskets, drawer inserts, vertical shelf dividers, or side-mounted hanging hooks for tools and bags. If you are considering adding caster wheels to the base of your unit for mobility, consult the manufacturer’s specifications first. Adding wheels significantly alters the weight dynamics of the shelf, usually reducing the maximum safe load capacity by half, and makes the unit more prone to tipping if moved while fully loaded.
Over time, your storage requirements will inevitably change, and you may need to reconfigure your modular shelf. To do this safely, always begin by completely unloading every item from the unit. Attempting to adjust shelf heights while items are still on other levels can cause the frame to shift unexpectedly, leading to collapse or injury. Always work from the top down when removing shelves, ensuring that the heavy base frame remains intact to support the vertical uprights while you make your adjustments.
For optimal daily use, organize your items both visually and functionally. Group smaller, loose items into matching opaque or clear plastic storage bins; this not only looks cleaner but also prevents small objects from falling through wire grates or slipping off the edges of flat shelves. Labeling these bins makes retrieving items effortless. Keep frequently used items at waist-to-chest height to minimize bending or stretching, and reserve the very top shelves for lightweight, seasonal items that you only need to access occasionally.
Perform Safety Checks and Verify Stability
Once your modular shelving unit is fully assembled and configured, you must conduct a thorough safety inspection before loading it with your belongings. Begin with a physical stability check. Stand in front of the empty unit, grasp the uprights at chest height, and give the shelf a firm but gentle shake from side to side and front to back. The unit should feel rigid and grounded. If you detect any wobbling, joint play, or clicking sounds, immediately trace the issue. Check for loose bolts, unseated rivets, uneven leveling feet, or missing safety pins, and correct these faults before proceeding.
Next, locate the manufacturer’s documentation to verify the maximum weight capacity limits. It is critical to understand that these limits are always specified under the assumption of a “uniformly distributed load.” This means weight must be spread evenly across the entire surface of each shelf, rather than concentrated in one single spot. Placing a heavy object right in the middle of a shelf can cause the panel to bow or the support brackets to bend, even if the object’s weight is technically below the maximum limit. Never exceed the stated per-shelf limit or the cumulative weight capacity for the entire shelving unit.
Wall-anchoring is a vital safety measure that should never be overlooked. Any shelving unit that stands taller than 1.2 meters, has a narrow depth-to-height ratio, is loaded with heavy items on the upper tiers, or is located in a high-traffic area must be securely anchored to the wall. This precaution is especially critical in households with young children, pets, or elderly family members. Children often view shelves as climbing frames, and even a moderately heavy shelf can cause catastrophic, life-threatening injuries if it tips over.
To anchor your shelf correctly, you must first identify your wall material, as different walls require specific hardware. Most residential homes in Singapore feature solid concrete or masonry walls, which require heavy-duty plastic wall plugs or expansion anchors paired with a hammer drill and masonry drill bit. If you are mounting to a drywall partition wall, you must use specialized toggle bolts or hollow-wall anchors, and ideally, screw the brackets directly into the vertical timber or metal wall studs behind the plasterboard. If you are unsure of your wall composition, or if you do not own the heavy-duty tools required to drill into solid concrete, always consult a qualified local handyman or professional installation service to ensure the anchor is secure.
Frequently Asked Questions (FAQ)
Can I add more shelves or tiers to my modular system later?
Most modular shelving systems are designed for future expansion, allowing you to purchase and install additional horizontal shelves within the height of your existing vertical poles. Before doing so, always verify that the total weight of all shelves combined does not exceed the manufacturer’s maximum load capacity for the entire unit. If you wish to extend the vertical height by joining extra upright poles, check the manufacturer’s guidelines to confirm if the system is engineered for vertical stacking. Extending the height shifts the center of gravity upward, which drastically increases the risk of tipping and makes securing the unit to the wall with heavy-duty anchors absolutely mandatory.
Do I need to anchor a modular shelf to the wall?
While low, wide shelving units (under 1.2 meters tall) that are heavily loaded at the bottom may stand safely on their own, wall-anchoring is highly recommended for almost all other configurations. You should always anchor your shelf if it is tall, narrow, top-heavy, or placed on a carpeted or slightly uneven floor. Wall-anchoring is non-negotiable in homes with young children or climbing pets, as they can easily pull a loaded unit down onto themselves. Taking a few minutes to install a simple anti-tip strap or wall bracket provides peace of mind and prevents serious household accidents.
Community discussion
Share your experience or ask a question. Comments are reviewed before publication.