
Assembling a modular open shelf cabinet transforms a blank wall into an organized, functional storage hub. This hands-on project allows you to tailor your storage to your exact spatial needs, but a successful build requires a methodical approach from the very first step. By understanding how to measure your space, prepare your tools, and systematically connect each component, you can construct a sturdy, professional-grade shelving system without paying for professional installation services.
Pre-Assembly Planning and Space Measurement
Before you unbox any components, you must thoroughly evaluate your physical environment. In Singapore, residential layouts like HDB flats or condominiums often feature specific architectural constraints. Measure the exact floor footprint and the vertical clearance of your designated wall space. Do not rely on visual estimates; use a metal measuring tape to record the width, depth, and height.
Remember to account for skirting boards, which can prevent the vertical frames of an open shelf cabinet from sitting flush against the wall. Check the location of power outlets, light switches, and wall-mounted air conditioning units to ensure your shelving does not block essential access or airflow.
Products mentioned in this guide
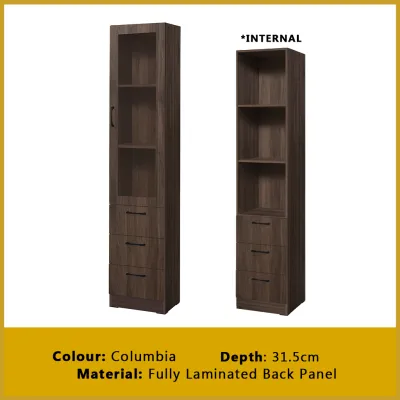
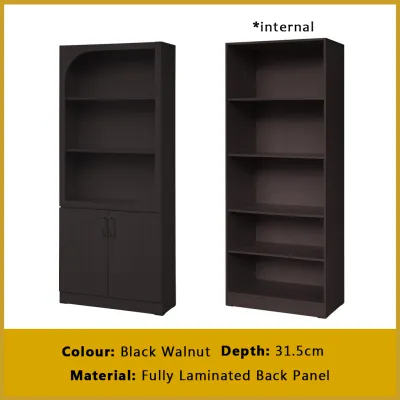
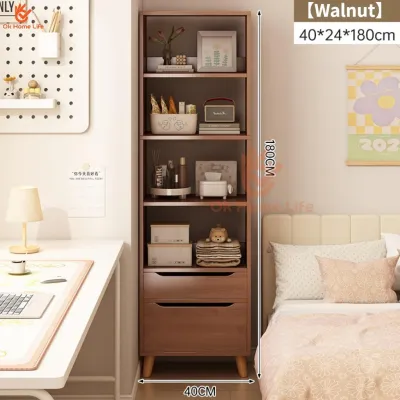

![[Bulky] Multi Purpose Open Wardrobe Shelves Storage Display Cabinet Drawer Bookshelf Shelve (FREE DELIVERY AND INSTALLATION)](https://img.lazcdn.com/g/p/7c6d15622200eb8a33c49f288f79a9ad.jpg_400x400q80.jpg_.webp)
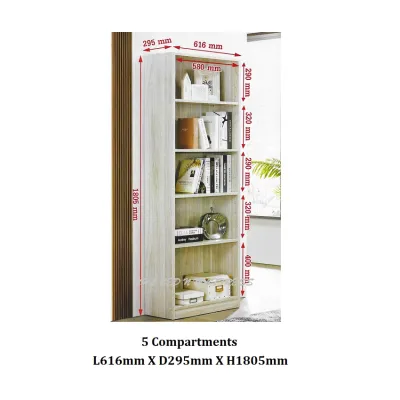
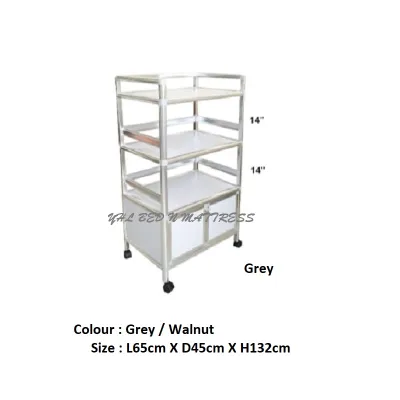
Prices are valid at publication and may change. Please refer to the product page for the latest price.
Another critical factor is lift and doorway access. Modular shelving kits often arrive in long, heavy flat-packs. Verify that the longest vertical posts or side panels can fit inside your building’s lift and pass through your front doorway without obstruction.
Next, examine the floor surface. Many floors, especially tiled or older parquet surfaces, are not perfectly level. An uneven floor places uneven stress on a modular frame, which can lead to joint failure or warping over time. Place a spirit level on the floor where the base will sit. If you detect a slope, plan to use plastic or wood furniture shims to level the base during assembly.
Finally, review the manufacturer’s weight capacity specifications. Different shelf materials and frame thicknesses support different loads. Plan your configuration based on what you intend to store. Heavy items, such as books, kitchen appliances, or storage bins filled with documents, must be positioned on the lowest shelves. Lighter items, like decorative pieces or small storage boxes, belong on the upper tiers. Never exceed the maximum load rating specified by the manufacturer, as overloading can cause structural collapse.
Essential Tools and Safety Preparations
Gathering the correct tools before you begin prevents interruptions and protects your new furniture from damage. While many modular open shelf cabinet kits include basic tools like a small hex key, relying solely on them can make the process tedious and physically demanding.

Keep these essential tools within arm’s reach:
- Rubber mallet: Crucial for tapping metal joints or wooden dowels into place without marring the finish.
- Spirit level: Essential for ensuring every vertical post is plumb and every horizontal shelf is perfectly level.
- Measuring tape: Used to verify frame squareness and shelf spacing.
- Screwdriver set or power drill: If using a power drill, adjust it to a low torque setting. High torque can easily strip screw holes, crack wooden panels, or bend thin metal frames.
- Allen keys (hex keys): Keep a set of high-quality keys on hand in case the included tool is uncomfortable to use or wears down.
Safety must remain a priority throughout the build. Wear heavy-duty work gloves to protect your hands from sharp metal edges, splinters from wooden components, or painful pinching hazards when interlocking frames.
Additionally, prepare your workspace by protecting your flooring. Clear a space that is at least twice the size of the fully assembled cabinet. Lay down the cardboard packaging from the shipping box or a soft moving blanket. This simple step prevents the cabinet pieces from scratching your floor and protects the finish of the shelving components during assembly. Always read the manufacturer’s instructions before starting, and if any step conflicts with general assembly practices, prioritize the manufacturer’s specific guidelines.
Step-by-Step Assembly Guide
Building a modular open shelf cabinet requires a logical, bottom-up approach. Attempting to assemble sections out of order can compromise the structural integrity of the frame and make alignment difficult.
Building the Base and Vertical Frames
The foundation of your open shelf cabinet dictates the stability of the entire structure. Begin by assembling the base plates, bottom feet, or leveling glides. Ensure these base components are aligned exactly as shown in the manufacturer’s diagram. If your kit includes adjustable leveling feet, screw them in halfway to allow for both upward and downward adjustments later.
Once the base is secure, insert the first set of vertical posts or side frames. If you are working alone, lean the vertical pieces against a wall or have a second person hold them steady to prevent them from tipping over and damaging your floor or bending the joint connectors. Use your spirit level to check that these uprights are plumb—meaning perfectly vertical—in both directions (front-to-back and side-to-side).
A crucial tip during this initial stage is to avoid tightening the structural bolts completely. Leave them slightly loose, with about a turn or two of play. Keeping the fasteners semi-loose allows the frame to flex slightly, making it much easier to align and insert the upper sections and horizontal shelves. You will tighten everything systematically once the entire structure is squared.
Installing Shelves and Cross-Bracing
With the vertical uprights standing, you can begin installing the horizontal shelves. Always start from the bottom tier and work your way upward. Installing the lower shelves first lowers the unit’s center of gravity, making the partially built structure much more stable and less likely to tip over while you work on the upper sections.
Slide or bolt the shelves into their designated slots, brackets, or support pins. Ensure each shelf is fully seated and level. If a shelf requires tapping to lock into a slot, use your rubber mallet gently, placing a scrap piece of wood or cardboard over the surface to distribute the force and protect the finish.
Once the primary shelves are in place, install any stabilization components included in your modular kit. This may include diagonal cross-braces, tension wires, or solid back panels. Do not skip this step, even if you prefer an entirely open look; cross-bracing is vital for preventing lateral swaying, racking, and eventual structural failure under load.
After all shelves and braces are correctly positioned, perform a squareness check. Measure diagonally from the top-left corner to the bottom-right corner of a bay, and then from the top-right to the bottom-left. If the two measurements are identical, your frame is perfectly square. Once squared, systematically tighten all fasteners. Work in a cross-pattern—such as bottom-left, top-right, bottom-right, top-left—to distribute the tension evenly across the joints.
Configuring and Customizing Your Shelving Layout
The primary benefit of a modular open shelf cabinet is its adaptability. Once the main structure is secure, you can configure the interior layout to match your specific storage and aesthetic goals.
Start by adjusting the shelf heights. Measure the tallest items you plan to store, such as large art books, storage baskets, or kitchen appliances, and position the shelves to accommodate them with a few centimeters of clearance. Keep structural balance in mind: always place your heaviest items on the bottom shelves. Placing heavy storage boxes or appliances near the top makes the cabinet top-heavy, significantly increasing the risk of tipping.
If your modular system is designed for expansion, you can link multiple units side-by-side to create a continuous wall of storage. When expanding, position the units adjacent to each other and use the manufacturer-provided connector bolts or joining clips to lock the vertical frames together. This physical connection prevents the units from drifting apart and increases the overall lateral stability of the entire assembly.
You can also integrate optional accessories to enhance functionality. Many modular systems offer compatible drawer inserts, dividers, shelf liners, or hanging rails. Before purchasing or installing these add-ons, verify that their dimensions and mounting mechanisms match your specific cabinet model. Incorrectly sized accessories can strain the shelf supports or prevent drawers from sliding smoothly.
Securing, Stabilizing, and Final Inspection
The final stage of assembly focuses on long-term safety and structural integrity. An open shelf cabinet can become a significant hazard if it is not anchored properly, particularly in dynamic household environments.
An absolute priority is anti-tip prevention. If your modular cabinet exceeds the manufacturer’s recommended freestanding height, or if you live in a household with children or pets, you must anchor the unit to the wall. Children may attempt to climb shelves, and pets can jump on upper tiers, creating a high risk of tip-over accidents.
Identify the wall material in your home before drilling. For concrete or brick walls common in Singapore, use a masonry drill bit and high-quality plastic wall plugs (anchors) with corresponding screws. For drywall partitions, locate the wooden studs behind the wall and screw directly into them, or use heavy-duty hollow-wall anchors. Secure the anti-tip brackets tightly to both the cabinet frame and the wall.
Next, conduct a final level check. Place your spirit level on multiple shelves, checking both the width and depth axes. If you detect any wobbling or sloping, adjust the leveling feet at the base. If your cabinet does not have adjustable feet, slide thin, non-slip furniture shims under the low points until the unit is completely stable and level.
Conclude your project with a thorough visual and physical inspection. Run your hands carefully along the joints to ensure there are no sharp metal edges, splinters, or protruding screw heads. Check that all bolts are flush with the frame. Finally, give the cabinet a gentle push from the side and the front. The structure should feel rigid, with no noticeable sway, creaking, or flexing. If you detect any movement, re-check the tightness of the structural fasteners and the wall anchors before placing any items on the shelves.
Community discussion
Share your experience or ask a question. Comments are reviewed before publication.