
Assembling a DIY modular mobile storage shelf allows you to maximize vertical space and adapt your storage to changing household needs. This flexible furniture solution is particularly valuable in space-constrained urban environments, such as Singapore apartments and HDB flats, where utility rooms, kitchens, and home offices require highly efficient organization. By constructing the unit systematically from the ground up, you can ensure the frame remains stable, level, and capable of safely transporting your items.
Success with a mobile storage shelf relies on precise structural alignment and proper weight distribution. Unlike static shelving, a mobile unit must withstand lateral forces when rolled across different flooring materials or over door thresholds. Taking the time to understand the assembly logic, verify component integrity, and configure the shelf heights correctly prevents structural failure and keeps your belongings secure.
Preparation and Tool Checklist for Assembly
Before starting the assembly, clear a flat, clean workspace that is large enough to lay out all components. Working on a hard, unprotected floor can scratch both your floor tiles and the shelf’s protective finish, so lay down a large piece of cardboard or a soft blanket. Unbox the entire kit carefully and group identical parts together to make the inventory check straightforward.
Products mentioned in this guide
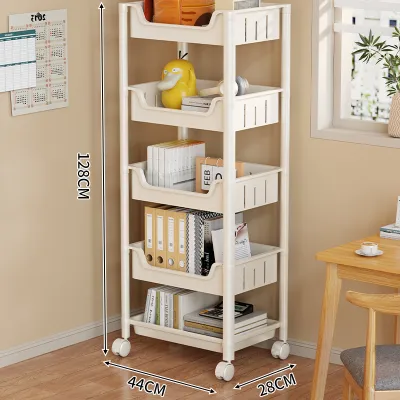
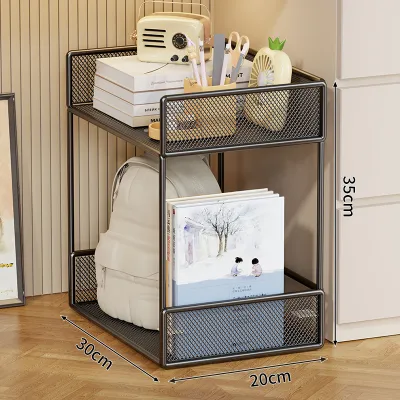
![Easyhome.sg [Ready To Use] Multi-Purpose Foldable Trolley Rack for Kitchen /Living Room / Movable Organizer Rack](https://img.lazcdn.com/g/p/2e145915412be90d6a8cb9392b05d8d3.png_400x400q80.png_.webp)
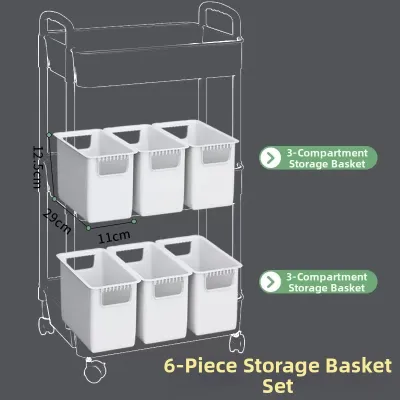
Prices are valid at publication and may change. Please refer to the product page for the latest price.
Verify that you have all the essential parts listed in the manufacturer’s instruction manual. A standard modular mobile shelf kit typically includes four vertical poles (often split into threaded segments), several wire or flat shelf panels, plastic slip sleeves or locking clips, and a set of four casters. Count each component precisely before starting, as a single missing slip sleeve or damaged caster stem will halt your progress.
Inspect each component thoroughly for any signs of transit damage. Check the threaded ends of the vertical poles to ensure they are not bent or stripped, and examine the corners of the shelf panels for warping or cracked welds. Inspect the caster wheels to ensure they rotate freely and that the mounting stems or plates are perfectly straight, as any defect here will cause the shelf to wobble or roll unevenly.
While many modular kits are designed for tool-free assembly, having a few basic household tools on hand makes the process much easier and safer. A rubber mallet is highly recommended for seating the shelves onto their locking sleeves without denting the metal or chipping the powder coating. Keep an adjustable wrench or the manufacturer-provided spanner nearby for securing threaded casters, along with a measuring tape to verify shelf spacing and a spirit level to ensure the entire structure is perfectly square.
Step-by-Step Assembly Guide
Constructing a mobile storage shelf requires a bottom-up approach to guarantee structural integrity and personal safety. Attempting to assemble the top tiers first or building the frame horizontally on the floor makes it incredibly difficult to align the joints properly, often resulting in a warped frame that is prone to tipping. Keep the manufacturer’s instruction manual open and visible throughout the process to verify the correct orientation of specific hardware, such as the directional arrow on plastic slip sleeves.

Attaching Casters to the Base
The foundation of any mobile shelving unit is its wheel base, which must be secured correctly before building upward. Most mobile kits include two different types of wheels: swivel casters that rotate 360 degrees for easy steering, and fixed or non-swivel casters that roll only in a straight line. If your kit features this combination, place the swivel casters on the side you intend to push from to give you maximum steering control, or follow the manufacturer’s specific layout instructions.
Secure the casters to the bottom of the lower vertical poles according to the mounting style provided. For threaded stem casters, screw the stem into the threaded insert at the bottom of the pole by hand, then use an adjustable wrench to tighten the hex nut at the base of the stem until it is flush against the pole end. For friction-stem casters, push the stem firmly into the pole socket until it clicks into place; if resistance is met, tap the bottom of the wheel gently with a rubber mallet.
Before proceeding to build the rest of the frame, engage the locking brakes on all equipped caster wheels. This simple step stabilizes the base poles and prevents the unit from rolling away, sliding, or twisting as you apply downward pressure to install the upper shelf tiers. Working on a rolling base is highly unstable and can lead to misaligned joints or accidental injury if the frame slips out from under you.
Building the Vertical Frames and Shelf Tiers
With the caster wheels locked securely, stand the four bottom poles upright to begin building the vertical frame. If your vertical poles come in multiple threaded sections, screw the lower and upper sections together tightly, ensuring the joints are flush and there is no cross-threading. Look closely at the poles to identify the double-groove markings, which typically appear at regular intervals (such as every 25 centimeters) to help you align the shelves evenly.
Snap the plastic slip sleeves or locking clips onto the vertical poles at your desired height for the bottom shelf, which should be positioned as low as possible to maintain a low center of gravity. Ensure the wider tapered end of each sleeve points downward, and slide them along the pole until you hear them click firmly into a groove. Verify that all four sleeves are positioned at the exact same height mark on each pole; an uneven bottom shelf will distort the entire vertical geometry of the unit.
Lower the first shelf panel over the top of the four poles, guiding the corner collars carefully over the plastic slip sleeves. Push the shelf down by hand until the collars wedge tightly over the sleeves, then use a rubber mallet to tap each corner gently directly over the collar. This action locks the tapered sleeve inside the shelf collar, creating a highly stable, friction-fit joint; avoid using a metal hammer, which can deform the collar or ruin the rust-resistant finish.
Place a spirit level across the shelf panel along both the width and depth axes to confirm it is perfectly level. If the bubble is off-center, tap the high corners down slightly or check if one of your slip sleeves has slipped out of its designated pole groove. Repeat this entire process for each subsequent shelf tier, maintaining consistent spacing and checking alignment at every level before moving upward.
Securing the Top Tier and Final Tightening
Installing the final top shelf or the included crossbars is critical because it ties the vertical poles together and locks the entire framework into a rigid, load-bearing structure. Slide the top shelf collars over the top of the poles, ensuring they seat fully onto their matching slip sleeves just like the lower tiers. If your kit includes decorative top caps or threaded finials, screw them into the exposed tops of the poles to prevent dust accumulation and protect against sharp metal edges.
Perform a comprehensive physical inspection of every joint, sleeve, bolt, and locking pin on the entire unit. Look closely at each shelf corner to ensure the plastic sleeves are fully wedged inside the collars and are not protruding unevenly from the bottom or top of the joint. If your modular system uses bolt-together brackets instead of slip sleeves, use your wrench to systematically check and tighten every connection.
When performing this final tightening pass, apply firm, steady pressure but avoid over-tightening the hardware. Stripping the threads on a caster socket or cracking a plastic slip sleeve by applying excessive force will permanently compromise the structural integrity of the shelf. If any plastic components feel brittle or show stress whitening, stop immediately and contact the manufacturer for replacement parts before loading any weight onto the shelf.
Configuring Shelf Heights and Layouts for Your Space
The primary benefit of a modular mobile shelf is its adaptability, allowing you to customize the layout to match your specific storage needs. When planning your shelf spacing, measure the heights of your largest items, such as storage boxes, kitchen appliances, or file organizers, and position the shelves to accommodate them with a few centimeters of clearance. Always place the largest and heaviest items on the lowest shelves to keep the center of gravity as low as possible, which dramatically improves stability when the unit is in motion.
Take advantage of add-on modular accessories to maximize the utility of your mobile storage shelf. Many systems support side hooks for hanging tools, pull-out wire baskets for smaller items, hanging rods for garments, or plastic shelf liners to prevent small objects from falling through wire grates. Ensure any accessories you install are rated for your specific shelf model and do not protrude so far that they catch on walls or furniture as you move the unit.
Before loading the shelf, measure its fully assembled exterior dimensions, including any protruding accessories, handles, or wide casters. Compare these measurements against the narrowest pathways in your home, such as standard doorway widths, hallway corners, and lift entryways if you plan to move the unit between rooms or floors. A mobile shelf that is too wide to pass through a standard 80-centimeter doorway loses its primary functional advantage and can damage door frames if forced through.
Post-Assembly Safety Checks and Maintenance
Once assembly is complete, perform a manual stability check by grabbing the middle shelves and giving the unit a gentle shake. The frame should feel rigid and move as a single cohesive unit without any excessive swaying, rattling, or independent movement from individual poles. If you detect any wobbling, it is usually a sign that one of the caster stems is not fully tightened, a shelf collar is not seated properly on its sleeve, or the floor surface itself is uneven.
Test the caster brakes on a flat surface by engaging the locking levers with your foot and attempting to push the unit. The brakes should hold the wheels firmly in place without slipping, sliding, or allowing the shelf to pivot. If the unit is parked on a smooth tile or laminate floor, verify that the locked rubber or polyurethane wheels provide enough grip to prevent the shelf from sliding when minor lateral force is applied.
Always locate and read the manufacturer’s weight capacity labels or product documentation rather than guessing how much load the shelf can support. Mobile shelves have two distinct weight ratings: static capacity (when parked) and dynamic capacity (when in motion), with the dynamic capacity always being significantly lower. Distribute weight evenly across the surface of each shelf rather than concentrating heavy items in the center, which can cause the wire or wood panels to sag over time.
In Singapore’s humid tropical climate, routine maintenance is essential to prevent rust and ensure the long-term mobility of your storage shelf. Inspect the metal joints and caster bearings every few months for signs of oxidation, and wipe down the frame with a dry or slightly damp microfiber cloth to remove dust and moisture. Periodically vacuum or clear the wheel tracks and caster axles of hair, lint, and dust buildup, which can bind the bearings and prevent the wheels from rolling smoothly.
Frequently Asked Questions (FAQ)
Can I add more tiers to my mobile shelf later?
Yes, many modular systems allow you to add extra shelves or extend the vertical poles using compatible manufacturer couplers. However, you must first verify that the pole diameter matches the new components exactly, as mixing brands or sizes will prevent the slip sleeves from locking. Never exceed the manufacturer’s specified maximum height or overall weight limit; adding height raises the unit’s center of gravity, which significantly increases the risk of the shelf tipping over when rolled.
How do I prevent a mobile shelf from tipping over when moving it?
To minimize tipping hazards, always organize the unit so that the heaviest items are stored on the bottom tier, keeping the overall center of gravity close to the ground. Before moving the shelf, inspect your path to ensure it is completely clear of thick rugs, electrical cords, floor transition strips, or debris that could suddenly stop the casters. When pushing the unit, place your hands on the middle of the vertical frame or use the designated push handle rather than pulling or pushing from the top shelf, and always engage the wheel locks as soon as the shelf reaches its destination.
Community discussion
Share your experience or ask a question. Comments are reviewed before publication.