
Assembling a modular desktop storage rack is an excellent way to reclaim valuable workspace, keep essential items within arm’s reach, and organize your daily workflow. Unlike fixed shelving units, modular systems offer the flexibility to customize shelf heights and configurations to suit your specific devices, books, and stationery. However, achieving a sturdy, level, and safe setup requires a methodical approach to assembly rather than rushing through the process.
By taking the time to prepare your workspace, verify your components, and follow a systematic bottom-up construction sequence, you can prevent structural instability and avoid damaging your desk surface. Whether you are setting up a compact study corner in a Singapore apartment or organizing a spacious corporate workstation, a properly assembled rack ensures long-term reliability. This guide walks you through the entire process, from opening the box to making final safety adjustments.
Preparing Your Workspace and Tools
Before unboxing your desktop storage rack, it is essential to prepare a clean, flat, and spacious work area. Clear off your entire desk or set up a dedicated assembly space on a clean floor area that is larger than the finished dimensions of the rack. This prevents components from falling off the edges and gives you ample room to maneuver panels and uprights safely.
Products mentioned in this guide
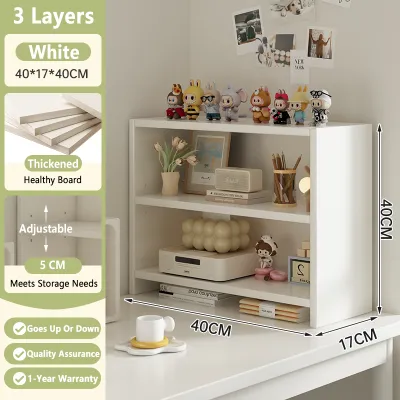
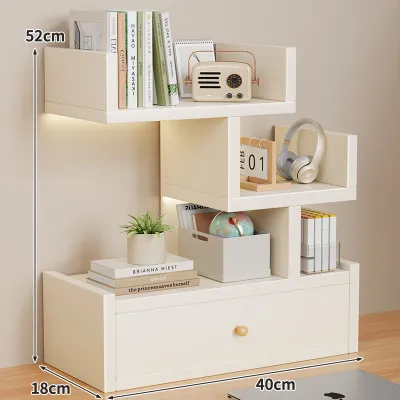





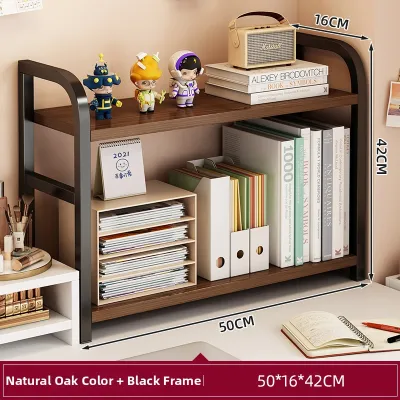
Prices are valid at publication and may change. Please refer to the product page for the latest price.
To protect both your existing furniture and the new rack components from scratches, lay down a soft protective barrier. A clean yoga mat, a thick towel, or even the flattened cardboard packaging box works perfectly as a protective layer. This simple step prevents the finish of your new shelves from chipping during assembly and safeguards your desk from accidental tool slips.
Gather all the necessary hand tools specified in the manufacturer’s manual before you begin. Most modular kits include basic tools like an Allen key, but you may also need a standard Phillips-head screwdriver or a rubber mallet for securing joints. Avoid using power drills or electric screwdrivers, as the high torque can easily strip pre-drilled holes, crack wooden panels, or damage plastic connectors.
Finally, ensure your workspace has adequate lighting so you can easily read the instruction manual and align small pre-drilled holes. Check the finished dimensions of the rack against the available clearance on your desk, keeping in mind the location of wall outlets, monitor arms, and computer cables. Having a clear plan for where the assembled rack will sit prevents the need to awkwardly maneuver a fully built structure into a tight space later.
Identifying and Organizing Individual Components
Once your workspace is ready, carefully unbox all the parts and organize them into distinct groups. Laying out identical components—such as shelves, side panels, vertical support poles, and connectors—in separate piles makes the assembly process much faster and less confusing. Grouping small fasteners, screws, and dowels into small cups or trays prevents them from rolling away or getting lost.

Before assembling a single joint, locate the packing list in the instruction manual and verify the quantity of every component. Counting the screws, brackets, and panels beforehand ensures you will not have to halt assembly halfway through due to a missing piece. If you discover any missing hardware, contact the manufacturer or the online marketplace where you purchased the item to request replacement parts before proceeding.
Take this opportunity to inspect each component for visible manufacturing defects or transit damage. Check wooden or laminate panels for chipped edges, inspect metal poles for dents, and examine plastic connectors for cracks. Pay close attention to pre-drilled holes and metal threads to ensure they are clean and free of debris.
Because material names alone do not guarantee scratch or moisture resistance, physically checking the quality of the protective finish is crucial. If you notice any stripped threads, warped panels, or significant finish defects, do not attempt to force the assembly. Forcing damaged parts together can lead to structural failure under load, so it is best to initiate a return or replacement process immediately.
Step-by-Step Assembly Process
Building the Base Frame
Every stable desktop storage rack relies on a solid foundation, which begins with assembling the base frame. Identify the bottom shelf or base panel and orient it so that the finished, polished edges face forward. If your modular kit includes adjustable leveling feet or non-slip rubber pads, install them onto the bottom corners of the base panel first.
Attach the bottom connectors, brackets, or corner joints to the base panel according to the manufacturer’s instructions. Ensure these initial connectors are aligned perfectly square with the edges of the panel. Tighten these base fasteners firmly, but avoid over-tightening them at this stage, as a small amount of play can help align the vertical components in the next step.
Installing Vertical Uprights
With the base frame established, the next step is to install the vertical uprights, which may consist of metal poles, wooden side panels, or interlocking frames. Carefully insert or screw the uprights into the base connectors, ensuring they stand perfectly perpendicular to the base. If your rack uses threaded metal rods, turn them slowly by hand to ensure they seat smoothly without cross-threading.
If you encounter resistance while screwing in an upright, back it out immediately and check the alignment. Forcing a cross-threaded screw will permanently damage the threads, compromising the structural integrity of the entire rack. Ensure all vertical supports are inserted to the same depth so that the subsequent shelves sit perfectly level.
Adding Middle and Top Shelves
Once the vertical uprights are securely in place, you can begin adding the middle and top shelves. Slide the shelf brackets or connectors onto the uprights, adjusting them to your desired height configurations. If your modular rack uses a peg-and-hole system, double-check that the support pegs on all sides are set to the exact same level before resting the shelf on them.
When securing subsequent shelves to the uprights, leave the fasteners slightly loose—about eighty percent tightened. Keeping the frame slightly flexible makes it much easier to align the upper tiers and the top panel without forcing the components. If you tighten each shelf completely as you go, you may find that the top holes do not align due to minor cumulative variances in the frame.
Securing the Top Panel and Final Tightening
Place the final top shelf or protective cap pieces onto the vertical uprights to complete the core structure. Once all components are in place, position the assembled rack on a flat, level surface to prepare for the final tightening. This ensures the rack settles into its natural, square shape before the joints are locked into position.
Systematically tighten all connectors and screws using a cross-pattern or diagonal sequence, similar to tightening lug nuts on a car wheel. For example, tighten the front-left connector, then the back-right, followed by the front-right, and finally the back-left. This method distributes tension evenly across the joints, preventing the frame from twisting or warping as the fasteners are secured.
Ensuring Stability and Safety
After completing the assembly, perform a physical wobble test to verify the stability of your desktop storage rack. Place your hands on the top shelf and gently shake the rack from side to side and front to back. If you detect any rocking or swaying, place the rack on a known flat surface to determine if the issue stems from loose connectors or an uneven desk.
If your rack includes adjustable leveling feet, rotate them individually until all corners make firm, even contact with the desk surface. For racks without leveling feet, placing small, non-slip felt or rubber pads under the base corners can compensate for minor surface unevenness while protecting your desk from scratches. Never ignore a wobble, as the vibrations from daily typing can cause loose joints to fail over time.
To maintain safety during daily use, locate and follow the weight distribution guidelines provided in your product manual. Always place heavier items, such as books, printers, or heavy organizers, on the bottom shelf to keep the center of gravity low. Lighter items, such as stationery, decorative plants, or small tech accessories, should be reserved for the upper shelves to prevent the rack from becoming top-heavy.
Establish clear stop conditions during both assembly and daily use. If you find that parts do not align naturally, or if you must apply excessive force to fit a shelf, stop immediately and consult the manufacturer’s support team. Forcing misaligned components can lead to sudden structural collapse, risking damage to your expensive computer equipment and potential personal injury.
Reconfiguring and Maintaining Your Modular Rack
One of the primary benefits of a modular desktop storage rack is the ability to reconfigure it as your storage needs change. When you decide to adjust shelf heights or add new components, always completely unload the rack first. Attempting to adjust connectors or move shelves while items are still on the rack can cause the structure to twist, stripping the joints or causing components to fall.
Use manual hand tools when loosening and retightening connectors during reconfiguration. Repeatedly assembling and disassembling modular furniture can wear down pre-drilled holes and plastic threads, so gentle hand-tightening is essential to prolong the lifespan of the joints. If a connection joint becomes loose or stripped over time, check if the manufacturer offers replacement hardware packs.
To keep your rack looking its best, follow routine cleaning methods that match the specific materials of your unit. For most laminate, metal, and wood finishes, wiping the surfaces with a dry or slightly damp microfiber cloth is sufficient to remove dust and fingerprints. Avoid using abrasive scrubbing pads or harsh chemical cleaners, which can strip away protective coatings and leave the underlying material vulnerable to moisture or scratches.
Finally, schedule periodic maintenance checks every few months to inspect the structural integrity of your rack. Daily activities, such as typing on your desk or placing heavy items on the shelves, create subtle vibrations that can gradually loosen fasteners over time. Spending a few minutes to retighten any loose screws or connectors ensures your modular desktop storage rack remains safe, stable, and functional for years to come.
Frequently Asked Questions (FAQ)
Can I assemble the rack without the original instruction manual?
If you have misplaced the original printed manual, do not attempt to guess the assembly sequence, as proprietary modular locking mechanisms can easily be damaged by incorrect installation. Instead, visit the manufacturer’s official website or contact their customer support department to request a digital PDF copy of the manual. Many brands also host model-specific video tutorials on their official online channels, which provide clear visual demonstrations of the assembly steps. If you cannot find official documentation and the connection mechanisms are unclear, seek assistance from a qualified professional rather than forcing the parts together.
How do I fix a wobbly desk rack after assembly?
A wobbly desk rack is usually caused by unevenly tightened fasteners, an uneven desk surface, or unadjusted leveling feet. Start by placing the rack on a flat surface and checking that all screws, cam locks, and connectors are fully tightened in a balanced cross-pattern. If your rack features adjustable leveling feet, turn them to ensure even contact with the desk. If the wobble persists, verify that the underlying desk itself is level and structurally stable, as a sagging or unstable desk will transfer movement to any storage unit placed on top of it.
Community discussion
Share your experience or ask a question. Comments are reviewed before publication.