
Building a functional book cabinet with doors from modular shelving components is an excellent way to create customized, dust-free storage that fits your specific living space. By combining individual modular frames with compatible door panels, you can design a unit that matches both your storage needs and your room’s layout. The assembly process involves preparing your space, building the structural frame from the base upward, mounting the door hinges, and securing the completed unit to the wall for safety. With a systematic approach and a few basic hand tools, you can achieve a professional, built-in look without the premium cost of custom carpentry.
Pre-Assembly Preparation and Space Checks
Before unboxing any modular components, you must thoroughly evaluate the designated installation area to prevent structural issues or alignment problems later. Start by measuring the width, depth, and height of the floor space where the book cabinet will stand. Compare these dimensions against the fully assembled specifications of your planned modular configuration, leaving at least a few centimeters of clearance at the top and sides for ease of installation. If you plan to stack modules to reach near the ceiling, verify that you have enough vertical clearance to lift and position the upper units without scraping the ceiling plaster.
The condition of your floor plays a critical role in the stability and alignment of modular furniture. Use a long spirit level to check the levelness of the floor along both the width and depth of the planned footprint. Even a minor slope can cause tall modular stacks to lean, which puts uneven stress on the joints and makes door alignment extremely difficult. If the floor is uneven, you will need to plan for adjustable leveling feet or shim plates to create a perfectly level foundation.
Products mentioned in this guide
![[A-STAR] 2 + 1 Door Display Bookcase cabinet Storage shelves (FREE INSTALL)](https://img.lazcdn.com/g/p/1df4088b89e8e18be5053c22636e398b.jpg_400x400q80.jpg_.webp)


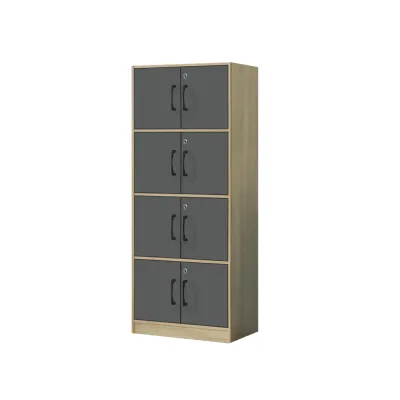
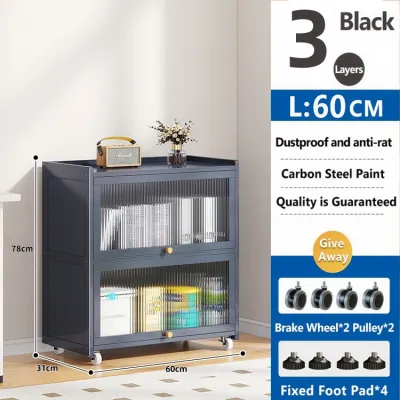
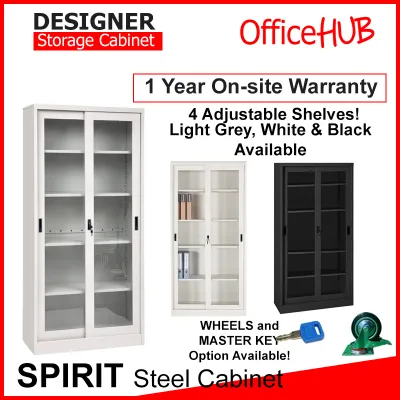
![[FREE INSTALLATION] KENZZO :Belly Glass Door Display Cabinet /book shelf/ filing cabinet/ wardrobe](https://img.lazcdn.com/g/p/ef0152d394d3bae692e449cb326dcb39.jpg_400x400q80.jpg_.webp)
Prices are valid at publication and may change. Please refer to the product page for the latest price.
Additionally, inspect the base of the wall for skirting boards or dado rails. Standard skirting boards can prevent a flat-backed modular cabinet from sitting flush against the wall, leaving a gap that compromises stability and makes wall anchoring more complicated. You may need to account for this gap by choosing modules with base cutouts, planning to remove a section of the skirting board, or selecting anchoring hardware designed to bridge the distance between the cabinet back and the wall.
Finally, review the manufacturer’s layout guide and packing lists before opening the boxes. Lay out your design plan on paper or a digital screen to confirm that the number of base units, stacking modules, shelves, and door panels you have purchased matches your intended layout. Verifying these details beforehand prevents the frustration of discovering a mismatch halfway through the assembly process.
Tools and Hardware Checklist
Having the correct tools on hand ensures a smooth assembly process and prevents damage to the modular components. Gather a high-quality rubber mallet for gently tapping joints together, a spirit level to verify alignment, a measuring tape, and both flathead and Phillips screwdrivers. A power drill with adjustable clutch settings can speed up the process, but you must use it on a low-torque setting to avoid stripping the pre-drilled holes in engineered wood or composite panels.

Unpack all boxes carefully and group similar components together on a clean, carpeted floor or a protective blanket to prevent scratches. Locate the hardware pack and sort the connecting bolts, cam locks, wooden dowels, shelf pins, and hinge components into separate containers or trays. Count every piece against the manufacturer’s parts list to ensure nothing is missing.
If you discover any damaged panels, cracked joints, or missing critical hardware, establish a strict stop condition. Forcing a misaligned joint or proceeding without essential structural fasteners can permanently damage the modular system or compromise its safety. Stop assembly immediately and contact the component supplier to obtain replacement parts before continuing.
Step-by-Step Assembly of the Modular Frame
The foundation of a stable modular book cabinet is a perfectly assembled base module. Begin by constructing the bottom-most unit according to the manufacturer’s instructions, using wooden dowels and cam locks to secure the side panels to the bottom plate. Once the base frame is assembled, place it in its final position and use your spirit level to check it from front to back and side to side. Adjust the leveling feet or place thin shims underneath until the base is completely level, as any slight tilt here will multiply as you stack more modules upward.
With the base unit leveled and positioned, you can begin adding vertical dividers and stacking subsequent modular cubes. Connect adjacent modules using the manufacturer’s specified interlocking bolts or metal connecting plates. Insert these fasteners through the pre-drilled holes on the interior sides of the frames and tighten them securely, checking the alignment of the front edges after tightening each joint. The front faces of the adjacent modules must sit perfectly flush with one another to ensure a clean appearance and proper door operation.
As you build upward, install the internal shelves and back panels. Back panels are not merely cosmetic; they provide essential lateral stability that prevents the modular frame from racking or swaying. Slide the back panels into their designated grooves or nail them securely to the rear edges of the frame, ensuring the cabinet remains perfectly square during the process. Measure diagonally from corner to corner of each module; if the two diagonal measurements are equal, the frame is square.
Once the main frame structure is complete, insert the adjustable shelf pins at your desired heights. Place the internal shelves onto the pins, pressing down gently to ensure they sit flat and do not wobble. If your modular system uses fixed structural shelves, ensure these are bolted tightly to the side panels, as they act as crucial tension members that hold the vertical sides of the cabinet together.
Installing the Doors and Adjusting Hinges
Adding doors to your modular shelving transforms it into a clean, dust-free cabinet, but this step requires precision to ensure the doors hang straight and swing smoothly. Start by mounting the hinge base plates to the pre-drilled holes on the inside of the cabinet frame. Use manual screwdrivers for this step to avoid over-tightening and stripping the threads in the cabinet walls. Next, insert the hinge cups into the circular recesses on the back of the door panels and secure them with the provided screws.
To hang the doors, align the hinge arms on the door with the base plates mounted inside the cabinet. Many modern modular systems use clip-on hinges that snap into place with gentle pressure, while others require you to slide the hinge arm onto the plate and tighten a securing screw. If the doors are large or heavy, have a second person support the weight of the door panel while you align and secure the hinges to prevent damage to the mounting holes.
Once all doors are hung, you will likely notice uneven gaps, sagging, or doors that rub against each other or the cabinet frame. Modern concealed hinges feature three separate adjustment screws that allow you to fine-tune the door’s position in three dimensions. Locate the depth adjustment screw to move the door closer to or further from the cabinet frame, the lateral screw to shift the door left or right, and the vertical screw to raise or lower the door panel.
Make small, incremental adjustments to these screws on both the top and bottom hinges of each door. Check the alignment after each turn by closing the door and observing the gaps. Aim for a consistent, uniform gap of approximately two to three millimeters around all edges of the doors. Finally, test the door swing to ensure smooth operation, and verify that any magnetic catches, push-to-open latches, or soft-close mechanisms engage properly without resistance.
Securing, Stabilizing, and Final Inspection
A tall book cabinet loaded with heavy books presents a serious tip-over hazard, especially when doors are opened or if someone attempts to climb the shelves. Wall anchoring is essential for any modular configuration that exceeds a safe height-to-depth ratio, typically when the height is more than three times the depth. Check the manufacturer’s safety guidelines to determine the specific anchoring requirements for your modular system.
To secure the cabinet, locate the wall studs behind the unit using a stud finder if you are mounting to a drywall or plasterboard wall. If the wall is solid concrete, brick, or masonry, you will need to use appropriate masonry wall plugs and a hammer drill. Align the cabinet’s anchoring brackets with the wall studs or marked masonry points, drill the pilot holes, and secure the brackets tightly using heavy-duty screws. If you are unsure about your wall’s composition or the correct anchor type to use, stop and consult a qualified professional to ensure a secure installation.
After anchoring the unit, conduct a final stability test by gently shaking the cabinet from the top to ensure there is no movement or swaying. Re-check all internal fasteners, cam locks, and hinge screws to confirm they remain tight after the structural adjustments. Open and close all doors simultaneously to verify they do not obstruct adjacent furniture, light switches, or walkways, completing your functional and safe modular book cabinet.
Frequently Asked Questions (FAQ)
Can I add doors to an existing modular shelving unit later?
Yes, you can often retrofit doors to an existing modular shelving unit, provided the frame has compatible pre-drilled hinge holes or flat interior surfaces suitable for mounting hinge plates. Before purchasing a door retrofit kit, check the manufacturer’s specifications to ensure the existing frame can support the additional weight of the door panels without sagging. You must also verify that the internal shelves are recessed slightly or positioned in a way that does not obstruct the door hinges or the door panel when closed.
How do I fix modular cabinet doors that are sagging or misaligned?
Sagging or misaligned doors are usually caused by loose hinge screws or natural settling of the cabinet frame over time. To fix this, first check the mounting screws that secure the hinge base plates to the cabinet frame and tighten them if they have worked loose. Next, use the multi-directional adjustment screws on the hinge arms to realign the doors. Turn the lateral adjustment screw to shift the door left or right, and use the vertical adjustment screw to raise or lower the door until the gaps are uniform and the panels sit perfectly level.
Community discussion
Share your experience or ask a question. Comments are reviewed before publication.