
Arranging stackable organiser boxes in a closet to maximize vertical space requires a systematic approach that balances physical dimensions, weight distribution, and structural stability. By measuring your wardrobe’s interior clearance, selecting boxes with compatible interlocking features, and placing the heaviest items at the base, you can transform underutilized vertical areas into highly functional storage zones. This method prevents the common pitfalls of cluttered closets, such as tipping stacks, crushed boxes, and inaccessible items, ensuring that every centimetre of your wardrobe is used efficiently.
In compact living environments where built-in wardrobe space is often limited, mastering vertical storage is a practical necessity. Relying solely on standard hanging rods and basic shelves leaves significant gaps of empty air, particularly at the top and bottom of the closet. Introducing a structured system of stackable organiser boxes allows you to build upward safely, keeping seasonal clothing, accessories, and household linens neatly categorized and easily reachable.
Assess Your Closet and Organiser Boxes Before Stacking
Before purchasing or arranging any storage containers, you must thoroughly evaluate the physical boundaries of your closet. Begin by measuring the interior height, depth, and width of the space using a reliable measuring tape. Be sure to account for potential obstructions that could interfere with the placement or retrieval of your boxes, such as sliding door tracks, door hinges, internal light fixtures, and the low-hanging hems of coats or dresses. Knowing these finished dimensions prevents the frustration of bringing home containers that are too deep for the wardrobe doors to close or too wide to fit side-by-side.
Products mentioned in this guide
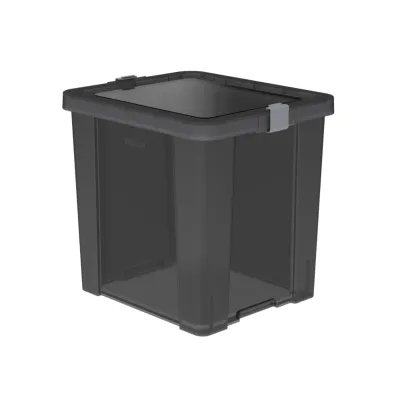
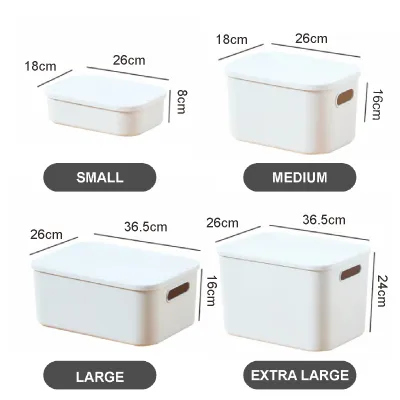
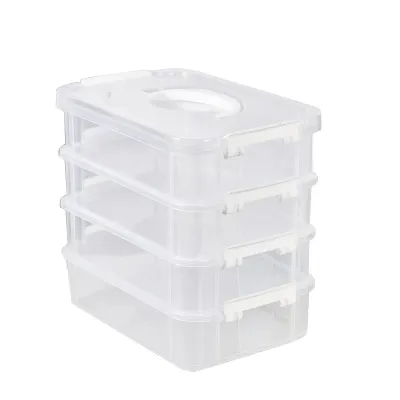
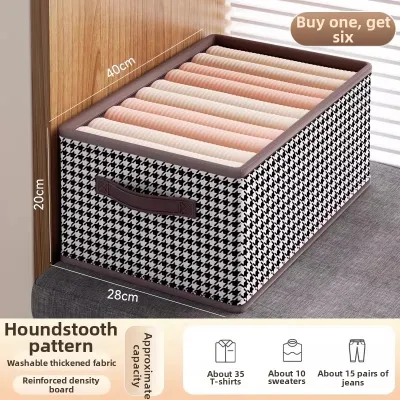
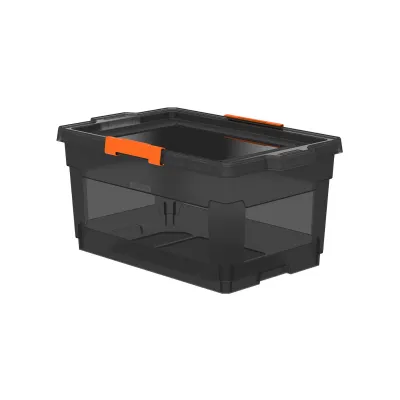
Prices are valid at publication and may change. Please refer to the product page for the latest price.
Next, inspect the physical characteristics and specifications of your organiser boxes. Check the manufacturer’s guidelines for weight limits and structural capacity, as exceeding these limits can lead to bowing, cracking, or complete collapse. Look closely at the design features of the boxes; high-quality stackable models typically feature recessed lids, interlocking ridges, or matching grooves on the top and bottom surfaces that prevent lateral sliding. If you are reusing existing containers, verify that the plastic, fabric, or cardboard material is in excellent structural condition, free of hairline cracks, soft spots, or warped lids that could compromise the stability of the entire stack.
Finally, perform a preliminary weight assessment to ensure the base boxes can support the cumulative load of the fully packed containers stacked above them. The bottom container in any stack bears the weight of every box placed on top of it, making its structural integrity paramount. If the base box shows any signs of flexing or lid deformation under a test load, it is unsuitable for a tall vertical stack and should either be reinforced, replaced, or positioned on a dedicated shelf.
Step-by-Step Guide to Stacking and Positioning Boxes
Executing a stable vertical stack requires a methodical, bottom-up assembly process that prioritizes physical balance and ease of access. Start by preparing the base layer. Ensure the floor of the closet or the surface of the bottom shelf is completely flat, clean, and free of dust or debris that could cause a box to wobble. Position your largest, deepest, or heaviest organiser boxes at the very bottom of the stack. This establishes a wide, stable foundation and keeps the heaviest physical loads closest to the ground, significantly lowering the overall center of gravity.

Once the base layer is securely positioned, proceed with vertical alignment. Carefully align the interlocking grooves or recessed lids of the lower box with the base of the container going on top of it. If your boxes do not have built-in interlocking features, you must align their outer edges with absolute precision to ensure the vertical load is distributed evenly down the container walls. Any misalignment, even by a few centimetres, shifts the center of gravity outward, creating a leaning tower that is highly susceptible to tipping when you open the closet doors.
As you build upward, transition to smaller, lighter, or less frequently accessed boxes for the middle and top layers. The highest section of the stack, which often sits near the closet ceiling or top shelf, should be reserved exclusively for lightweight items that you only need occasionally, such as off-season garments or spare bedding. When positioning these top boxes, ensure there is no overhang beyond the front edge of the lower containers or shelves. Overhanging boxes create an unbalanced lever effect that can pull the entire stack forward, posing a safety hazard to anyone opening the wardrobe.
Organizing Items Inside the Boxes for Weight and Stability
The way you pack the interior of each organiser box directly impacts the structural integrity and safety of the entire vertical stack. Proper weight distribution is the first rule of internal organization. Always pack dense, heavy items—such as winter coats, heavy denim, extra blankets, or books—in the boxes designated for the bottom of the stack. Lighter, high-volume items like summer t-shirts, activewear, scarves, and lightweight linens should be packed into the upper boxes. This progressive weight gradient ensures the stack remains bottom-heavy and highly resistant to accidental tipping.
Internal stabilization is equally important for maintaining a consistent center of gravity. When items are loosely packed inside a large organiser box, they can slide to one side when the box is moved, lifted, or tilted. This sudden shift in weight can destabilize a tall stack. To prevent this, use adjustable internal dividers, smaller sorting trays, or fabric inserts to keep items securely in place. If a box is not completely full, fill the empty spaces with soft, lightweight items like tissue paper or clean dust bags to prevent the contents from shifting during daily use.
To maintain this organized system over time, clear labeling is essential. Label the front-facing side of each organiser box with a detailed description of its contents, using a label maker, printed cards, or clear adhesive pockets. When you can identify the contents of a box at a glance, you eliminate the need to pull down multiple containers and rummage through them. This reduces unnecessary handling, minimizes wear and tear on the interlocking joints, and ensures the vertical stack remains undisturbed and structurally sound.
Safety Checks and Maintenance for Stacked Storage
A vertical storage system is not a set-and-forget installation; it requires regular safety checks and ongoing maintenance to ensure it remains secure. First, evaluate the height-to-width ratio of your stacks to prevent tip-over accidents. As a general safety guideline, a freestanding stack of organiser boxes should not exceed three times the width of its base. If your storage needs require a taller stack, consider securing the containers to the closet’s back panel or side walls using safety straps, or place them within a rigid shelving unit that provides lateral support.
Perform routine physical inspections of your storage setup at least once every few months. Examine the plastic or material of each organiser box, paying close attention to the corners, lids, and interlocking joints. Look for early warning signs of material fatigue, such as bowing side walls, stress whitening on plastic corners, hairline cracks, or lids that no longer sit flat. In humid climates, check fabric or cardboard boxes for moisture absorption, which can soften the material and cause the entire stack to sag or lean.
Establish clear stop conditions for your vertical storage system. If you observe any visible deformation, bulging sides, or a noticeable lean in the stack, you must take immediate action. Unstack the boxes safely, starting from the top, and inspect each container individually. Redistribute the internal weight, replace any damaged or weakened boxes, and rebuild the stack with a lower height or a wider base to restore absolute stability before resuming daily use.
Adapting the Setup for Different Closet Layouts
Every wardrobe has its own unique architectural layout, and your stacking strategy should adapt to these structural variations to maximize efficiency. If your closet features built-in wooden or wire shelving, use these shelves as natural support breakpoints. Instead of building a single, tall stack from the floor to the ceiling, limit your stack heights to the vertical clearance between each shelf. This distributes the physical load across multiple structural supports, protecting the lower boxes from excessive weight and making individual containers much easier to slide out and access.
For closets with open, high-clearance spaces that lack built-in shelving, you can combine stackable organiser boxes with freestanding modular shelving units or heavy-duty tension rods. Placing a simple, open-frame shelf unit in a tall closet creates stable intermediate platforms. This setup allows you to stack boxes two or three high on the floor, place a shelf directly above them, and then start a fresh, independent stack on the shelf. This method prevents the bottom boxes from bearing the weight of the entire vertical column, dramatically increasing both safety and accessibility.
Under-hanging areas—the dead space directly beneath hanging shirts, skirts, or trousers—present another excellent opportunity for vertical optimization. Measure the exact clearance between the floor and the bottom of your hanging garments. Select low-profile, wide-base organiser boxes that slide easily into this space. By stacking two or three of these shallow boxes beneath your hanging clothes, you utilize space that would otherwise go completely wasted, all without causing your hanging garments to bunch up, wrinkle, or drag across the tops of the containers.
Frequently Asked Questions (FAQ)
Can I stack organiser boxes without built-in interlocking lids?
Yes, you can safely stack boxes that lack specialized interlocking designs, but you must take extra precautions to prevent sliding. Place non-slip silicone or rubber shelf liners between the lid of the lower box and the base of the upper box to increase friction. Additionally, limit the stack height to a maximum of two or three tiers, and ensure that the lids of the boxes are completely flat, rigid, and reinforced. Avoid stacking soft-lidded or fabric boxes without internal wire frames in this manner, as they will sag and cause the stack to collapse.
How high is too high for stacking plastic organiser boxes?
The safe height for stacking plastic organiser boxes depends on the manufacturer’s specifications, the weight of the contents, and the box’s material thickness. As a general rule, freestanding stacks should not exceed chest height (approximately 1.2 to 1.5 metres) to ensure you can safely lift and retrieve the top box without straining or losing balance. If the stack begins to wobble when you gently push the middle container, or if the bottom box shows any signs of flexing, the stack is too high and must be reduced.
Should I leave space between the top box and the closet ceiling?
Yes, you should always leave a physical gap of at least 10 to 15 centimetres between the top of your highest organiser box and the closet ceiling or upper door trim. This clearance is necessary to allow your hands to grip and lift the top box safely without scraping your knuckles or damaging the ceiling. Furthermore, leaving an open gap promotes healthy air circulation within the wardrobe, which helps prevent stagnant air pockets and reduces the risk of musty odours or moisture buildup on your stored items.

Community discussion
Share your experience or ask a question. Comments are reviewed before publication.