
Applying edge banding tape to exposed plywood, particleboard, or MDF edges is a highly effective way to give raw wood projects a clean, professional, and seamless finish. Whether you are building custom cabinetry for a high-humidity kitchen or repairing a worn-out study desk, mastering this technique protects the core material from moisture while matching the face veneer. Achieving a durable bond requires careful preparation, precise heat or adhesive application, and systematic trimming. By following a structured process, you can transform rough, unfinished edges into smooth, durable surfaces that blend seamlessly with the rest of your furniture.
Tools and Materials Required for Edge Banding
Selecting the right materials and tools before starting ensures a smooth workflow and prevents mid-project delays. Edge banding tape is primarily available in two formats: pre-glued (iron-on) and unglued. Pre-glued tape features a heat-activated hot-melt adhesive on the back, making it highly accessible for home workshops and quick repairs. Unglued tape, on the other hand, requires a separate application of contact cement or specialized wood adhesives, which is often selected for specific heavy-duty or custom laminating projects.
For pre-glued tape, a standard household iron without water (steam turned completely off) or a dedicated edge banding heat gun is the primary tool used to melt the adhesive. You will also need a sharp utility knife or a dedicated double-edge trimmer to slice away the excess overhang. A sanding block with fine-grit sandpaper is essential for smoothing the final edges. To press the tape firmly into the wood grain while the glue is hot, prepare a hard rubber roller or a smooth wooden block wrapped in a soft cloth.
Products mentioned in this guide
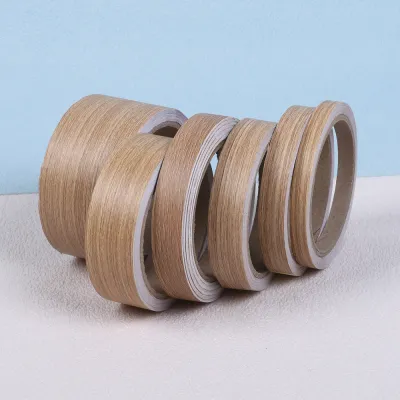
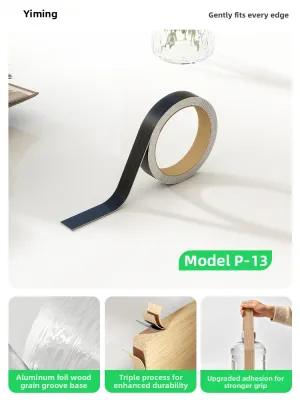
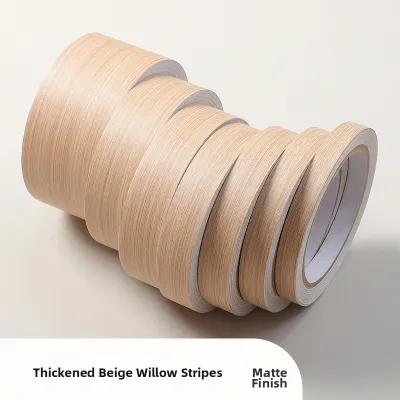
Prices are valid at publication and may change. Please refer to the product page for the latest price.
Workspace protection and safety gear are equally critical, especially when working in confined indoor spaces like a typical apartment balcony or utility room. Lay down a heavy drop cloth or cardboard to catch adhesive drips, wood shavings, and sharp tape trimmings. Wear heat-resistant gloves to protect your fingers when pressing hot tape, and ensure the room is well-ventilated to disperse any fumes from heated adhesives or solvent cleaners.
Preparing the Wood Edge and Workspace
The longevity of your edge banding depends heavily on the quality of the bond, which is directly determined by how well you prepare the substrate. Begin by inspecting the raw wood edge of your plywood or MDF panel. The surface must be completely flat, structurally sound, and free of deep voids, splinters, or loose fibers. If you are working with low-grade plywood that has large core gaps, fill these voids with a high-quality wood filler and allow it to dry completely before proceeding, as empty pockets will prevent the tape from adhering evenly.

Once the edge is structurally sound, sand it lightly with a medium-grit sanding block to remove any saw marks, ridges, or manufacturing glaze. The goal is to create a smooth but slightly porous surface that allows the adhesive to grip effectively. After sanding, thoroughly clean the edge using a dry microfiber cloth or a vacuum brush attachment to remove every trace of sawdust. Any remaining dust will mix with the melted glue, creating a weak, gritty barrier that leads to premature peeling.
Environmental conditions also play a significant role in adhesive performance, particularly in warm, humid climates like Singapore. High ambient humidity can affect how quickly adhesives cool, cure, or bond to the wood fibers. Ensure your workspace is dry and sheltered from direct moisture or heavy drafts. Always check the tape manufacturer’s specifications for recommended application temperatures and humidity limits to ensure the hot-melt glue or contact adhesive sets under optimal conditions.
Step-by-Step Application of Edge Tape
To begin the application, measure the length of the wood edge you intend to cover and cut a piece of edge banding tape that is roughly two to three centimeters longer than the actual edge. This extra length provides a safe margin for handling and trimming. Position the tape over the wood edge, ensuring there is a slight, even overhang on both the top and bottom sides. This balanced overhang is crucial because it guarantees the entire thickness of the wood core is fully covered, even if the tape shifts slightly during heating.
If you are using pre-glued tape, set your household iron to the heat setting recommended by the manufacturer, which is commonly the cotton or wool setting. Place the hot iron directly onto the starting end of the tape, holding it in place for a few seconds to melt the adhesive underneath. Slowly and steadily glide the iron along the length of the tape, moving at a consistent pace of about two to three inches per second. Avoid leaving the iron stationary for too long, as excessive heat can scorch the wood veneer or burn through thin polyester tapes.
Immediately behind the moving iron, follow up with your hard roller or a smooth wooden block to apply firm, downward pressure. Pressing the tape while the adhesive is still in its molten state forces the glue deep into the pores of the wood grain, ensuring a permanent mechanical bond. Work in manageable sections of about twenty to thirty centimeters at a time, heating the tape and then immediately rolling it flat before the adhesive has a chance to cool and solidify.
Keep a close eye on the tape’s alignment and behavior as you progress down the edge. If you notice the tape shifting off-center, or if a section burns or fails to adhere, stop immediately. While the glue is still warm, you can gently peel the misaligned section back, reposition it, and reapply heat. If the adhesive has already cooled and hardened with a defect, do not attempt to force it; instead, reheat the affected area with the iron to liquefy the glue again before making adjustments.
Trimming and Finishing for a Seamless Look
Once the edge tape is fully applied and the adhesive has cooled completely to room temperature, you can begin the trimming process. It is vital to wait until the glue is cold and hard; trimming warm adhesive will cause the blade to gum up, leading to messy cuts and potential tearing of the veneer. Start by trimming the overhanging ends first. Place the panel flat on your work surface and use a sharp utility knife to score the excess tape flush with the perpendicular edge, then gently snap it downward for a clean break.
Next, address the long overhanging edges using a dedicated double-edge trimmer or a very sharp utility knife held at a slight angle. If using a utility knife, pull the blade toward you in a smooth, continuous motion, keeping the flat of the blade slightly angled away from the face of the furniture to avoid gouging the finished veneer. If you are using a double-edge trimmer, slide it in the direction of the wood grain to prevent tear-outs. Work slowly and maintain consistent pressure against the face of the panel.
After removing the bulk of the excess tape, you will likely feel a sharp, slightly proud edge where the tape meets the face of the wood. To blend this transition seamlessly, wrap a piece of fine-grit sandpaper around a sanding block. Hold the block at a 45-degree angle to the edge and sand downward in light, one-directional strokes. Never sand upward or flat against the edge, as this can catch the tape and peel it away from the wood core.
Conclude the process with a thorough visual and tactile inspection of the finished edge. Run your fingertips along the entire length to check for any sharp spots, tiny gaps, or areas where the veneer might have chipped during trimming. If you spot a small gap where the tape did not bond securely, you can often resolve it by placing a clean sheet of paper over the spot and running the hot iron over it briefly, followed by immediate pressure from your roller.
Troubleshooting Common Edge Banding Issues
Even with careful preparation, issues like peeling, bubbling, or poor adhesion can occasionally occur. These problems are almost always caused by insufficient heat during application, moving the iron too quickly, or failing to apply enough pressure while the glue was hot. If you notice a bubble or a lifting edge after the tape has cooled, you can usually fix it by reheating the specific area with your iron to reactivate the adhesive, then pressing down firmly with your wooden block until it cools.
Another common issue is visible glue lines or squeeze-out, where excess adhesive oozes out from under the tape onto the face of the furniture. To clean this up without damaging the wood finish, wait for the glue to cool completely and become brittle. You can then carefully scrape away the hardened squeeze-out using a sharp chisel held flat against the wood surface, or use a cloth lightly dampened with an adhesive remover or mineral spirits, verifying first that the solvent is safe for your specific wood species and finish.
In cases where a large section of the tape has scorched, shifted dramatically, or failed to bond entirely, localized repairs may not be sufficient. It is highly practical to recognize when to stop, remove the damaged strip completely, and start fresh. To do this safely, apply heat along the entire strip with your iron to soften the adhesive, peel the tape off smoothly while hot, and scrape away the warm residue before prepping the wood edge for a new application.
Frequently Asked Questions (FAQ)
Can I apply edge tape to painted or sealed wood?
Standard hot-melt and contact adhesives require a clean, porous wood surface to establish a strong mechanical bond. Applying edge tape directly over paint, varnish, or polyurethane sealants is generally not recommended, as the heat can melt the finish and prevent the glue from gripping the wood fibers. Always check the manufacturer’s product labels to verify compatibility, and sand away any existing paint or sealant down to bare wood before attempting to apply new edge banding.
How do I remove old or damaged edge banding?
To remove old or damaged edge banding safely, apply direct heat to the surface using a household iron or a heat gun to soften the underlying adhesive. Once the glue liquefies, use a putty knife or a scraper to gently pry the tape away from the wood edge, working in small sections. After the tape is removed, clean off any remaining adhesive residue using a scraper or a cloth dampened with a compatible solvent, ensuring the solvent does not damage the surrounding wood finish.
Community discussion
Share your experience or ask a question. Comments are reviewed before publication.