
To make chair leg protector tape actually stay on, you must focus on two critical, often overlooked factors: absolute surface decontamination and sufficient adhesive curing time. While many assume that peeling tape is the result of a cheap product, the primary culprit is almost always a microscopic barrier of dust, floor wax, or factory oils that prevents the adhesive from establishing a chemical bond with the furniture leg. By cleaning the surface with rubbing alcohol, measuring and cutting with precision, and allowing the adhesive to cure undisturbed for 24 to 48 hours, you can prevent the tape from rolling up, collecting hair, or sliding off your chairs.
Why Chair Leg Protector Tape Fails (and How to Prevent It)
Adhesive failure on furniture legs is a common household frustration, especially on heavily used dining chairs or bar stools that are dragged across parquet, vinyl, or tiled floors multiple times a day. When you slide a chair, the lateral shear force exerted on the bottom of the leg is immense. If the adhesive bond is weak, this force easily shears the tape away from the wood, metal, or plastic surface.
The environment also plays a silent but destructive role. In humid climates like Singapore, ambient moisture can easily penetrate a compromised adhesive layer, accelerating its breakdown. Additionally, household dust, pet hair, and microscopic fibers act as contaminants. If even a tiny speck of dust settles on the adhesive during application, or if the edge of the tape lifts slightly, these particles will cling to the exposed adhesive, gradually neutralizing its stickiness until the entire piece peels away.
Products mentioned in this guide
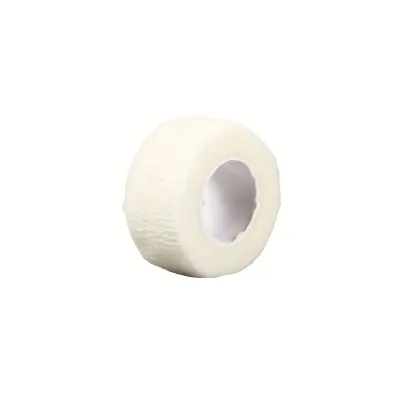
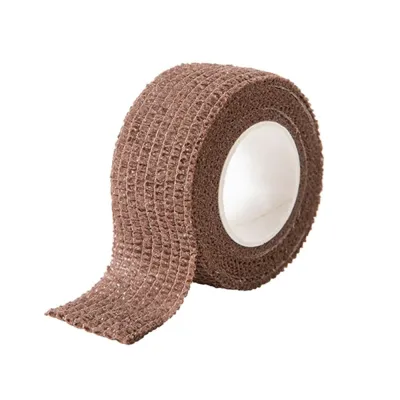
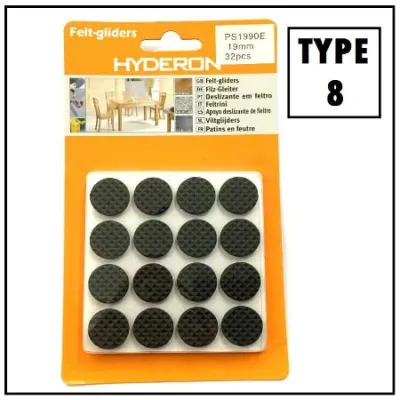
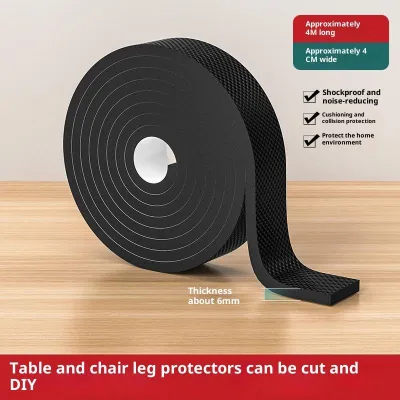
Prices are valid at publication and may change. Please refer to the product page for the latest price.
To prevent premature failure, you must treat the application as a multi-step bonding process rather than a simple peel-and-stick task. This requires meticulous cleaning to remove all invisible residues, precise cutting to avoid overhangs that catch on the floor, and a strict curing period before the chair is subjected to any weight or movement.
Tools and Materials You Will Need
Before starting, gather the necessary tools and materials to ensure a smooth, uninterrupted application process. Having everything prepared beforehand prevents you from touching clean chair legs with dusty hands or leaving adhesive exposed to the air while searching for scissors.

You will need the following items:
- High-quality chair leg protector tape: Select a durable, heavy-duty felt or silicone-backed adhesive tape designed specifically for furniture.
- Isopropyl rubbing alcohol (70% or higher): This is essential for breaking down oils, grease, and old adhesive residues without leaving a film.
- Lint-free microfiber cloths: Avoid paper towels or standard cotton rags, which can shed tiny fibers onto the freshly cleaned surface.
- Measuring tape or a flexible ruler: Essential for determining the exact dimensions of the chair leg base.
- Sharp scissors or a utility knife: Dull blades will tear the felt or stretch the adhesive backing, compromising the clean edges.
- A plastic scraper, squeegee, or an old credit card: Useful for applying firm, even pressure and smoothing out any trapped air bubbles.
Step 1: Deep Clean and Prepare the Surface
The secret to a permanent bond lies in the preparation of the chair leg’s bottom surface. Even brand-new chairs straight from the showroom carry factory oils, wood dust, or protective wax coatings that prevent adhesives from sticking. Older chairs are often coated in layers of floor wax, cleaning chemical residues, and ground-in dirt.
Begin by inspecting the bottom of each chair leg. If there are old felt pads, plastic glides, or stubborn adhesive residues, you must remove them completely. Use a plastic scraper or an old credit card to scrape away the bulk of the old material. If the residue is particularly stubborn, apply a small amount of adhesive remover, but ensure you wipe it away thoroughly afterward, as these removers often leave an oily film that will ruin your new tape’s adhesion.
Once the physical debris is gone, saturate a clean microfiber cloth with isopropyl rubbing alcohol and vigorously scrub the bottom of each chair leg. Rubbing alcohol is the ideal cleaning agent because it dissolves oils and grease instantly and evaporates rapidly without leaving any microscopic residue. Avoid using multi-surface spray cleaners, glass cleaners, wet wipes, or soapy water; these products frequently contain silicones, fragrances, or moisturizing agents that leave a thin, slick coating behind.
After scrubbing, allow the chair legs to air-dry completely. Even if the surface looks dry, wait at least ten to fifteen minutes to ensure that any moisture trapped in the wood pores or plastic crevices has fully evaporated. Applying tape to an even slightly damp surface will trap moisture, destroying the adhesive’s chemical structure and causing it to fail within days.
Step 2: Measure, Cut, and Apply with Precision
Once the surfaces are perfectly clean and dry, you can proceed to measuring, cutting, and applying the tape. Precision during this stage prevents the tape from overhanging the edges of the chair legs, which is a major cause of peeling.
Measuring and Cutting
To ensure a perfect fit, measure the diameter or width of the bottom of the chair leg. If the leg is square or rectangular, measure both dimensions. For round or tapered legs, wrapping a flexible measuring tape around the leg can help you determine the exact circumference if you plan to wrap the tape around the sides.
When cutting the chair leg protector tape, aim for a size that is slightly smaller—by about 1 to 2 millimeters—than the actual footprint of the leg. This slight margin is a crucial professional trick: if the tape is flush with or larger than the leg’s edge, it will rub against the floor when the chair is tilted or dragged, catching on floor joints or tile grout lines. This constant friction will quickly roll the edges up. By keeping the tape slightly recessed, you protect the edges from lateral friction. Use sharp scissors or a utility knife to make clean, straight cuts; jagged edges are weak points where peeling can easily start.
Application Technique
When you are ready to apply the cut piece, peel the protective backing off slowly. Avoid touching the exposed adhesive with your fingers, as the natural oils on your skin will instantly weaken the bond. Hold the tape by its very edges or use tweezers if necessary.
Align the tape carefully with the bottom of the chair leg. Once aligned, press the center of the tape down first, then work your way outward to the edges. This technique prevents air bubbles from becoming trapped under the tape. Once the tape is in place, use your plastic scraper or credit card to press down on the entire surface with significant force. The adhesives used on these tapes are pressure-sensitive, meaning they require physical force to activate and flow into the microscopic texture of the furniture leg.
For chairs with tapered or angled legs, the lateral forces are unevenly distributed. If you are wrapping tape around a tapered leg, apply the tape without stretching it. Stretching the tape creates internal tension; over time, the material will attempt to snap back to its original length, pulling away from the leg and causing the adhesive to fail.
Step 3: Allow Proper Curing Time and Verify
One of the most common mistakes is using the chairs immediately after applying the protector tape. Adhesives do not bond instantly; they require time to flow, cure, and establish a permanent chemical grip on the surface.
Keep the chairs upside down or tilted in a dry, dust-free area for at least 24 to 48 hours. During this curing phase, do not place any weight on the chairs and do not drag them across the floor. In Singapore’s humid climate, keeping the chairs in an air-conditioned room or a well-ventilated space during the first 24 hours can help the adhesive cure more effectively, as high humidity and heat can sometimes soften uncured adhesives.
After the curing period has passed, perform a gentle visual and tactile inspection before putting the chairs back into service. Lightly run your finger along the edges of the tape to ensure they are perfectly flat and flush against the leg. If you notice any lifting, curling, or bubbles, do not ignore them. Press them down firmly again with your scraper. If an edge refuses to stay down, it is best to remove that piece, re-clean the area, and apply a fresh strip, as a partially lifted edge will only collect dust and peel off entirely within a few days.
Troubleshooting Peeling Edges and Long-Term Care
Even with perfect application, chair leg protector tape operates in a high-friction environment and requires occasional maintenance to prolong its lifespan.
If you notice an edge starting to lift after several months of use, check for dust accumulation. If the exposed adhesive is already dirty, trimming the lifted portion with a sharp utility knife can sometimes save the rest of the pad from peeling. However, if a significant portion has lifted, it is cleaner and more effective to replace the entire strip using the full cleaning and curing process.
To extend the life of your protector tape, adapt your floor cleaning routine. Avoid sloshing excessive water or harsh chemical detergents around the chair legs when mopping. Water can seep under the edges of the tape, dissolving or weakening the adhesive over time. Instead, use a damp, well-wrung mop, and try to lift or move the chairs out of the room while the floor is wet, returning them only when the floor is completely dry.
Additionally, check the bottoms of your chairs periodically for embedded grit, pet hair, or dirt. Over time, felt tape can act like a broom, trapping small particles that can scratch your floors. Gently vacuuming the bottom of the chair legs with a brush attachment once a month will keep the felt clean and functioning smoothly.
Frequently Asked Questions (FAQ)
Can I apply chair leg protector tape to uneven or heavily textured wood?
No, standard adhesive tape requires a relatively smooth, flat surface to establish full contact and bond properly. If the bottom of your chair leg is rough, splintered, or heavily textured, the adhesive will only touch the high points, leaving gaps where dust and moisture can enter, leading to rapid peeling. For minor roughness, gently sand the bottom of the leg with fine-grit sandpaper (such as 220-grit) to create a smooth flat surface, then clean away all wood dust before applying the tape. For highly carved, uneven, or hollow legs, alternative protectors like flexible silicone slip-on caps or nail-on glides are much more reliable options.
Will the tape leave a sticky residue when I eventually remove it?
Yes, high-strength adhesives often leave a sticky residue behind when peeled off, especially after being compressed under the weight of a chair for months or years. To safely remove this residue, peel off as much of the old tape as possible by hand. Apply a small amount of isopropyl rubbing alcohol or a dedicated citrus-based adhesive remover to a microfiber cloth and rub the sticky area gently. Always test the adhesive remover on an inconspicuous part of the chair first to ensure it does not damage or discolor the wood stain, varnish, or paint finish. Once the residue is gone, wipe the area clean with a damp cloth and let it dry completely before applying any new protectors.
Community discussion
Share your experience or ask a question. Comments are reviewed before publication.