
A standard wooden shoe rack typically holds between 6 and 30 pairs of shoes, depending on its width, height, and shelf configuration. For a single person or couple, a compact rack holding 6 to 12 pairs is often sufficient, while a small family may require a medium-sized unit accommodating 12 to 24 pairs. Larger households or avid collectors frequently need robust setups designed for 24 or more pairs. Finding the right capacity involves balancing your personal footwear collection with the physical space constraints of your entryway.
Assessing Your Household's Shoe Storage Needs
To determine the ideal capacity, start by conducting a realistic audit of your household’s footwear. A practical approach is to categorize shoes by frequency of use. Tally the everyday pairs that must remain by the door, such as work shoes, school shoes, and daily sneakers. Next, account for specialty footwear like running shoes, high heels, or heavy boots.
It is important to remember that not all shoes occupy the same physical footprint. A standard shelf width might accommodate four pairs of slim flats or sandals, but only three pairs of wide running shoes or bulky high-top sneakers. Taller footwear, such as boots or high heels, requires significantly more vertical clearance, which can reduce the overall number of shelves you can fit in a given height. Establishing this baseline pair count—and noting the physical variety of your collection—prevents you from purchasing a rack that is visually spacious but practically too small.
Products mentioned in this guide
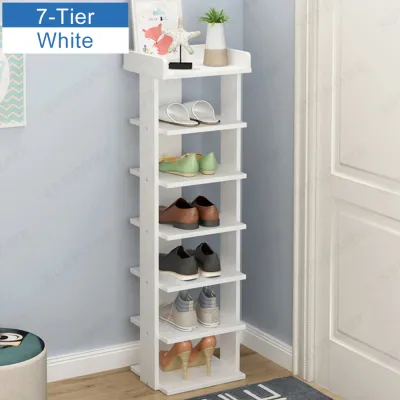
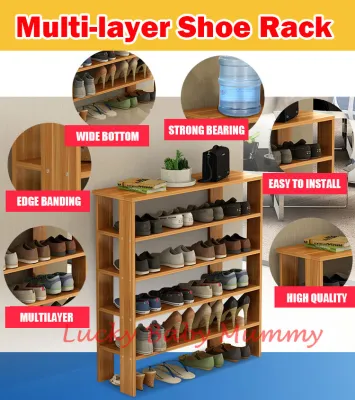
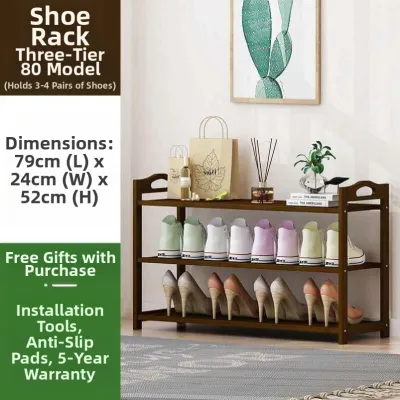
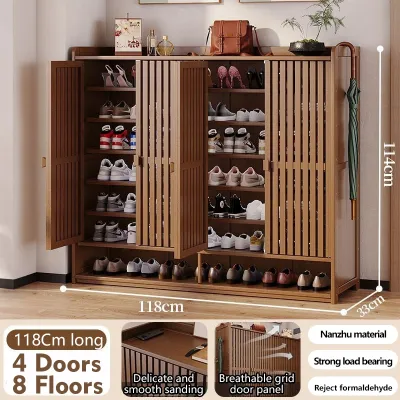
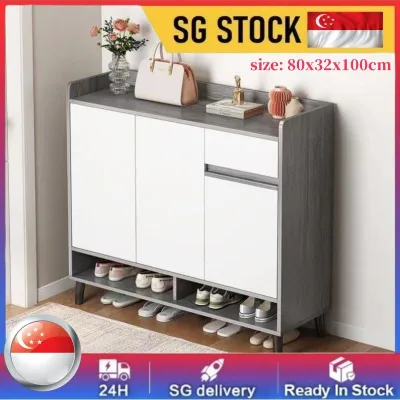
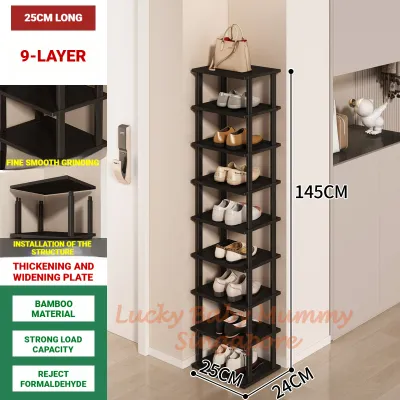
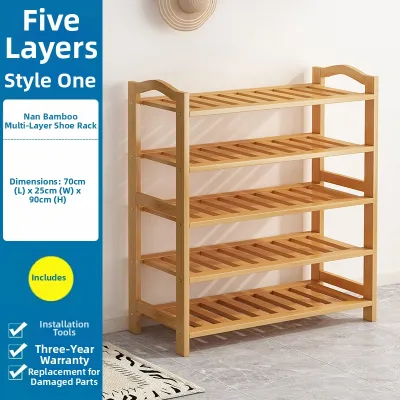
Prices are valid at publication and may change. Please refer to the product page for the latest price.
When calculating your baseline, it is also wise to factor in guest footwear. If you frequently host gatherings, having a small amount of flexible, unallocated space on the bottom tier or a designated area nearby prevents shoes from piling up haphazardly at your front door. This ensures your entryway remains tidy and safe even during social events.
Planning Capacity Tiers for Different Household Sizes
When translating your shoe count into a physical furniture purchase, it helps to think in flexible capacity tiers. A compact wooden shoe rack, usually featuring two or three tiers, is excellent for individuals or couples, comfortably holding 6 to 12 pairs of standard shoes. For small households of three to four people, a medium tier rack holding 12 to 24 pairs provides a balanced storage solution without overwhelming the entryway. Large households or those with extensive collections should look at units designed for 24 or more pairs, which often utilize taller vertical designs or wider double-column configurations.

The internal configuration of the rack plays a critical role in its actual capacity. Fixed shelves offer structural rigidity but force you to conform to a single height, which can lead to wasted vertical space above low-profile shoes or make it impossible to store taller boots. Adjustable or removable shelves allow you to customize the spacing, maximizing the utility of every tier.
Another design consideration is whether to choose an open slatted rack or a closed wooden shoe cabinet. Open slatted designs promote excellent airflow, which helps dry out damp shoes and minimize odors—a significant advantage in warm, humid climates. Closed cabinets, while offering a cleaner and more minimalist aesthetic by hiding clutter, require proper ventilation features like louvered doors or rear vents to prevent stagnant air and moisture buildup inside the unit.
Additionally, consider the trade-offs between a single high-capacity unit and multiple smaller modular racks. A single large cabinet or tall rack provides a cohesive look and centralizes storage, but it requires a significant, uninterrupted wall space. Modular racks, on the other hand, offer the flexibility to expand your storage over time or split the units, placing a small everyday rack in the immediate foyer and a secondary storage unit in a hallway or closet.
Measuring Your Entryway and Clearance Space
Before committing to a specific wooden shoe rack, precise physical measurements of your entryway are essential, especially in compact apartment layouts like HDB flats or condominiums. Begin by measuring the available floor width, depth, and vertical height. Measure from the baseboards rather than the bare wall, as baseboards can reduce the usable floor width by several centimeters. Check for any unevenness in the flooring that might cause a tall wooden rack to wobble.
Clearance is just as critical as the physical footprint of the furniture. You must account for the door swing arcs of your main entrance door, nearby room doors, or built-in distribution board (DB) box doors. Ensure that the rack does not protrude into the main walkway, leaving ample space for household members to pass comfortably. In Singapore, maintaining unobstructed access to common corridors and fire escape routes is a safety priority, so the rack must fit entirely within your designated foyer space.
Beyond the final placement spot, do not forget to measure the delivery path. Ensure that a fully assembled wooden shoe cabinet or large rack can easily fit through your apartment’s main doorway, lift doors, and any tight corridor turns. If you live in a high-rise building, verifying these dimensions beforehand prevents the frustration of receiving a piece of furniture that cannot physically reach your front door.
Finally, look up and around the proposed installation area. Note the locations of electrical outlets, light switches, or smart home control panels. A tall wooden shoe cabinet or rack should not block access to these daily necessities, nor should it cover ventilation grilles or intercom systems.
Evaluating Wooden Rack Structure and Weight Limits
A wooden shoe rack must be structurally sound to support the cumulative weight of dozens of pairs of shoes, which can be surprisingly heavy. Always consult the manufacturer’s specifications for the maximum load capacity per shelf and the total weight limit of the entire unit. Exceeding these limits can lead to structural failure or permanent damage to the furniture.
When assessing the stability and build quality of a wooden rack, look closely at the construction details. Sturdy joints, such as mortise-and-tenon or reinforced screw connections, offer better long-term stability than simple glue-and-dowel joints. Check the thickness of the shelves; thicker wooden planks are less prone to sagging under heavy loads. A solid back panel or cross-bracing on the rear of the rack significantly enhances lateral stability, preventing the unit from swaying or tipping.
Because entryways are often exposed to external elements, humidity, and wet footwear, do not assume all wood types perform the same. Check the product details for specific surface treatments, such as water-resistant lacquers, varnishes, or sealants. Untreated wood can absorb moisture from damp shoes, leading to warping, staining, or mold growth over time. Selecting a pre-treated or properly finished wooden rack ensures it can withstand the humid climate and daily wear.
Common Sizing and Placement Mistakes to Avoid
One of the most frequent errors is overestimating the usable depth of a shoe rack. If the shelves are too shallow, larger shoes will overhang the edges, preventing cabinet doors from closing or creating an unsightly obstruction in narrow hallways. Always compare the outer depth of the rack with the actual length of your largest pair of shoes.
Another common mistake is ignoring the vertical clearance between shelves. Forcing tall shoes into tight spaces can bend, crease, or damage the materials, while leaving too much empty space above flat shoes wastes valuable storage potential.
Lastly, overloading shelves beyond their rated weight capacity is a safety hazard. Over time, excessive weight causes wooden shelves to bow permanently, weakening the joints and increasing the risk of a sudden collapse. Distribute heavier footwear, like boots and leather dress shoes, on the bottom shelves to maintain a low center of gravity and protect the structural integrity of the rack.
Frequently Asked Questions (FAQ)
Can I stack two small wooden shoe racks to increase capacity?
Stacking two wooden shoe racks is only safe if the manufacturer explicitly designs and sells them as a stackable system. Stacking standard, non-modular units creates a severe tipping hazard and can overload the joints of the bottom rack, leading to structural collapse. If the product manual confirms that the units are stackable, always use the provided interlocking hardware, dowels, or brackets. Additionally, any stacked configuration must be securely anchored to the wall using appropriate safety brackets to prevent accidental tip-overs, especially in homes with active pets or young children.
How do I protect a wooden shoe rack from moisture near the entrance?
To protect your wooden shoe rack from moisture, avoid placing soaking wet shoes directly onto the wooden shelves. Allow damp footwear to dry completely in a well-ventilated area before storing them. For added protection, place removable, waterproof drip trays or absorbent mats on the shelves or underneath the rack to catch water, mud, and dirt. Regularly inspect the wood for signs of moisture buildup, and follow the manufacturer’s care instructions for cleaning. If recommended by the manufacturer, periodically reapply a suitable wood sealer or protective finish to maintain the moisture-resistant barrier.
Community discussion
Share your experience or ask a question. Comments are reviewed before publication.