
Selecting the correct 3M bumper for your household fixtures is more than a matter of grabbing the first packet of adhesive pads you see online. To silence slamming cabinet doors, prevent drawer friction, and stabilize toilet seats, you must match the bumper’s physical shape, thickness, and adhesive formulation to the specific mechanical forces and environmental conditions of each application. Choosing the wrong variant can lead to misaligned doors, peeling paint, or adhesive failure within weeks, especially in challenging environments. By analyzing the unique demands of each furniture piece, you can select a bumper that provides long-lasting protection and quiet operation.
How Shape and Material Affect Bumper Performance
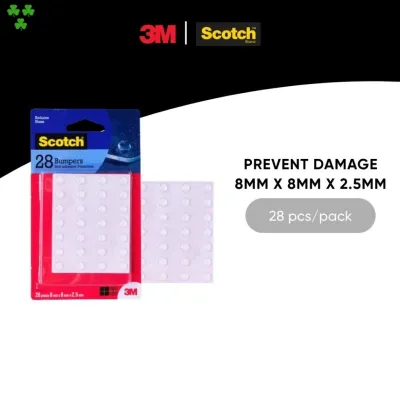
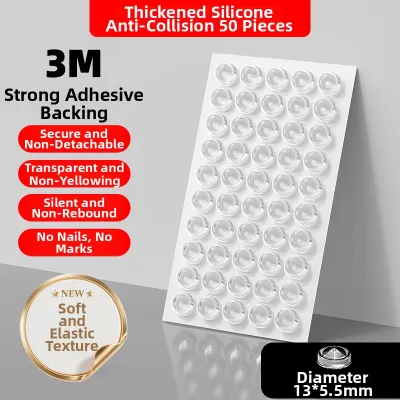
The geometry of a 3M bumper dictates how it distributes impact energy, resists lateral forces, and fits within gaps. The three most common profiles are hemispherical, cylindrical, and flat or low-profile designs. Hemispherical bumpers feature a dome-like shape that concentrates impact at a single point, allowing the elastomeric material to compress progressively. This makes them highly effective for absorbing high-velocity impacts, such as a cabinet door being swung shut. Cylindrical bumpers, with flat tops and straight sides, offer a larger contact surface area. This design distributes weight more evenly and provides higher load-bearing capacity, making them suitable for heavier applications or where lateral stability is required. Flat, low-profile bumpers provide minimal cushioning but excellent scratch protection and slip resistance in tight spaces.
While these shapes are typically molded from polyurethane, material name alone does not guarantee weather resistance, moisture protection, or long-term durability. You must check the product packaging or manufacturer specifications for environmental ratings. Some bumpers are optimized for dry, indoor environments and use synthetic rubber adhesives that offer rapid, high-tack bonding but degrade when exposed to heat or moisture. Others are formulated with specialized acrylic adhesives designed to withstand UV exposure, temperature fluctuations, and high humidity.
Products mentioned in this guide
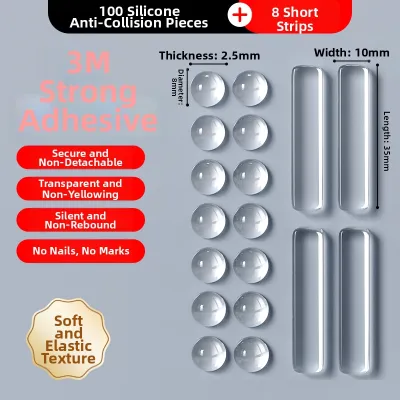
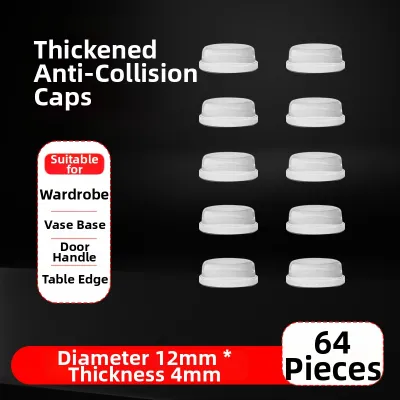
Prices are valid at publication and may change. Please refer to the product page for the latest price.
Before purchasing, establish a clear framework for matching the bumper’s thickness to the physical gap of your furniture. If you select a bumper that is too thick, it will prevent cabinet doors from closing flush, cause drawers to protrude, or interfere with magnetic catches and soft-close mechanisms. Conversely, a bumper that is too thin will fail to prevent wood-on-wood contact. To determine the correct thickness, measure the natural clearance gap of your closed furniture using a small piece of modeling clay or folded paper inserted into the gap, then select a bumper that matches or is slightly thinner than this measurement.
Stopping the Slam: Choosing Bumpers for Cabinet Doors
Cabinet doors endure repetitive impacts that can loosen hinges, chip finishes, and create noise. To stop the slam effectively, you need a bumper variant that prioritizes shock absorption and progressive compression. For standard kitchen and bathroom cabinets, hemispherical bumpers are the industry standard. Their dome shape allows them to absorb the initial force of the slam and gently decelerate the door. If you have heavy, solid-wood cabinet doors—which are common in high-quality Singapore kitchen installations—taller cylindrical profiles with flat tops are often more appropriate, as they can support the heavier weight without bottoming out.

Placement plays a critical role in how effectively the bumper dampens sound and protects the cabinet frame. The optimal strategy is to place one bumper at the extreme top outer corner and another at the extreme bottom outer corner of the door’s interior face. This positioning ensures that the impact force is distributed evenly across the frame. Avoid placing bumpers too close to the hinge side of the door. Placing a bumper near the hinges creates a high-leverage pivot point; when the door is closed, the hinge must fight against the thickness of the bumper, which can warp the door over time, strain the hinge screws, or cause the bumper to shear off due to concentrated lateral pressure.
Additionally, verify the clearance of your cabinet doors before applying the bumpers. Modern cabinetry often utilizes soft-close hinges or magnetic touch-latches. If the selected bumper is too thick, it can prevent the soft-close mechanism from completing its gentle pull, leaving the door slightly ajar. It can also push the door past the engagement threshold of a magnetic latch, preventing it from staying closed. Always check that the bumper’s height is slightly less than the natural resting gap of the closed door to maintain a flush, seamless appearance across your cabinet run.
Smooth and Quiet: Selecting Bumpers for Drawers
Unlike hinged doors, drawers operate on horizontal sliding tracks, subjecting bumpers to shear forces and friction. When a drawer is closed, the front panel strikes the cabinet frame, but as the drawer is pulled open and pushed shut, any contact between the drawer box and the frame can cause wear. To ensure smooth and quiet operation, you must select bumpers that do not interfere with the drawer’s sliding alignment.
For most drawer applications, low-profile or flat-topped bumpers are highly recommended. Drawers are built with tight tolerances, especially in modern modular kitchen units. A thick, hemispherical bumper applied to the back of a drawer front will push the drawer outward, causing it to sit proud of the surrounding cabinetry and ruining the clean, flush lines of your furniture. Flat, thin bumpers (often 1mm to 2mm in thickness) provide sufficient dampening to eliminate the wood-on-wood contact when closed, without disrupting the alignment of the drawer slides or causing the drawer to jam.
You can apply the bumpers directly to the inside corners of the cabinet face frame where the drawer front rests, or to the back side of the drawer front itself. If you are dealing with deep, heavy drawers used for storing pots and pans, you can also apply thin bumper strips along the bottom edges of the drawer box to prevent friction against the internal support rails. Because drawers are repeatedly pulled and pushed, the bumper is subjected to constant lateral sliding forces. Ensure the product features a high-shear adhesive backing, such as a high-performance acrylic adhesive, which is specifically designed to resist sliding or peeling under horizontal friction.
Moisture and Stability: Bumpers for Toilet Seats and Lids
Bathrooms in tropical regions like Singapore present high relative humidity, warmth, and frequent cleaning, creating constant moisture exposure. Standard rubber-based adhesives, which perform well on dry living room furniture, will quickly degrade, liquefy, or peel off when applied to a toilet seat or lid. To ensure a lasting bond, you must carefully inspect product labels and select bumpers explicitly rated for waterproof or high-moisture environments.
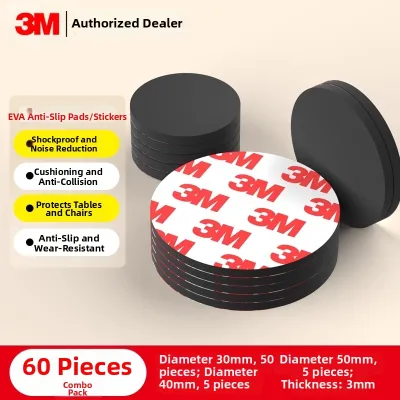
Toilet seats and lids require bumpers for two distinct reasons: stabilizing the seat to prevent lateral shifting and cushioning the lid to prevent a loud crash against the ceramic bowl. For the toilet lid, larger and wider cylindrical or flat-topped bumpers are ideal. The lid is heavy and can drop with significant force; a wider bumper distributes this impact across a larger surface area of the ceramic rim, protecting both the plastic lid and the ceramic bowl from cracking. For the toilet seat itself, stability is the primary concern. When a person sits on the seat, lateral forces can cause the seat to slide sideways, straining the plastic hinges. Placing wide, flat bumpers on the underside of the seat helps grip the ceramic rim, preventing this side-to-side movement.
Proper application is critical in wet environments. Ensure that the ceramic or plastic surfaces are completely dry and free of any soap scum, lime scale, or cleaning chemical residues before applying the bumper. Any moisture trapped beneath the adhesive during application will prevent the pressure-sensitive acrylic bond from forming, leading to premature failure. If your bathroom experiences heavy condensation, apply the bumpers during the driest part of the day and allow the adhesive to cure fully before the bathroom is used again.
Preparation and Application for a Lasting Bond
The longevity of a self-adhesive 3M bumper depends on surface preparation. Pressure-sensitive adhesives require direct, microscopic contact with the substrate. Barriers like dust, finger oils, or chemical residues compromise this connection, causing premature failure.
To prepare the surface correctly, follow these low-risk steps:
- Clean the Surface: Use a clean microfiber cloth dampened with isopropyl alcohol to thoroughly wipe the application area. Do not use household glass cleaners, multi-surface sprays, or dish soaps, which often leave behind a microscopic, slippery film that prevents the adhesive from wetting out the surface.
- Allow Complete Drying: Wait for the isopropyl alcohol to evaporate completely. This usually takes less than a minute, but ensuring the surface is 100% dry is critical, especially in humid climates.
- Avoid Touching the Adhesive: Carefully peel the bumper from its backing card by holding it by the edges. Avoid touching the adhesive surface with your bare fingers, as natural oils will instantly contaminate the adhesive and reduce its bonding strength.
- Apply Firm Pressure: Align the bumper with your target location and press it down firmly. Apply steady, direct pressure with your thumb for at least 30 seconds. Pressure-sensitive adhesives rely on physical force to flow into the microscopic pores of the surface.
- Allow to Cure: Do not subject the bumper to immediate impact or friction. While the bumper will feel secure right away, the adhesive requires time to reach its maximum bond strength. Allow the adhesive to cure undisturbed for 24 to 72 hours before closing doors, sliding drawers, or dropping toilet lids.
As a safety boundary, exercise caution when applying strong adhesives to delicate, unsealed, or easily damaged finishes. Antique varnishes, unsealed wood, delicate gold leaf, or poorly bonded paint can be pulled away when the bumper is compressed or removed. If you are applying bumpers to these types of surfaces, always test a single bumper in a small, inconspicuous area first, or consult the furniture manufacturer’s care instructions to verify compatibility.
Frequently Asked Questions (FAQ)
Can I use 3M bumpers on painted or varnished wood?
Yes, 3M bumpers can be used on painted or varnished wood, provided the finish is fully cured and stable. However, you must exercise caution. Freshly painted surfaces can take up to four weeks to fully cure, even if they feel dry to the touch. Applying an adhesive bumper to uncured paint can trap solvents and prevent curing, or bind so tightly to the paint layer that removing the bumper will peel the paint off. On varnished or sealed wood, ensure the varnish is intact and not flaking. If you are dealing with antique furniture, delicate veneers, or high-value pieces, always check the furniture manufacturer’s care instructions and perform a test application in a hidden area before proceeding.
How do I remove old 3M bumpers without damaging the surface?
To remove old 3M bumpers safely, avoid sharp metal scrapers or knives that can gouge wood, scratch plastic, or chip ceramic. Instead, use a gentle, mechanical slicing method. Take a piece of dental floss or thin nylon fishing line, hold it tautly between your hands, and slide it behind the bumper. Use a back-and-forth sawing motion to slice through the adhesive or foam layer, separating the bumper from the surface. To remove the remaining sticky residue, roll it off with your thumb or gently rub it with a soft cloth dipped in a mild, surface-safe adhesive remover or a small drop of vegetable oil. Once the residue is gone, clean the area with soapy water, rinse, and dry thoroughly.
Community discussion
Share your experience or ask a question. Comments are reviewed before publication.