
Selecting the right 3M anti-slip product for your furniture depends on the specific furniture type, the floor material, and the expected load. While adhesive pads protect floors under moving chair legs, heavy-duty tapes and textured treads secure stationary bases, shelving, and steps. Matching the correct adhesive backing and surface texture to your furniture ensures long-lasting stability and prevents costly damage to both the item and your flooring.
Quick Guide: Matching 3M Anti-Slip Forms to Furniture Types
To achieve optimal stability, you must match the physical form of the anti-slip material to the movement pattern and weight of the furniture. For example, a dining chair that is frequently pulled out requires a different friction profile than a stationary display cabinet or a heavy sideboard.
| Furniture Type | Recommended 3M Product Form | Primary Surface Material | Key Selection Factor |
|---|---|---|---|
| Dining Chairs & Bar Stools | Clear Elastomeric Bumpers or Felt-Rubber Pads | Hardwood, Vinyl, Homogeneous Tiles | Lateral movement frequency and leg diameter |
| Heavy Dining Tables & Sofas | Heavy-Duty Rubber Pads or Grips | Polished Stone, Ceramic Tiles, Laminate | Total static load and floor indentation risk |
| Cabinet Shelves & Organisers | Fine-Grit or Smooth Anti-Slip Tapes | Glass, Varnished Wood, Acrylic | Surface texture of stored items and moisture levels |
| Step Stools & Furniture Ramps | Coarse-Grit Tapes or Heavy-Duty Treads | Raw Wood, Metal, Concrete | Footwear type and slip risk in high-traffic zones |
| Heavy Appliance Bases | Thick Molded Rubber Treads or Roll Formats | Concrete, Utility Tiles | Vibration dampening and structural load capacity |
When selecting these products, three primary decision factors dictate performance: load-bearing capacity, surface texture, and the operating environment (indoor versus outdoor). Heavy furniture requires high-density materials that resist compression, while lightweight decorative items benefit from soft, non-marring elastomeric bumpers. Outdoor furniture exposed to rain and high humidity requires specialized weather-resistant adhesives, whereas indoor pieces can utilize standard pressure-sensitive adhesives.
Products mentioned in this guide
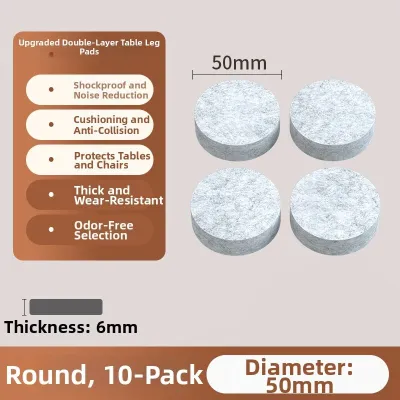
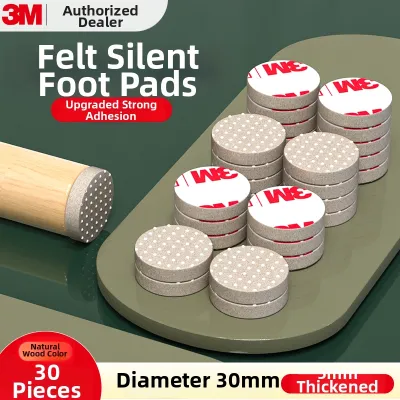
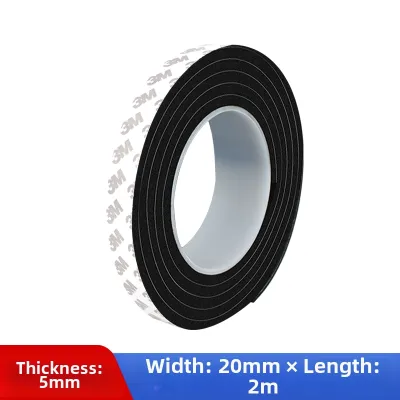
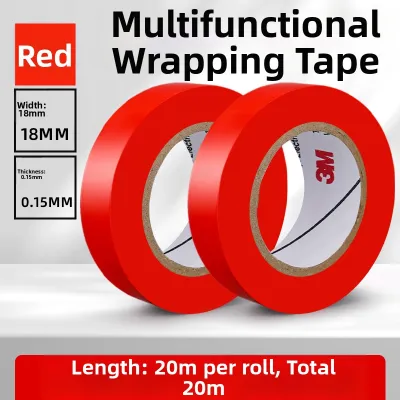
Prices are valid at publication and may change. Please refer to the product page for the latest price.
Relying on generic anti-slip solutions without verifying the manufacturer’s technical specifications often leads to premature adhesive failure or floor staining. Generic rubber pads may contain plasticisers that migrate into wood finishes, causing permanent discoloration. Checking the official 3M product data sheets ensures the adhesive is chemically compatible with your specific floor finish and can withstand the expected shear forces.
Selecting 3M Anti-Slip Pads for Chair Legs and Table Feet
Protecting floors from scratches while preventing unwanted sliding requires a careful choice between clear bumpers, rubber grips, and felt-rubber combinations. Each material interacts differently with common flooring types, such as homogeneous tiles, luxury vinyl tiles, and parquet hardwood.

- Clear Elastomeric Bumpers: These polyurethane bumpers are ideal for lightweight furniture, glass tabletops, and cabinet doors. They provide high friction on smooth surfaces like glass and polished stone, preventing sliding without being visually obtrusive.
- Solid Rubber Grips: Designed for medium to heavy furniture, these pads offer high grip on hard, smooth floors like ceramic tiles and laminate. They prevent heavy sofas or dining tables from shifting when users sit down.
- Felt-Rubber Combinations: These hybrid pads feature a soft felt layer facing the floor and a high-friction rubber core bonded to the furniture leg. They are highly suited for dining chairs on parquet or hardwood floors, allowing smooth, quiet movement when lifted slightly, while resisting sliding under direct downward weight.
To calculate the required pad size and thickness, measure the exact diameter or cross-section of the furniture leg. The pad should cover at least 85% of the leg’s contact area to distribute weight evenly and prevent the edges of the pad from peeling. For heavy dining tables or solid wood sideboards, select thicker pads (at least 3mm to 5mm) to absorb structural vibrations and accommodate minor floor unevenness. Calculate the total weight of the furniture piece plus its maximum expected load, then divide this by the number of legs to ensure the load per pad does not exceed the manufacturer’s rated limit.
Before purchasing, always check the product packaging and labels for weight limits and floor-compatibility warnings. Some high-friction rubber pads are not recommended for soft vinyl or newly sealed polyurethane wood floors, as the high pressure can cause the rubber to bond with the floor finish or leave dark scuff marks.
Applying 3M Anti-Slip Tapes for Cabinet Shelves and Ramps
Flat surfaces, inclined ramps, and cabinet shelves require a low-profile anti-slip solution that does not interfere with the storage of items or safe foot traffic. 3M anti-slip tapes provide a continuous high-friction barrier, but the grit level must be carefully matched to the application.
- Fine-Grit and Smooth Tapes: These are designed for areas touched by bare hands or delicate items. For cabinet shelves holding glassware, fine china, or plastic organizers, a smooth, rubberized anti-slip tape prevents items from sliding during shelf movement without scratching delicate bases.
- Medium to Coarse-Grit Tapes: These feature an abrasive mineral coating suitable for shoe traffic. They are ideal for internal step stools, utility ramps, or the bases of heavy storage racks where maximum traction is required.
Adhesive compatibility varies significantly across shelf materials. Glass and metal surfaces provide excellent bonding conditions for acrylic adhesives, but porous materials like raw wood or unsealed MDF require a primer or sealer before tape application. Without proper sealing, the porous surface will absorb the adhesive solvents, leading to dry-out and premature peeling. Additionally, be aware that removing high-strength adhesive tapes from porous wood or painted surfaces can leave a sticky residue or strip away the top layer of paint or varnish.
For a clean, professional installation on shelves and ramps, use precise measuring and cutting techniques. Cut the tape using heavy-duty shears, and always round the corners of each strip using a corner-rounding tool or scissors. Rounded corners are far less likely to catch on cleaning cloths, shoes, or storage boxes, which significantly reduces the risk of the tape peeling at the edges over time.
Using 3M Anti-Slip Treads for Stairs and Heavy Furniture Bases
Staircases, step stools, and the wide bases of heavy appliances demand robust slip resistance. For these high-stress areas, 3M anti-slip treads offer heavy-duty performance, available in both pre-cut pieces and continuous roll formats.
- Pre-Cut Treads: These are highly convenient for standard stair steps and individual step stools. They feature pre-rounded corners and uniform dimensions, ensuring a neat, consistent appearance across multiple steps.
- Roll Formats: Continuous rolls are better suited for custom or irregularly shaped furniture bases, long ramps, or wide industrial shelving. They allow you to cut custom lengths to fit unique dimensions precisely.
In dimly lit areas, such as basement stairs, utility rooms, or outdoor steps during the evening, visibility is a critical safety factor. Consider utilizing high-visibility treads that feature bright yellow safety borders or photoluminescent (glow-in-the-dark) strips. These visual aids help users identify the edge of each step clearly, reducing the risk of missteps.
Before applying heavy-duty treads, you must verify the structural integrity of the step or furniture base. The adhesive bond is only as strong as the surface beneath it. If the wood is rotting, the paint is flaking, or the concrete is crumbling, the tread will quickly detach along with the failing surface material. Inspect the base thoroughly, repair any structural defects, sand down loose paint, and ensure the surface is completely flat and stable before proceeding with the application.
Surface Preparation and Installation Checklist
Proper surface preparation is the single most important factor in determining how long an anti-slip product will remain bonded to your furniture. Skipping these steps will almost certainly result in the adhesive peeling within a few weeks, especially in warm, humid climates.
- Step 1: Clean the Surface: Remove all dust, dirt, grease, and wax from the application area. Use a clean, lint-free cloth dampened with a 50:50 mixture of isopropyl alcohol and water. For stubborn grease or old adhesive residues, use a dedicated adhesive remover, ensuring it is safe for the specific furniture material. Avoid using standard household glass cleaners or soapy water, as they often leave a thin film that prevents the adhesive from bonding.
- Step 2: Dry and Verify: Ensure the surface is completely dry before application. In humid environments like Singapore, allow extra drying time or use a clean dry cloth to wipe away any condensation.
- Step 3: Check Environmental Conditions: Verify the application temperature specified on the 3M packaging. Most pressure-sensitive adhesives require an ambient temperature of at least 15°C to 25°C during application to flow and bond correctly. Avoid applying adhesives in direct sunlight or highly humid outdoor conditions, as moisture can become trapped beneath the tape.
- Step 4: Apply Firm Pressure: Peel the backing paper off the pad or tape, taking care not to touch the adhesive surface with your fingers. Align the product carefully and press it firmly onto the surface. Use a rubber hand roller or a smooth wooden block to apply even, heavy pressure from the center outward to expel any trapped air bubbles and activate the pressure-sensitive adhesive.
- Step 5: Respect the Curing Time: Do not place weight, slide the furniture, or expose the area to moisture immediately. Most high-strength adhesives require a minimum curing time of 24 hours to reach 90% bond strength, and up to 72 hours for maximum adhesion.
Frequently Asked Questions (FAQ)
How do I safely remove 3M anti-slip pads or tape without damaging wood finishes?
To remove adhesive pads or tape from sensitive wood finishes, apply gentle heat using a handheld hairdryer set to a low or medium temperature. Direct the warm air at the edge of the pad for 30 to 60 seconds to soften the acrylic adhesive. Slowly peel the pad back at a sharp angle, keeping it close to the surface to minimize upward pull on the wood grain. If adhesive residue remains, apply a small amount of mild solvent, such as mineral spirits or a dedicated citrus-based adhesive remover, to a clean cloth and gently wipe the area. Always test the solvent on an inconspicuous part of the furniture first to ensure it does not dissolve the varnish or paint. If the wood finish begins to soften, bubble, or lift during the process, stop immediately and consult a professional furniture restoration specialist.
Can I clean 3M anti-slip treads with standard household floor cleaners?
Yes, but you must check the specific 3M product label to ensure chemical compatibility with your cleaning agents. Avoid using harsh chemicals, bleach, or highly acidic cleaners, as they can degrade the adhesive backing and the synthetic binders holding the abrasive grit. Clean the treads using a soft-bristled brush and a mild, neutral-pH detergent mixed with warm water to scrub away dirt and oils. Never apply floor waxes, polishes, or silicone-based cleaners to the treads, as these substances will coat and clog the textured grit surface, severely reducing its slip-resistant properties. If you notice that the abrasive grit has worn smooth, the edges are curling permanently, or the tread material is cracking, it is a sign that the product has reached the end of its service life and must be replaced rather than cleaned.
Community discussion
Share your experience or ask a question. Comments are reviewed before publication.