
To prevent a bed from sliding across the floor and stop a headboard from rattling against the wall, you must address two entirely different physical forces. The most effective solution involves using two distinct types of 3M anti-slip products: high-friction, load-bearing rubber or elastomer pads for the bed feet, and soft, vibration-dampening silicone bumpers or damage-free mounting strips for the headboard. Using a single product type for both applications often leads to failed grip, damaged walls, or ruined flooring.
Selecting the right variant requires evaluating the weight of your bed, the material of your flooring, and the finish of your walls. By matching the specific physical demands of each bed component to the correct material properties, you can achieve a silent, stable sleeping environment. This guide outlines how to assess your setup, choose the appropriate products, and apply them safely to protect your home.
Why Bed Feet and Headboards Require Different Anti-Slip Solutions
Bed feet and headboards experience completely different mechanical stresses during daily use. Bed feet are subjected to massive downward vertical loads from the weight of the frame, mattress, and sleepers, combined with sudden lateral shear forces when people sit down, get up, or shift positions. To counteract these forces, the anti-slip material placed under the bed legs must possess high compressive strength and a high coefficient of static friction. If the material is too soft or compressible, the heavy load will flatten it completely, destroying its grip and allowing the hard bed leg to grind against the floor.
Products mentioned in this guide
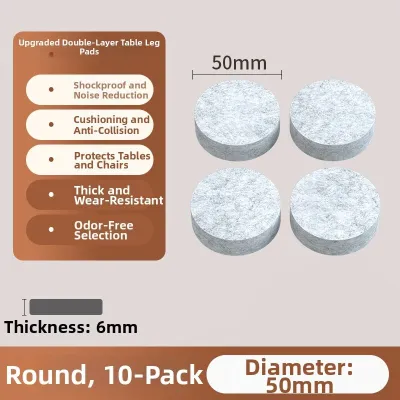
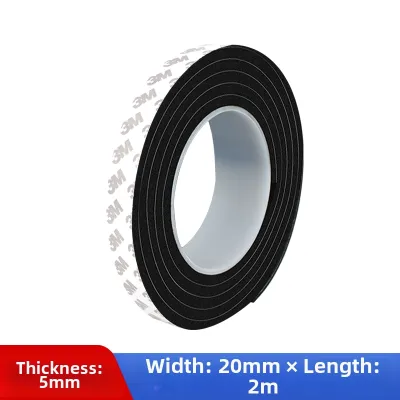
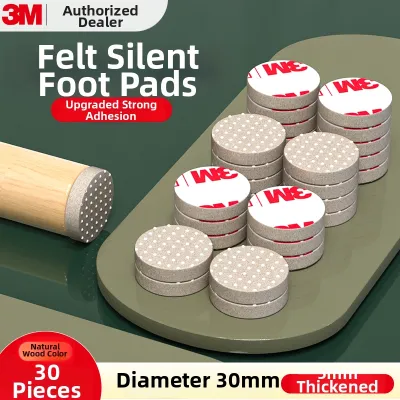
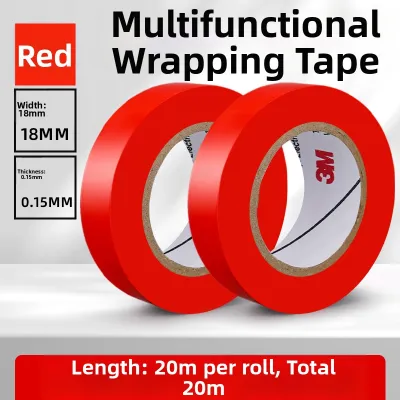
Prices are valid at publication and may change. Please refer to the product page for the latest price.
In contrast, headboards are subjected to horizontal impact and micro-vibrations rather than heavy vertical loads. When you lean back against the headboard or move during sleep, the frame flexes, causing the headboard to knock repeatedly against the wall. This action generates irritating rattling noises and gradually scuffs, dents, or discolors the wall surface. The solution here requires a material designed for energy absorption and vibration dampening, which cushions the impact and keeps the headboard slightly separated from the wall.
Using the wrong product type in either location can cause significant damage to your home. For instance, applying a heavy-duty, high-tack floor grip pad to a painted wall behind a headboard is a recipe for disaster. The aggressive adhesive designed to hold heavy furniture in place on a floor will bond too strongly to the paint film, likely tearing away the drywall paper or plaster when the bed is moved. Conversely, placing soft, thin wall-protection bumpers under heavy bed feet will fail almost immediately, as the sheer weight will crush the bumpers, causing them to split, slide out of place, or leave sticky adhesive residue smeared across your floor.
Understanding these distinct roles allows you to select products engineered for these exact tasks. For the floor, you need dense, non-marking elastomer pads that distribute weight and resist sliding. For the wall, you need soft, resilient silicone or polyurethane bumpers that absorb impact without bonding permanently to delicate paint or wallpaper.
How to Assess Your Bed Weight and Room Surfaces
Before purchasing any anti-slip products, you must evaluate the specific materials and weight distribution of your bed setup. Different flooring materials react uniquely to pressure and adhesives. Hardwood floors, particularly those with delicate polyurethane or oil finishes, are highly susceptible to scratching and chemical migration from low-quality plastics. Ceramic tiles present a different challenge, as grout lines create an uneven surface that can reduce the contact area of thin pads. Vinyl and laminate flooring can sometimes discolor if subjected to certain adhesive backings over long periods, making non-adhesive grip options or specialized non-marking materials preferable.

The wall surface behind your headboard requires equally careful inspection. Standard painted drywall is relatively fragile; the bond between the paint layer and the paper backing can easily fail under tension. Wallpaper is even more delicate, as any adhesive applied directly to it risks tearing the decorative fibers during removal. If you have an exposed brick or concrete wall, the rough, porous texture makes it difficult for standard thin adhesives to establish a secure bond, requiring thicker, highly conformable foam-backed mounting options instead.
Estimating the total weight of your bed is crucial for determining the thickness and density of the pads you need. A standard wooden or metal queen-size bed frame, combined with a high-density pocket spring or latex mattress, can easily weigh between 80 and 120 kilograms. When you add the weight of two adults, the total load resting on the bed feet can exceed 250 kilograms. This total weight is distributed across four to six contact points, meaning each bed foot must support a constant load of 40 to 60 kilograms.
To handle this weight without bottoming out, the anti-slip pads under the bed feet must be thick enough and dense enough to maintain their structural integrity under continuous pressure. If you use pads that are too thin, the weight will squeeze out the air pockets or compress the material to its limit, reducing its anti-slip properties and potentially allowing the bed leg to scratch the floor. Checking the manufacturer’s specifications on the product packaging for weight limits and material thickness is a vital step before making a purchase.
Choosing the Right 3M Grip Products for Bed Feet
When selecting 3M products to stabilize bed legs, you must choose between adhesive-backed rubber pads and non-adhesive heavy-duty grip mats or caster cups. Adhesive-backed rubber pads, such as those made from heavy-duty polyurethane or synthetic rubber, are excellent for beds with flat, wooden, or plastic feet. The adhesive keeps the pad permanently aligned with the foot, preventing it from slipping out of place when the bed is subjected to lateral forces. However, you must ensure the adhesive is compatible with your flooring type to avoid chemical bonding that could mar the finish.
For sensitive flooring like solid hardwood or natural stone, non-adhesive heavy-duty grip mats or caster cups are often the safer choice. These products rely purely on surface texture and high-friction materials to prevent movement. You can cut a larger 3M non-slip grip sheet into custom sizes to place directly under each bed foot. This method eliminates the risk of adhesive residue entirely, as the weight of the bed itself provides the downward force necessary to keep the grip sheet firmly pressed against both the bed leg and the floor.
Before purchasing, always check the product packaging for specific indoor flooring compatibility and weight limits. Look for terms like “non-marring” or “floor-safe” to ensure the rubber compound will not leave dark scuff marks or yellow stains on your tiles or wood. The thickness of the pad is also a key indicator of performance; a thickness of at least 3 to 5 millimeters is generally recommended to provide adequate cushioning and grip on slightly uneven floor surfaces.
If you decide to use adhesive pads, you must also consider the ease of removal. Over several years, the combination of heavy pressure and ambient room temperature can cause adhesives to cure more deeply into the floor finish. Verify the manufacturer’s instructions regarding safe removal methods, and look for products that specify clean removal. If you are renting your home, using non-adhesive grip pads under caster cups is highly recommended to avoid any potential disputes over floor damage when you eventually move out.
Selecting 3M Cushioning and Mounting Options for Headboards
To stop a headboard from rattling and protect your wall from damage, you need products that focus on cushioning and vibration absorption. Self-adhesive silicone bumpers, such as 3M Bumpon protective products, are highly effective for this application. These small, resilient hemispherical or cylindrical bumpers can be applied directly to the back of the headboard at the points where it makes contact with the wall. They create a small, consistent gap between the headboard and the wall, absorbing the energy of any movement and preventing the hard wood or metal frame from striking the drywall.
For lightweight headboards that are not securely attached to the bed frame itself, you may need a mounting solution to hold the headboard flat against the wall. Heavy-duty double-sided mounting tapes, such as 3M Command strips, are ideal for this purpose because they are designed to hold weight firmly while offering clean, damage-free removal. When using these strips, you must follow the surface preparation requirements carefully, which usually involve cleaning the wall with isopropyl alcohol to remove dust and oils that could weaken the bond.
When evaluating mounting tapes, always check the weight capacity listed on the packaging. Standard picture-hanging strips are rated for specific weight ranges, and exceeding these limits will cause the adhesive to fail, potentially leading to the headboard falling. For heavier headboards, you should rely on the bed frame’s physical brackets for structural support and use the adhesive strips solely to stabilize the top edge and prevent lateral wobbling, rather than expecting the tape to bear the entire vertical load of the headboard.
The most critical factor when applying any adhesive to a wall is verifying its removability. Standard permanent mounting tapes are designed for outdoor or industrial use and will destroy drywall paint and paper if you attempt to peel them off. Always ensure you are using a stretch-release adhesive or a product explicitly labeled as “damage-free removal” for painted surfaces. This precaution ensures that when you decide to rearrange your bedroom or move houses, you can remove the stabilizers without needing to patch and repaint the wall.
Application Steps and Surface Safety Checks
Achieving a long-lasting bond and maximum friction requires proper surface preparation and application techniques. Before applying any adhesive product to your bed feet or headboard, you must clean both the furniture and the contact surfaces thoroughly. Dust, lint, floor wax, and body oils will prevent the adhesive from making full contact with the substrate, leading to premature failure. Wipe the area with a clean microfiber cloth dampened with isopropyl alcohol, if compatible with your furniture finish, and allow it to dry completely before proceeding.
When applying adhesive pads to bed feet, press the pad firmly onto the center of the foot and hold it under pressure for at least thirty seconds. This initial pressure activates the pressure-sensitive adhesive, ensuring a strong bond. For maximum effectiveness, avoid dragging the bed immediately after application; allow the adhesive to cure according to the manufacturer’s instructions, which often recommend waiting 24 hours before subjecting the joint to heavy lateral forces.
For headboard bumpers, identify the exact contact points by gently pushing the headboard against the wall and marking where it touches. Apply the silicone bumpers to these marked spots on the back of the headboard rather than on the wall itself. This keeps the wall clean and ensures the bumpers remain hidden from view. If you are using stretch-release strips to secure the headboard, ensure the pull-tabs remain accessible so you can remove them safely in the future without tearing the wall surface.
There are certain conditions where you should stop and avoid using adhesive products altogether. If your flooring consists of unsealed wood, antique parquet, or highly porous natural stone, adhesives can penetrate the pores and cause permanent staining or stripping of the finish. Similarly, if your walls are covered with delicate, unpainted plaster or textured wallpaper, adhesives will likely cause damage. In these scenarios, you should consult the furniture or flooring manufacturer for alternative non-adhesive stabilization methods, such as heavy rubber caster cups or free-standing furniture anchors.
Frequently Asked Questions (FAQ)
Can I use the same 3M anti-slip pad for both bed feet and the headboard?
No, you should not use the same product for both applications because they are designed to solve entirely different problems. Floor pads are engineered to resist high vertical loads and lateral shear forces, using dense, high-friction rubber that is often too hard to absorb vibrations effectively. If you place these dense floor pads on a headboard, they will not provide enough cushioning to stop the rattling noise and may scuff or discolor your wall paint due to their chemical composition.
Conversely, the soft silicone bumpers and stretch-release strips designed for headboards are not built to withstand the heavy, continuous weight of a bed frame. Placing wall bumpers under bed feet will cause them to crush, split, or slide out of place almost immediately. To protect your home and ensure a quiet bed, always use dense, load-bearing grip pads for the floor and soft, vibration-dampening bumpers or damage-free mounting strips for the wall.
How do I safely remove 3M adhesive residue from floors or walls?
To safely remove adhesive residue without damaging your surfaces, you must identify the material of the affected area first. For hard flooring like tile or sealed wood, you can often roll the residue off with your fingers or use a plastic scraper very gently. If the residue persists, check the product’s removal instructions to see if a mild adhesive remover or a small amount of rubbing alcohol is safe to use on your specific floor finish. Always test any liquid remover on an inconspicuous spot first to ensure it does not dull or strip the finish.
For painted walls, you must be extremely gentle to avoid peeling the paint. Never use sharp metal scrapers or harsh chemical solvents on drywall. Instead, use a hair dryer on a low-heat setting to gently warm and soften the adhesive, making it easier to peel away slowly. If you are removing stretch-release strips, remember to pull the tab straight down along the wall rather than pulling it outward at a ninety-degree angle, as pulling outward is the primary cause of drywall damage.
Community discussion
Share your experience or ask a question. Comments are reviewed before publication.