
Selecting the right door hanger requires balancing your living situation, your door’s physical characteristics, and the weight of the items you plan to hang. Whether you are living in a rented apartment with strict tenancy rules or organizing a permanent family home, the mounting style you choose determines both the utility of your storage and the long-term condition of your doors. Making the wrong choice can lead to unsightly paint peeling, structural door damage, or hangers that constantly rattle and slip.
To find the ideal match, consider your specific living arrangements and storage needs. Choose an adhesive door hanger if you are renting, have a smooth and non-porous door surface, and only need to hang lightweight items like keys, lanyards, or small umbrellas. Opt for an over-the-door hanger if you need a temporary, drill-free solution for medium-weight items like bathrobes or daily bags, provided your door frame has adequate top clearance. Select a screw-mounted door hanger if you own your home, require maximum weight capacity for heavy winter coats or fully loaded backpacks, and are comfortable making permanent modifications to the door structure. Before purchasing any hanger, always verify if your door material or lease agreement restricts certain mounting methods.
Adhesive Door Hangers: Evaluating Suitability for Renters and Light Loads
Adhesive door hangers offer a highly accessible, drill-free organization method that appeals particularly to tenants and students. These hooks rely on specialized pressure-sensitive adhesive strips to bond directly to the door’s surface finish. They are ideal for temporary living situations where lease agreements strictly prohibit drilling holes or making permanent alterations to the property.
Products mentioned in this guide
![[Ship in 24h]Behind Door Hanger Hooks No Drill Aluminum Clothes Hooks Wall Hook Over-The-Door Hooks/Hangers For HDB Door Main Door Bedroom Door Kitchen Door](https://img.lazcdn.com/g/p/f316264f7858512fb01a8a8222a3394f.jpg_400x400q80.jpg_.webp)
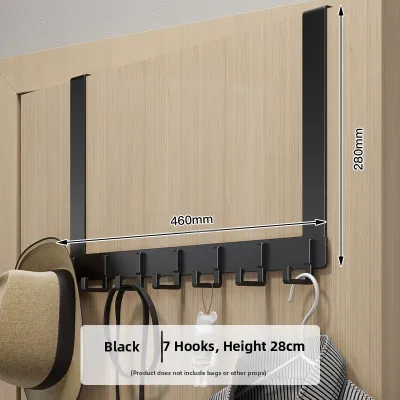
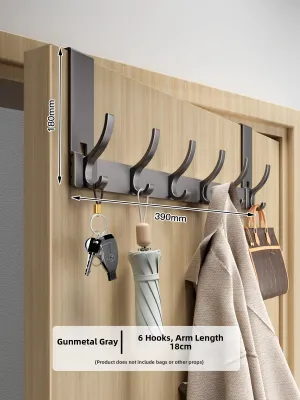
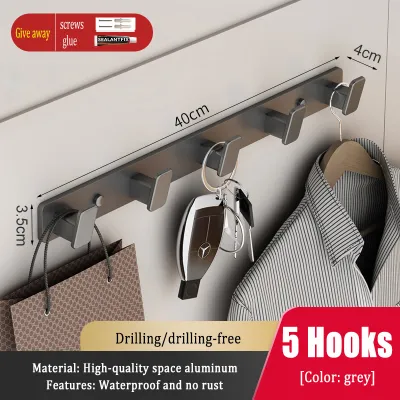
Prices are valid at publication and may change. Please refer to the product page for the latest price.
The success of an adhesive hanger depends heavily on the surface material of your door. These hangers perform best on smooth, flat, and non-porous surfaces such as painted wood, sealed metal, smooth laminate, or glass. Textured doors, unfinished wood, or highly porous surfaces do not allow the adhesive to form a complete bond, which often leads to premature failure and falling items.
When using adhesive hangers, you must rely strictly on the manufacturer’s packaging for maximum load limits. Do not attempt to estimate weight capacity based on the physical size of the hook, as a large plastic hook may still use a light-duty adhesive strip. Overloading an adhesive hook can cause it to release suddenly, potentially damaging both the door finish and the falling items.
Proper surface preparation is critical to achieving the maximum rated hold. Begin by thoroughly cleaning the application area with isopropyl rubbing alcohol to remove dust, grease, and finger oils. Avoid using household spray cleaners, as they often leave behind a slick residue that prevents the adhesive from bonding. Allow the surface to dry completely before applying the adhesive strip.
Once the adhesive is applied, press it firmly against the door surface for the duration specified in the product instructions, typically around thirty seconds. In warm, humid environments like Singapore, it is especially important to let the adhesive cure without any weight attached. Most manufacturers recommend waiting a full twenty-four hours before hanging any items to allow the bond to reach its full strength.
Before applying adhesive hooks to delicate or older door finishes, check the product labels for damage-free removal claims. It is highly recommended to test the adhesive strip in an inconspicuous area, such as the inside of a closet door, to ensure the finish does not lift when the strip is removed. If the door paint is already peeling or cracked, the adhesive will likely pull the paint off during removal.
Over-the-Door Hangers: Assessing Clearance and Temporary Storage Needs
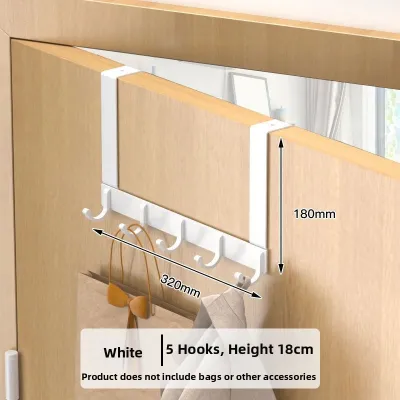
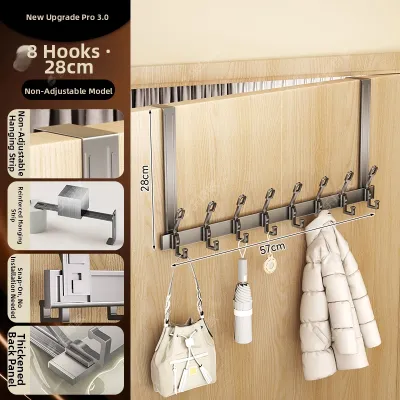
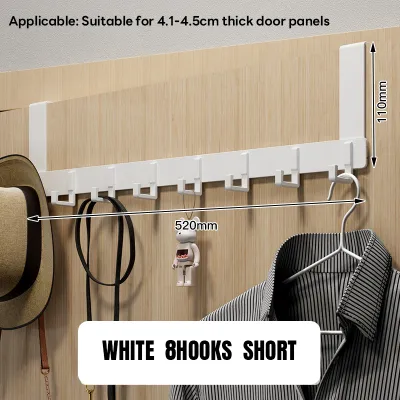
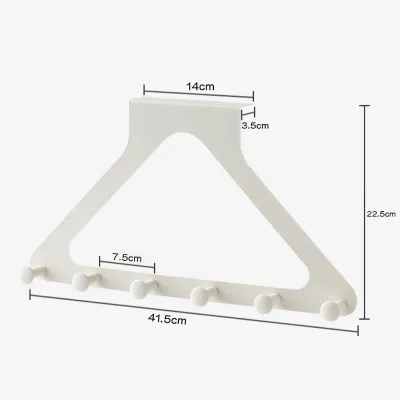
Over-the-door hangers provide an excellent middle ground for those who need substantial storage capacity without the permanence of screws or the surface-sensitivity of adhesives. These units feature brackets that drape over the top edge of the door, suspended by gravity. They are highly favored by frequent movers because they can be installed or removed in seconds without leaving any trace behind.

Before purchasing an over-the-door rack, you must perform a critical clearance check. Measure the gap between the top of the door and the frame when the door is closed. A common method is to place a small coin on top of the door and attempt to close it; if the door closes without resistance, there is likely enough clearance for a standard metal bracket. If the top gap is too tight, the bracket will scrape against the door frame, preventing the door from closing properly and damaging the woodwork.
You must also verify that the hanger brackets accommodate the specific thickness of your door. Standard interior doors typically measure between thirty-five and forty-five millimeters in thickness. If the bracket is too narrow, it will not fit over the door; if it is too wide, the hanger will tilt forward, wobble, and slide side-to-side whenever the door is opened or closed.
To address stability and noise issues, look for over-the-door models that include built-in foam padding or rubber bumpers on the back of the brackets and frame. This padding serves two essential functions: it protects the door’s paint or veneer from friction scratches, and it dampens the rattling noise that occurs when the door swings. If your chosen model lacks padding, you can apply thin felt tape or adhesive foam strips to the contact points yourself.
Keep in mind that over-the-door hangers concentrate all the suspended weight onto the top edge of the door. While this is generally safe for solid wood doors, lightweight hollow-core doors can experience stress over time if overloaded. Distribute the weight evenly across the hooks rather than hanging all heavy items on one side to prevent the door from sagging on its hinges.
Screw-Mounted Door Hangers: Planning for Heavy Loads and Permanent Installation
For long-term storage of heavy items, screw-mounted door hangers offer unmatched stability and weight capacity. By anchoring directly into the door’s structural core, these hangers eliminate the risk of adhesive failure or bracket slippage. They are the preferred choice for homeowners who want a clean, permanent storage solution for heavy winter coats, wet towels, or loaded bags.
Before drilling, you must determine your door’s material compatibility. Solid wood doors provide excellent holding power for standard wood screws. However, hollow-core doors—which consist of a thin outer veneer over a cardboard honeycomb interior—require specialized hollow-door anchors, such as toggle bolts or expanding plastic anchors. Attempting to mount a heavy-duty hanger to a hollow-core door using standard wood screws will result in the screws pulling out under load, damaging the door face.
Installation of screw-mounted hangers requires basic tools, including a power drill, appropriate drill bits, a level, and a screwdriver. You must measure and mark the pilot holes carefully before drilling. Drilling pilot holes prevents the wood or laminate from splitting as the screws are driven in, ensuring a tight and secure fit.
A critical safety step is verifying the screw length against the thickness of your door. The screws must be long enough to bite deeply into the door core but short enough that they do not penetrate completely through to the opposite side. Piercing the front face of a bedroom or bathroom door creates an unsightly hole that is difficult and expensive to repair.
If you are renting, remember that installing a screw-mounted hanger will leave permanent holes. Even if you patch the holes with wood filler and paint them over upon moving out, some landlords may still consider this a violation of the tenancy agreement. Always obtain written permission from your landlord before drilling into any doors or walls.
Decision Matrix: Comparing Mounting Styles by Door Type and Use Case
To help you finalize your choice, the following matrix compares the three primary mounting styles across key practical dimensions.
| Feature | Adhesive Hangers | Over-the-Door Hangers | Screw-Mounted Hangers |
|---|---|---|---|
| Primary Suitability | Lightweight items, renters, smooth surfaces | Medium-weight items, temporary use, quick setup | Heavy items, permanent storage, high-use areas |
| Weight Capacity Reliance | Strictly limited by adhesive strip rating | Limited by door hinge strength and bracket flex | Limited by door core density and anchor type |
| Door Material Compatibility | Smooth, non-porous surfaces (glass, metal, sealed wood) | Standard thickness doors with top frame clearance | Solid wood or hollow-core with specialized anchors |
| Rental Friendliness | High (requires proper damage-free removal) | High (no tools or modifications required) | Low (leaves permanent screw holes) |
| Installation Effort | Low (requires surface cleaning and curing time) | Minimal (hangs directly over the door top) | Moderate (requires drilling and leveling tools) |
When using this matrix, remember that weight capacities must always be verified against the specific product’s packaging rather than assuming a category standard. A high-quality adhesive hook may support more weight than a poorly constructed, thin plastic over-the-door hanger. Additionally, rental friendliness is ultimately determined by your specific lease agreement; some landlords prohibit even adhesive strips due to the risk of paint damage on cheap finishes.
Pre-Installation Checklist: Verifying Door Compatibility and Safety
Before purchasing or installing any door hanger, walk through this checklist to ensure a safe setup that protects your home from damage.
- Identify the Door Core and Surface Material: Tap on the door to determine if it is solid wood or hollow-core. A hollow-core door will produce a clear, resonant echo, while a solid door will sound dull and heavy. Inspect the surface finish to ensure it is clean, stable, and not peeling.
- Measure the Door Dimensions: Use a tape measure to record the exact thickness of your door. If choosing an over-the-door model, measure the gap at the top of the door frame using a coin or a feeler gauge to ensure the bracket will not bind.
- Review Manufacturer Instructions: Read the installation guides for both the door hanger and, if available, the door itself. Be aware that drilling into certain engineered or fire-rated doors can void their warranties or compromise their safety ratings.
- Check the Swing Clearance: Ensure that the added depth of the door hanger and the items hung on it will not prevent the door from opening fully. If the door swings back against a wall, you may need to install a doorstop to prevent the hanger from slamming into the drywall.
- Consult a Professional When Unsure: If you cannot identify the door material, if the door is made of fragile glass or thin metal, or if you plan to hang items that approach the structural limits of the door hinges, stop and consult a professional carpenter or the door manufacturer.
Frequently Asked Questions (FAQ)
Can I use adhesive hooks on a hollow-core door?
Yes, you can use adhesive hooks on a hollow-core door, but you must understand that the adhesive bonds entirely to the surface finish rather than the hollow interior. Because hollow-core doors are often finished with thin wood veneers, laminates, or lightweight paint, hanging heavy items can put excessive stress on these surface layers. If the weight exceeds the strength of the surface finish, the adhesive may pull the veneer or paint clean off the door. Always stick to lightweight items and follow the adhesive manufacturer’s weight guidelines strictly.
Will over-the-door hangers damage the door frame?
Bare metal over-the-door brackets can scratch, dent, or wear down the paint and wood finish of your door frame over time. This damage occurs due to the constant friction and pressure when the door is opened and closed, as well as the slight movement of the hanger when items are added or removed. To prevent this surface damage, look for hangers that feature integrated foam or rubber backing. Alternatively, you can apply small pieces of felt tape or silicone bumpers to the inside of the bracket where it contacts the door.
How do I safely remove adhesive hooks without peeling the paint?
To safely remove an adhesive hook, you should soften the adhesive bond before attempting to pull it off. Use a hairdryer on a low heat setting to gently warm the hook and the adhesive strip for about thirty seconds. Once the adhesive is warm and pliable, slowly pull the release tab straight down parallel to the door surface, rather than pulling it outward toward yourself. If you notice the paint beginning to lift or crack during this process, stop immediately and consult the manufacturer’s specific removal instructions for alternative solvent recommendations.
Community discussion
Share your experience or ask a question. Comments are reviewed before publication.